
Car repair AvtoVAZ Car repair Renault Car repair Hyundai Car repair Ford Car repair Volkswagen Car repair Audi Car repair Chevrolet
English Русский
Български
Беларускі
Український
Српски
Hrvatski
Română
Polski
Slovenský
Magyar
articles sitemap contacts bookmark
LadaMan.ru


Kalina Granta Priora Vesta Largus XRAY
Priora 1 (2007-2018, VAZ-2170)

Replacing the front suspension stabilizer bar components (Priora 2170)

  • Main
  • Priora
  • Priora 1
  • Chassis (running gear)
  • Car suspension
  • Replacing the front suspension stabilizer bar components
0
You will need: a 13 mm wrench, a 17 mm wrench (two), a hammer (wooden or polymer).

1. Place the vehicle on an inspection pit or lift and support the front of the vehicle.

Attention! Brake the car with the parking brake and install the anti-rollback stops ("shoes") under the rear wheels.


2. Remove the additional muffler (see "Replacing the additional muffler").
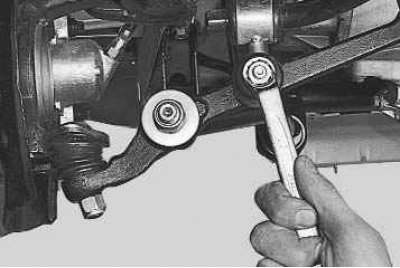
3. Unscrew one nut securing the stabilizer struts on both sides of the vehicle.

3. Unscrew one nut securing the stabilizer struts on both sides of the vehicle.

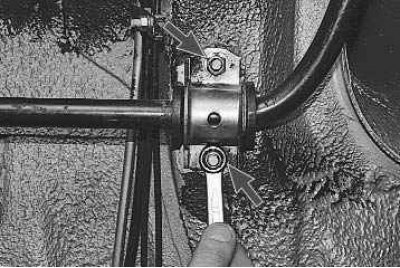
4. Unscrew the two nuts securing the stabilizer bar brackets on both sides of the vehicle.

4. Unscrew the two nuts securing the stabilizer bar brackets on both sides of the vehicle.

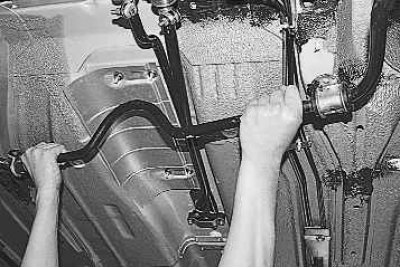
5. Remove the stabilizer bar together with the brackets and struts.

5. Remove the stabilizer bar together with the brackets and struts.


Note: If you only need to replace the stabilizer struts or their bushings, unscrew the nuts that…


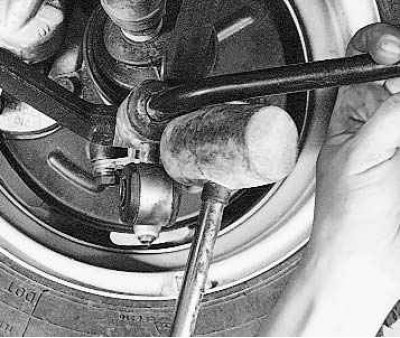
Note: If you only need to replace the stabilizer struts or their bushings, unscrew the nuts that secure the struts to the arms and knock the struts off the stabilizer bar with a wooden or polymer hammer.
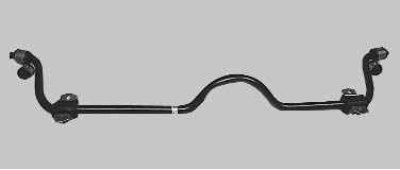

6. Inspect the stabilizer bar. It should not be deformed, and its ends should be in the same plane.…


6. Inspect the stabilizer bar. It should not be deformed, and its ends should be in the same plane. If the geometry of the rod changes, replace it.
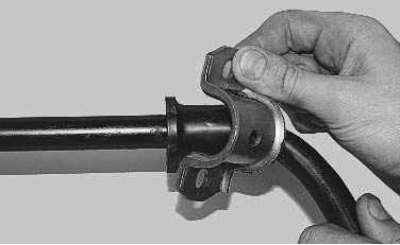
7. Remove the brackets from the stabilizer bar cushions.

7. Remove the brackets from the stabilizer bar cushions.


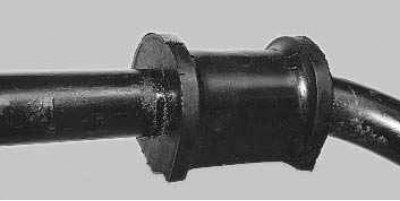
8. If the stabilizer cushions are worn, torn, have lost elasticity or do not fit tightly on the…


8. If the stabilizer cushions are worn, torn, have lost elasticity or do not fit tightly on the rod, replace the stabilizer bar assembly with the cushions.
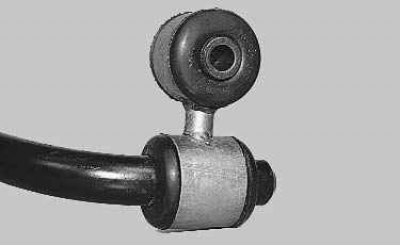
9. Inspect the struts and bushings. Replace warped posts and bushings if they are worn, torn,…


9. Inspect the struts and bushings. Replace warped posts and bushings if they are worn, torn, cracked, have lost elasticity, or do not fit tightly on the bar.

Note: Since replacing worn rubber bushings on the stabilizer struts requires a press, it is easier to replace the strut together with the bushings.
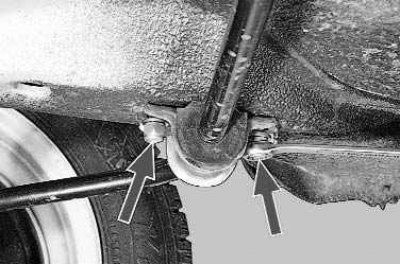

10. Install the rod and tighten the nuts securing the stabilizer cushion brackets.
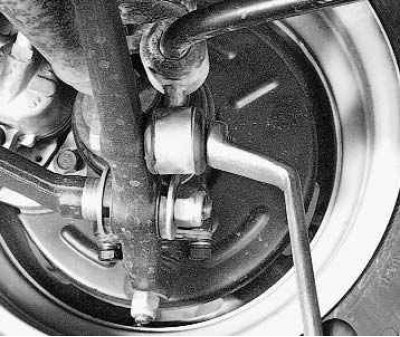

10. Install the rod and tighten the nuts securing the stabilizer cushion brackets.


11. Tighten the strut mounting nuts until the gaps between the struts and levers are selected.


11. Tighten the strut mounting nuts until the gaps between the struts and levers are selected.

12. Install the additional muffler (see "Replacing the additional muffler").

13. After placing the car on the wheels, finally tighten all stabilizer mounting nuts with the suspension loaded (the car is installed on an inspection pit). The tightening torque of the rack mounting nuts is 43–53 N·m (4.3–5.3 kgf·m), and the bracket mounting nuts are 13–16 N·m (1.3–1.6 kgf·m).


This article is available at russian, bulgarian, belarusian, ukrainian, serbian, croatian, romanian, polish, slovak, hungarian
This article has been reviewed: Vladislav Voloshin
Share with friends:
◀ Previous
Lada Priora 1: Car suspension
Next ▶

Replacing the front suspension strut
Replacing the front suspension arm
Replacing the front ball joint
Disassembling the front telescopic strut
Removal and installation the front telescopic strut
Replacing the front suspension hub bearing
Features of the rear suspension design
Possible faults of the rear suspension
Replacing the shock absorber and rear suspension spring
Replacing the rear suspension hub bearing
More articles with information from manuals for Lada:

• Replacing the front suspension arm Lada Kalina Sedan (2004-2013, VAZ-1118)
• Front Suspension Reference Data Lada Granta 1 (2011-2023, VAZ-2190)
• Description of the front suspension design Lada Vesta 1 (2015-2023, VAZ-2180)
• Ball joint of the front suspension arm Lada Largus 1 (2012-2023)
• Front Suspension Subframe — removal and installation Lada X-Ray 1 (2015-2022)
Link to this article in various formats
Reviews and comments of visitors
No comments yet


Add up two numbers: 34 + 27


Priora 1 (2007-2018) 
  • General information
  • Vehicle device
  • User manual
  • Faults en route
  • Maintenance
  • Power unit
  • Engine repair
  • Cooling and lubrication system
  • Supply system
  • Exhaust system
  • Transmission
  • Clutch
  • Car gearbox
  • Drive shafts
  • Chassis (running gear)
  • Car suspension
  • Steering
  • Brake system
  • Body and interior
  • Exterior (external elements)
  • Interior (internal elements)
  • Doors, locks and windows
  • Electrical equipment
  • Equipment and devices
  • Power devices
  • Lighting and signaling
  • Cooling and heating
  • Electrical circuits
LadaMan.ru © 2018–2026 | Mobile version | About Lada | Sitemap: EN BG BY UA RS HR RO PL SK HU | Contacts with admin | | Add to bookmarks
Kalina Hatchback (2004-2013) | Kalina Sedan (2004-2013) | Granta 1 (2011-2023) | Priora 1 (2007-2018) | Vesta 1 (2015-2023) | Largus 1 (2012-2023) | X-Ray 1 (2015-2022) |
This site uses cookies to ensure everything runs smoothly.