Car repair AvtoVAZ Car repair Renault Car repair Hyundai Car repair Ford Car repair Volkswagen Car repair Audi Car repair Chevrolet
English Русский
Български
Беларускі
Український
Српски
Hrvatski
Română
Polski
Slovenský
Magyar
articles sitemap contacts bookmark
LadaMan.ru


Kalina Granta Priora Vesta Largus XRAY
Vesta 1 (2015-2023, VAZ-2180)

Windshield — replacement (Vesta 2180)

  • Main
  • Vesta
  • Vesta 1
  • Body and interior
  • Doors, locks and windows
  • Windshield — replacement
0
To complete the job, you will need: a glass gluing kit, a sharp knife, a glue gun, a string for cutting the adhesive sealant, a heated room in which you can leave the car without moving while the glue dries.

We perform the work with an assistant.

The glass bonding kit consists of a tube of adhesive sealant, an activator for degreasing the surface, primer, a cloth for degreasing and a tampon for applying the primer.
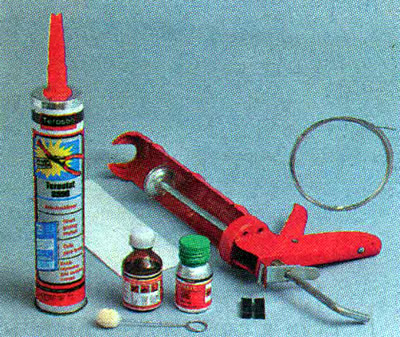
The glass bonding kit consists of a tube of adhesive sealant, an activator for degreasing the…


Note: Since the materials used by different manufacturers may vary slightly, you should also read the instructions included with the repair kit before performing the work.


Kits (from different manufacturers) can be supplemented with spacers under the glass and a string for cutting the adhesive seam. The string breaks very often. It can be purchased separately, but is usually included with handles.
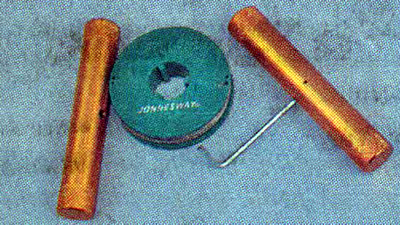
Kits (from different manufacturers) can be supplemented with spacers under the glass and a string…


Note: If you don't have special handles, you can tie the string to screwdriver handles or wooden blocks.


If you don't have a special string, you can use a fishing line or welding wire with a diameter of 0.8 mm from a semiautomatic device like "Kempi".

Sequence of execution


1. Prepare the car for work (see "Preparing the car for maintenance and repair").

2. Disconnect the front wiper arms and remove the ventilation grille (see "Windscreen wiper - checking and replacing").
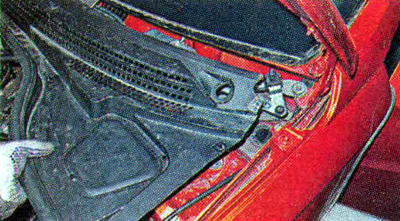
2. Disconnect the front wiper arms and remove the ventilation grille (see «Windscreen wiper -…


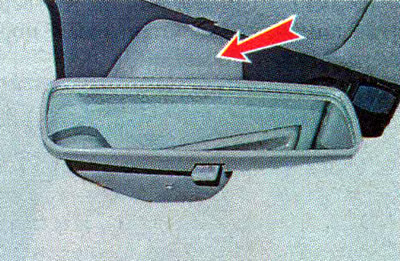
3. Remove the rearview mirror.

3. Remove the rearview mirror.


4. Move the left door opening seal along the front pillar. We remove the left front pillar trim, removing its lower edge from the instrument panel trim.
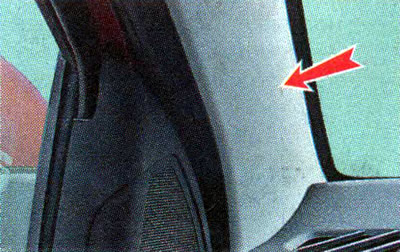
4. Move the left door opening seal along the front pillar. We remove the left front pillar trim,…


5. Similarly, remove the right front pillar trim.


6. Using nippers, cut off a string about a meter long. We pierce the glue-sealant with a string and insert the end of the string into the interior.
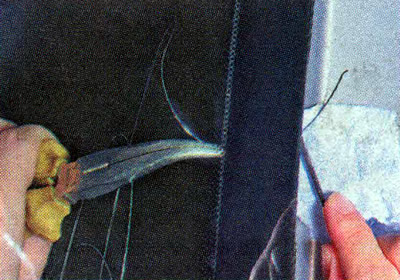
6. Using nippers, cut off a string about a meter long. We pierce the glue-sealant with a string and…


7. Put handles on the ends of the string.
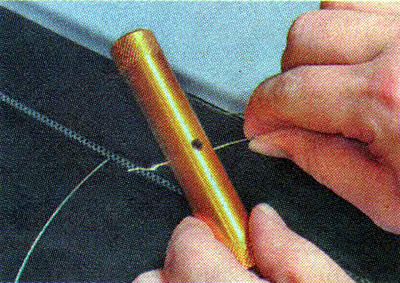
7. Put handles on the ends of the string.


Recommendation. To avoid accidentally damaging the paintwork of the car body, you can stick masking tape along the edge of the glass.


8. Together with an assistant, use a string, like a two-handed saw, to cut the glue seam along the entire perimeter of the glass.

Note: To prevent damage to the dashboard and headliner when cutting the adhesive sealant, place cardboard or thick cloth between the dashboard and the string.
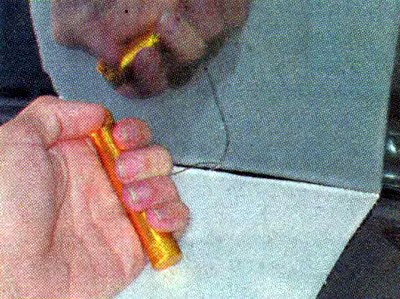

Note: To prevent damage to the dashboard and headliner when cutting the adhesive sealant, place…


9. Remove the glass from the car.


10. Using a sharp knife, carefully cut off the remaining adhesive seam from the body (permissible residual seam thickness no more than 2 mm).

[Taken from the website www.Ladaman.ru]

11. Open the front door windows.

12. Having placed the new glass on a flat surface, degrease the painted edges of the inner surface of the glass with an activator (from the repair kit).
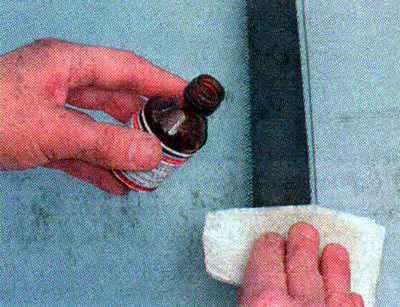
12. Having placed the new glass on a flat surface, degrease the painted edges of the inner surface…


13. Using a swab, apply primer around the perimeter of the glass.
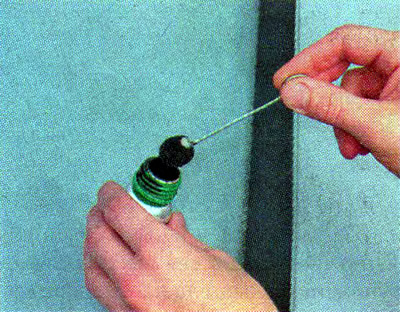
13. Using a swab, apply primer around the perimeter of the glass.


14. Repeat similar operations on the window opening of the body.

15. We attach a new seal to the edge of the glass at a distance of 30 mm from the edge.

16. Install a new seal and stoppers on the glass.

17. Apply adhesive sealant evenly around the perimeter of the seal, leaving 8-10 mm from the edge of the glass. Apply adhesive sealant with a roller 10-12 mm high.
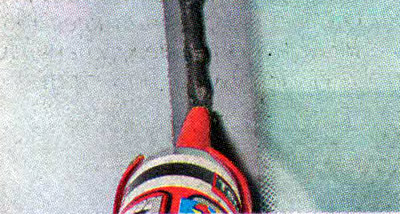
17. Apply adhesive sealant evenly around the perimeter of the seal, leaving 8-10 mm from the edge…


This article is available at russian, bulgarian, belarusian, ukrainian, serbian, croatian, romanian, polish, slovak, hungarian
This article has been reviewed: Kirill Dementyev
Share with friends:
◀ Previous
Lada Vesta 1: Doors, locks and windows
Next ▶

Windshield — minor damage repair
Outside rear view mirror — removal and installation
Front door trim — removal and installation
Front Door Inner Handle — Removal and Installation
Front Door Outside Handle — Removal and Installation
Front door lock — removal, installation and adjustment
More articles with information from manuals for Lada:

• Windshield — Replacement Lada Kalina Hatchback (2004-2013, VAZ-1119)
• Lower Windshield Trim — Removal and Installation Lada Granta 1 (2011-2023, VAZ-2190)
• Removal and installation windshield frame trims Lada Priora 1 (2007-2018, VAZ-2170)
• Windshield, side glass, loading doors — removal and installation Lada Largus 1 (2012-2023)
• Troubleshooting Windshield Wiper Problems Lada X-Ray 1 (2015-2022)
Link to this article in various formats
Reviews and comments of visitors
No comments yet


Add up two numbers: 31 + 50


Vesta 1 (2015-2023) 
  • General information
  • Governing bodies
  • User manual
  • Maintenance
  • Troubleshooting
  • Power unit
  • Engine repair
  • Control system
  • Supply system
  • Cooling system
  • Exhaust system
  • Transmission
  • Clutch
  • Mechanical gearbox
  • Automatic gearbox
  • Drive shafts
  • Chassis (running gear)
  • Wheels, tires and hubs
  • Front suspension
  • Rear suspension
  • Steering
  • Brake system
  • Body and interior
  • Exterior (external elements)
  • Doors, locks and windows
  • Heating and ventilation
  • Electrical equipment
  • Equipment and devices
  • Power devices
  • Breakers and switches
  • Lighting and signaling
  • Electrical circuits
LadaMan.ru © 2018–2026 | Mobile version | About Lada | Sitemap: EN BG BY UA RS HR RO PL SK HU | Contacts with admin | | Add to bookmarks
Kalina Hatchback (2004-2013) | Kalina Sedan (2004-2013) | Granta 1 (2011-2023) | Priora 1 (2007-2018) | Vesta 1 (2015-2023) | Largus 1 (2012-2023) | X-Ray 1 (2015-2022) |
This site uses cookies to ensure everything runs smoothly.