
If a leak is found along the junction of the upper and lower parts of the tank, these places can be soldered (it is recommended to do it in specialized workshops). To do this, pour out the remaining gasoline, thoroughly rinse and dry the tank. Then solder the leak with soft solder.
Attention! You can only solder a thoroughly washed and dried tank that does not contain gasoline vapors, otherwise the vapors may ignite when soldering.
Attention! Use detergent to flush the fuel tank «Lobomid», MS or ML. To remove detergent residue, rinse and steam the tank with hot water. Dry the tank thoroughly.
It is more convenient to remove an empty tank while working on a lift, overpass or inspection ditch.
You will need: keys «on 10», «at 13», screwdrivers with flat and Phillips blades.
1. Reduce the pressure in the supply system (see «Reduced fuel pressure in the engine power system»).
2. Disconnect the wire from the terminal «minus» battery.
3. Disconnect the fuel lines from the fuel pump (see «Removal and installation of the fuel pump»).
4. Place the vehicle on a lift or inspection ditch.
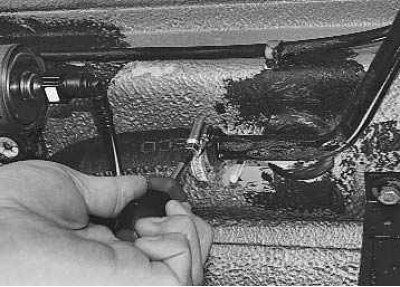
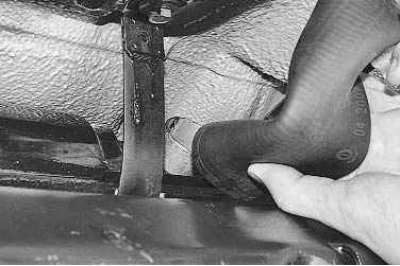
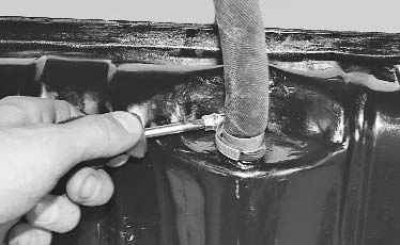
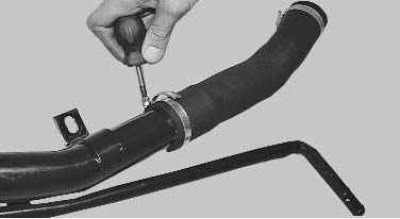
5. Loosen the air hose clamp…
6.... and disconnect it from the air outlet tube of the filling pipe.
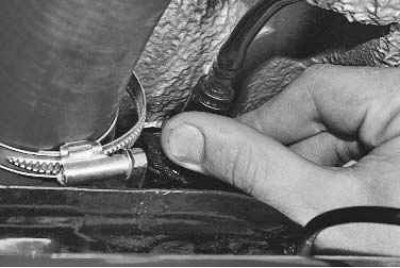
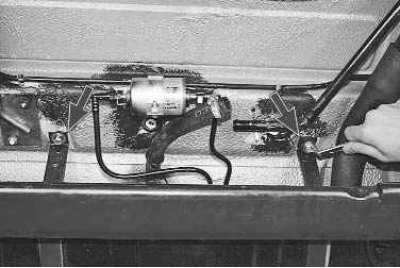
7. Squeeze the fasteners of the quick fitting..
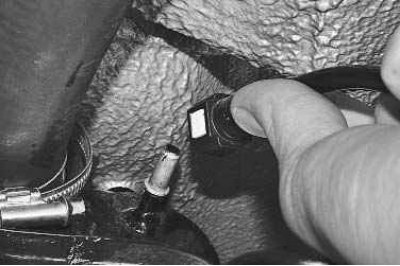
8.... and remove the fuel drain pipe from the separator.

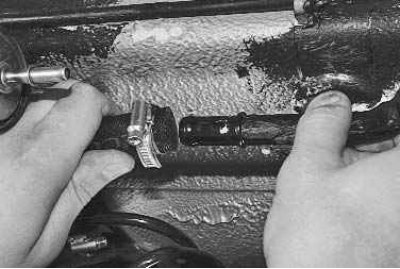
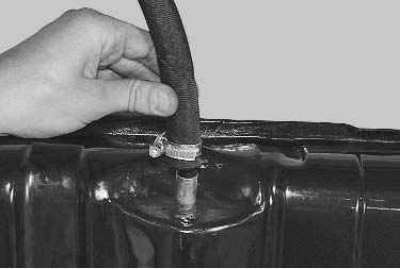
9. Loosen the clamp fastening the connecting hose of the inlet pipe..
10.... and disconnect the hose from the fuel tank pipe.
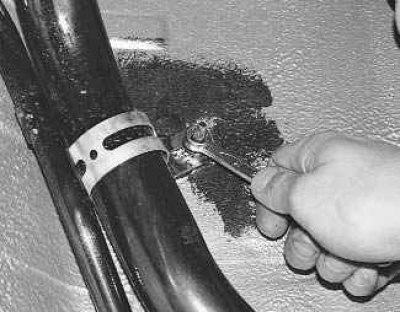
11. Turn out two bolts of collars of fastening of a fuel tank..
12.... move the clamps forward..
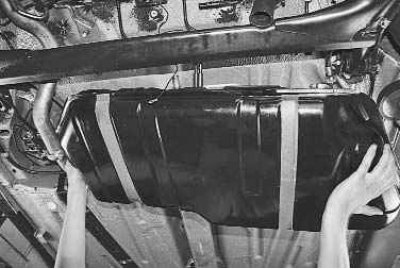
13.... and remove the tank from the car.
14. In case of replacement of the fuel tank, rearrange the parts and assemblies from the old tank to the new tank. Loosen the air hose clamp..
15.... remove the hose from the fuel tank fitting..
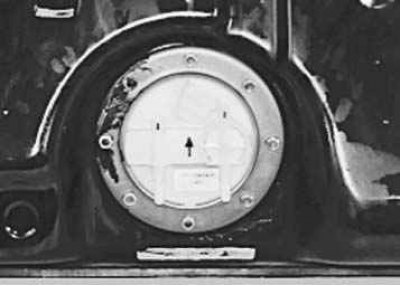
16.... and remove the fuel pump from the tank (see «Removal and installation of the fuel pump»).
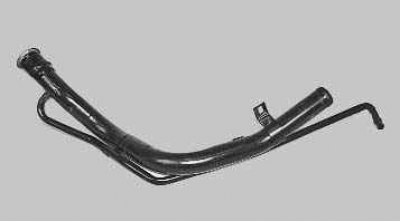
filling pipe fuel tank, if necessary, can be removed from the vehicle as follows.
17. Remove the plug from the filler neck (see «Refueling a car with gasoline»).
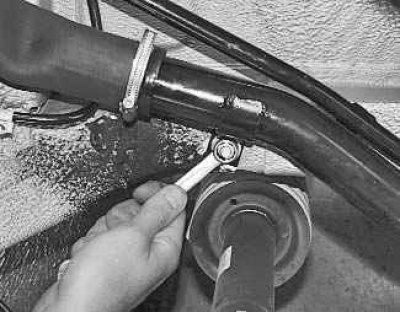
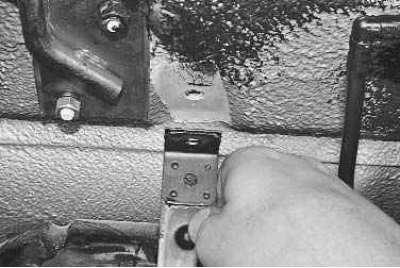
18. Turn away nuts of fastening of lower..
19.... and the upper bracket for attaching the filling pipe.

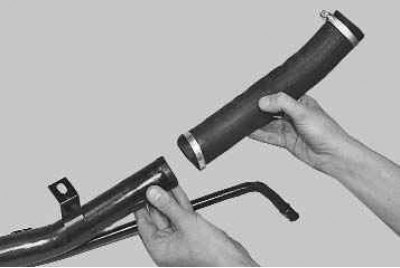
20. Remove the filler pipe from the vehicle by removing its upper end from the facing of the filler neck.
Note. The wheel has been removed for clarity.
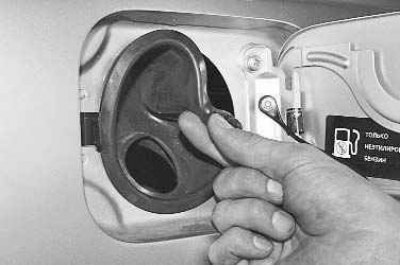
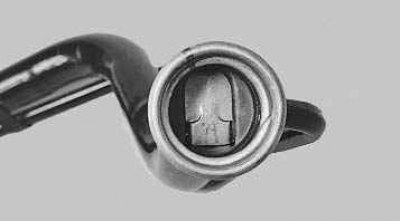
21. Bend the edge of the rubber lining of the filler neck..
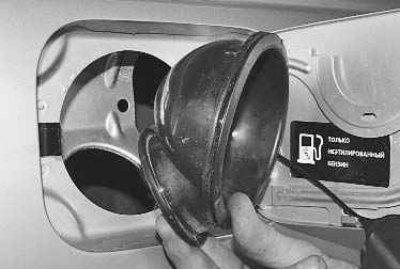
22.... and remove the lining.
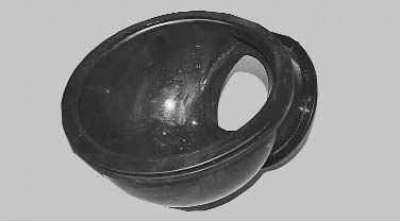
Note. Check the condition of the lining of the filler neck and if cracks, breaks or loss of elasticity are found, replace it with a new one.
23. Loosen the clamp..
24.... and remove the hose from the filler neck.
25. Check the integrity of the welds..
26.... and the condition of the safety shutter of the filling pipe. If necessary, replace the pipe with a new one.
27. Install the fuel tank and all removed parts in the reverse order of removal.
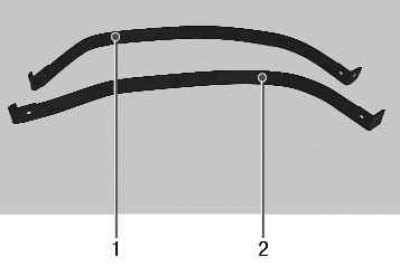
Note. Before installing the fuel tank, inspect the clamps of its fastening. Replace clamps that are rusty or cracked at the weld seam with new ones. Please note: clamps are different (left 1 and right 2).