Car repair AvtoVAZ Car repair Renault Car repair Hyundai Car repair Ford Car repair Volkswagen Car repair Audi Car repair Chevrolet
English Русский
Български
Беларускі
Український
Српски
Hrvatski
Română
Polski
Slovenský
Magyar
articles sitemap contacts bookmark
LadaMan.ru


Kalina Granta Priora Vesta Largus XRAY
Priora 1 (2007-2018, VAZ-2170)

Fuel pump repair (Priora 2170)

  • Main
  • Priora
  • Priora 1
  • Power unit
  • Supply system
  • Fuel pump repair
0
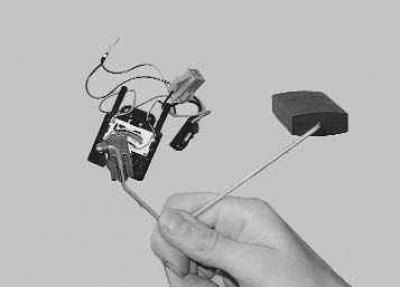
The fuel pump consists of a fuel level sensor, a fuel filter, the electric pump itself and a pressure regulator. All these elements are installed in the bracket and the fuel pump housing (in the fuel pump module).

Main faults of the fuel pump:
  • failure or incorrect operation of the fuel level indicator sensor;
  • clogged or damaged fuel pump filter;
  • failure of the electric pump;

failure of the pressure regulator.

  • failure of the pressure regulator.

In most cases, malfunction of the fuel level sensor is caused by contamination or oxidation of its contact group.

You will need: a flat-blade screwdriver, pliers.
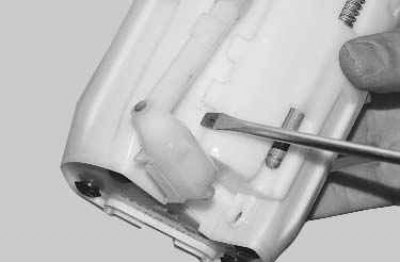
1. Disconnect the drain pipe from the pump module housing by prying it off with a screwdriver.
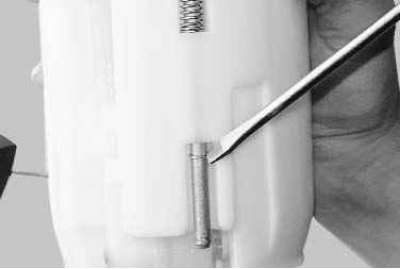

1. Disconnect the drain pipe from the pump module housing by prying it off with a screwdriver.

2. Overcoming the force of the spring, move the module body slightly up the guides and, using a…


2. Overcoming the force of the spring, move the module body slightly up the guides and, using a screwdriver, remove the retaining ring from one of the guides. After this, the module body can be moved slightly away from the bracket.


3. Disconnect the ground wire from the fuel pressure regulator.
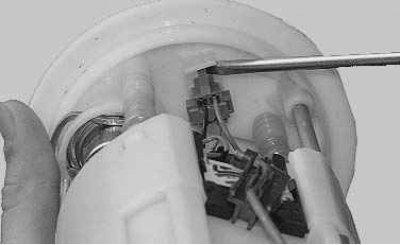

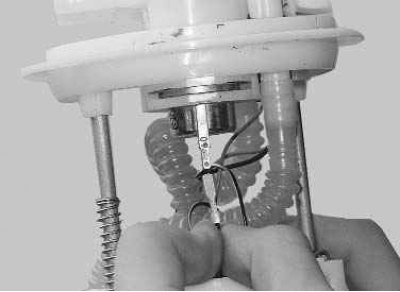
3. Disconnect the ground wire from the fuel pressure regulator.

4. Use a screwdriver to press the wiring harness connector lock…
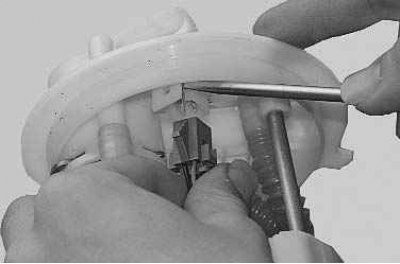

4. Use a screwdriver to press the wiring harness connector lock…

5. …and disconnect it from the intermediate block.
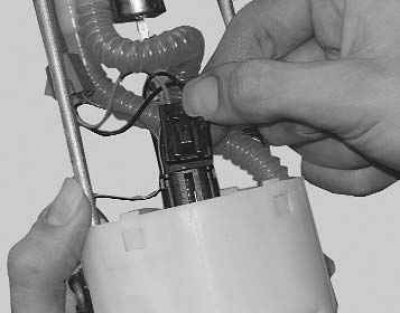

5. …and disconnect it from the intermediate block.

6. Disconnect the wiring harness connector from the electric pump.
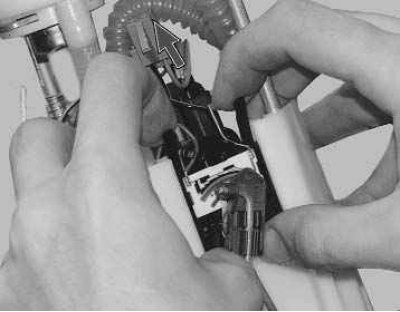

6. Disconnect the wiring harness connector from the electric pump.


7. Release the two fasteners of the fuel level sensor and, moving it up along the grooves of the…


7. Release the two fasteners of the fuel level sensor and, moving it up along the grooves of the fuel pump housing..
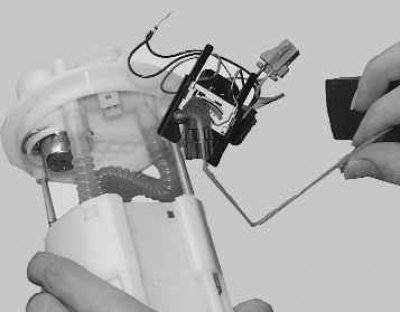
8. …remove the sensor from the housing.


8. …remove the sensor from the housing.

9. Wash the sensor rheostat contacts and its slider plate with gasoline, then wipe with a lint-free cloth soaked in alcohol.
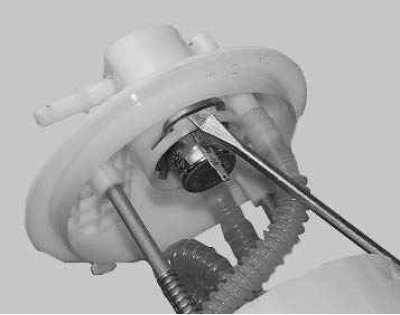
10. Using a screwdriver, pry up the spring retainer of the fuel pressure regulator…

10. Using a screwdriver, pry up the spring retainer of the fuel pressure regulator…


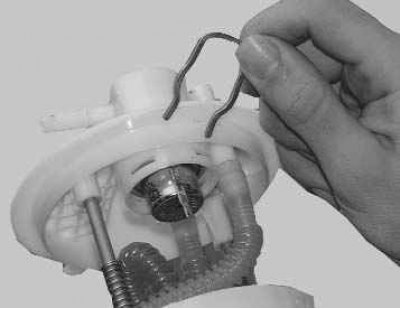
11. …remove the retainer from the bracket…

11. …remove the retainer from the bracket…

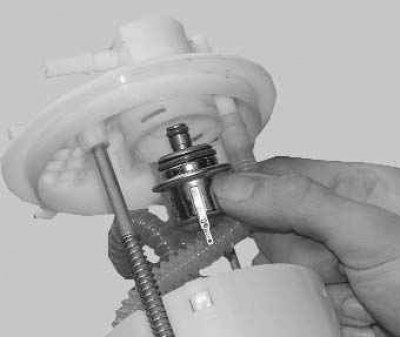
12. …and remove the regulator.
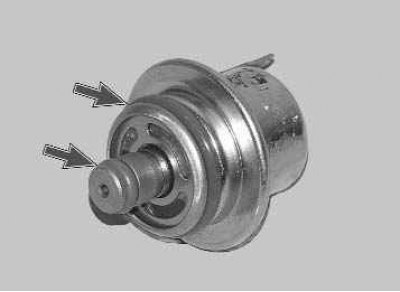

12. …and remove the regulator.

13. Inspect the pressure regulator O-rings. Replace rings that are too tightly compressed, hardened…


13. Inspect the pressure regulator O-rings. Replace rings that are too tightly compressed, hardened or torn by removing them using a screwdriver.

Note: Lubricate the fuel pressure regulator O-rings with a thin layer of grease or engine oil before installation.
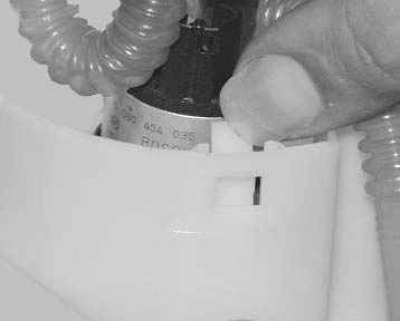


14. Press down the plastic clips…

14. Press down the plastic clips…

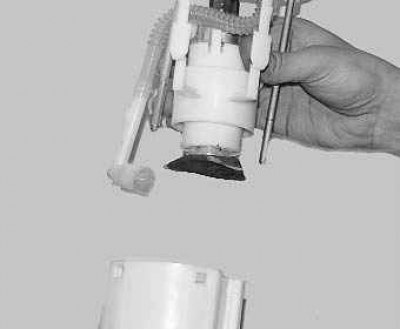
15. …and remove the lower part of the fuel pump housing from the bracket guides.

15. …and remove the lower part of the fuel pump housing from the bracket guides.

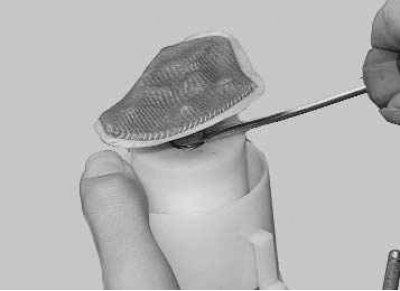
16. To replace or clean the fuel filter, pry its base with a pointed tool…
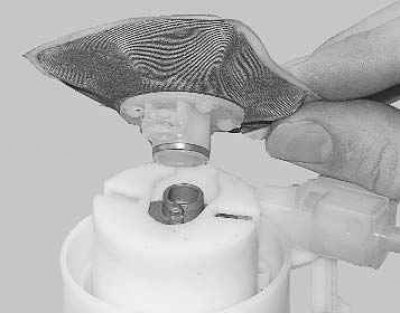

16. To replace or clean the fuel filter, pry its base with a pointed tool…

17. …and remove the filter from the pump body, overcoming the resistance of the spring lock washer.
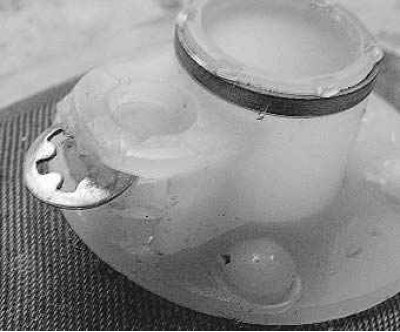

17. …and remove the filter from the pump body, overcoming the resistance of the spring lock washer.


18. Before reinstalling the filter, remove the lock washer, straighten it with pliers and install…


18. Before reinstalling the filter, remove the lock washer, straighten it with pliers and install it into the filter housing.

19. Install the filter in the reverse order of removal.
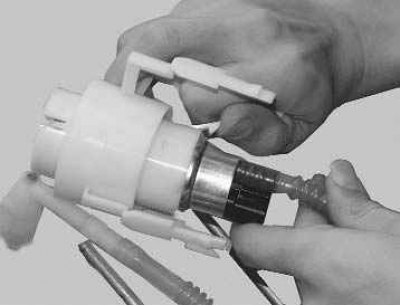
20. To replace the electric pump, press the plastic retainer…
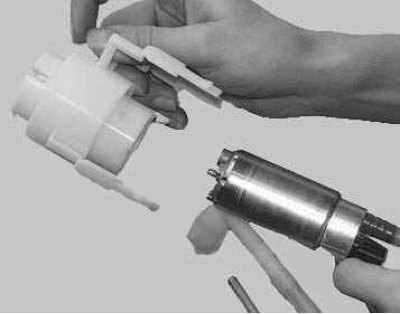

20. To replace the electric pump, press the plastic retainer…

21. …and remove the electric pump from the housing.


21. …and remove the electric pump from the housing.

22. Assemble the fuel pump in the reverse order of disassembly.


This article is available at russian, bulgarian, belarusian, ukrainian, serbian, croatian, romanian, polish, slovak, hungarian
This article has been reviewed: Vladislav Voloshin
Share with friends:
◀ Previous
Lada Priora 1: Supply system
Next ▶

Removal and installation the fuel pump
Removal and installation the air filter
Reduced fuel pressure in the engine fuel system
Checking the pressure in the engine fuel system
Features of the design of the engine power supply system
Replacing the fuel tank and its filler pipe
Removal and installation the throttle assembly
Replacing the idle speed control valve
Removal and installation the fuel rail
Checking and replacing injectors
More articles with information from manuals for Lada:

• Fuel pump repair Lada Kalina Sedan (2004-2013, VAZ-1118)
• Fuel pump — replacement Lada Granta 1 (2011-2023, VAZ-2190)
• Fuel Module — Fuel Pump Replacement Lada Vesta 1 (2015-2023, VAZ-2180)
• Fuel pump and fuel level sensor Lada Largus 1 (2012-2023)
• Electric fuel pump module (EFP) — removal and installation Lada X-Ray 1 (2015-2022)
Link to this article in various formats
Reviews and comments of visitors
No comments yet


Add up two numbers: 37 + 35


Priora 1 (2007-2018) 
  • General information
  • Vehicle device
  • User manual
  • Faults en route
  • Maintenance
  • Power unit
  • Engine repair
  • Cooling and lubrication system
  • Supply system
  • Exhaust system
  • Transmission
  • Clutch
  • Car gearbox
  • Drive shafts
  • Chassis (running gear)
  • Car suspension
  • Steering
  • Brake system
  • Body and interior
  • Exterior (external elements)
  • Interior (internal elements)
  • Doors, locks and windows
  • Electrical equipment
  • Equipment and devices
  • Power devices
  • Lighting and signaling
  • Cooling and heating
  • Electrical circuits
LadaMan.ru © 2018–2026 | Mobile version | About Lada | Sitemap: EN BG BY UA RS HR RO PL SK HU | Contacts with admin | | Add to bookmarks
Kalina Hatchback (2004-2013) | Kalina Sedan (2004-2013) | Granta 1 (2011-2023) | Priora 1 (2007-2018) | Vesta 1 (2015-2023) | Largus 1 (2012-2023) | X-Ray 1 (2015-2022) |
This site uses cookies to ensure everything runs smoothly.