



Note: According to the regulations, replacement of individual parts of the fuel module is not provided for, and in the event of failure of any of its components, the module is replaced as an assembly. However, in an emergency, to replace the fuel pump, to clean the fuel filter, or to replace the fuel level sensor, the module can be disassembled.
To disassemble the fuel module and replace parts, remove it from the vehicle (see here).
Disconnect the fuel level sensor wiring harness from the cover.
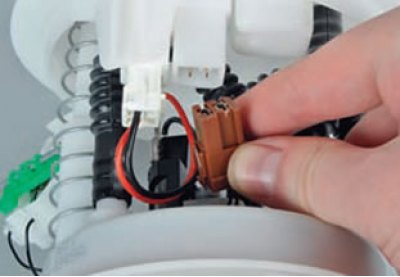
Having released the lock...
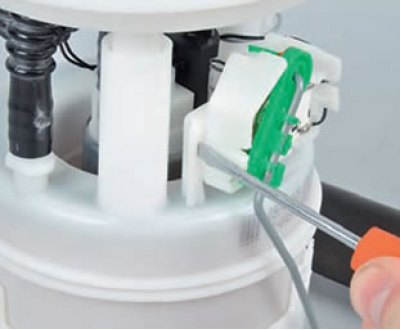
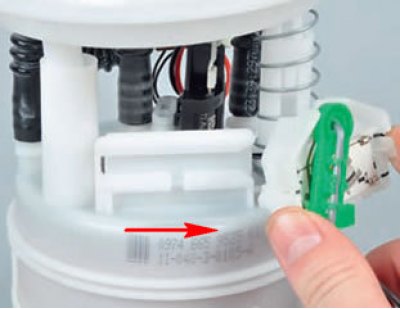
Remove the fuel level sensor by sliding it in the direction of the arrow.
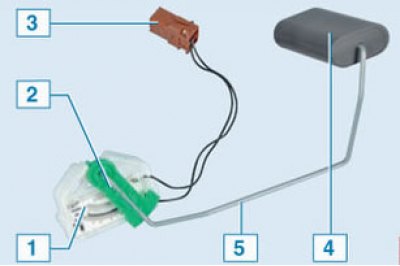
Fuel level sensor: 1 – resistor; 2 – slider; 3 – sensor wiring block; 4 – float; 5 – float lever
Use a screwdriver to press out the three plastic clips…
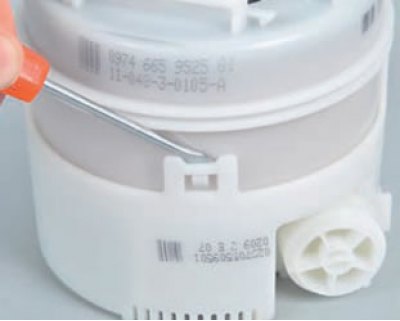
…and remove the glass from the fuel module body. Here is the fine fuel filter (housing) and the coarse mesh filter
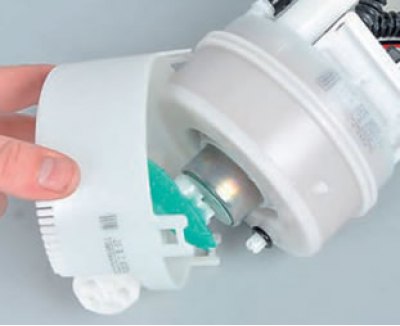
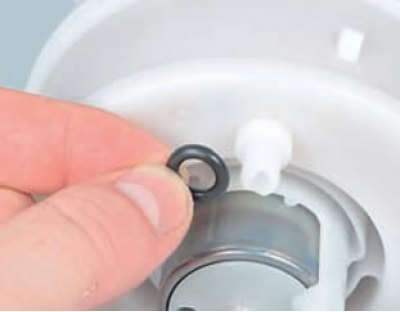
Remove the fuel pressure regulator rubber sealing ring.
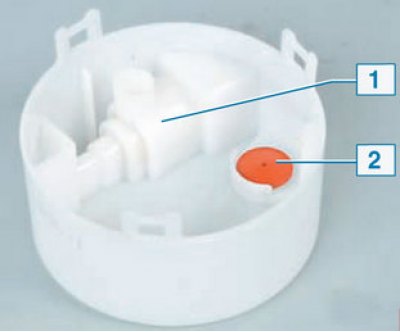
The glass contains a fuel pressure regulator 1 and an anti-drain valve 2.
Having overcome the force of the clamps, we remove the mesh fuel filter.
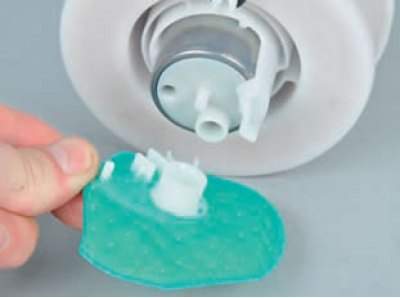
Rinse, blow out, or replace the mesh filter.
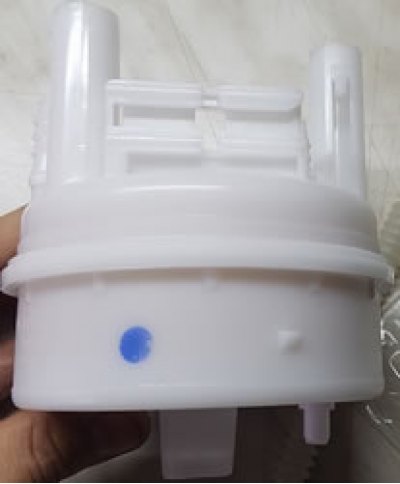
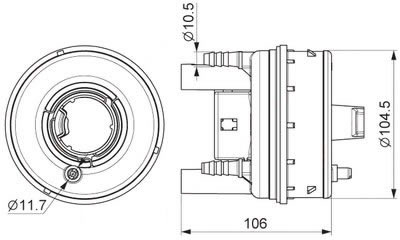
Note: To replace the fine filter, some car enthusiasts used a non-original filter with art. LF249M (see photo and dimensions)
Using a screwdriver, press the cover lock..
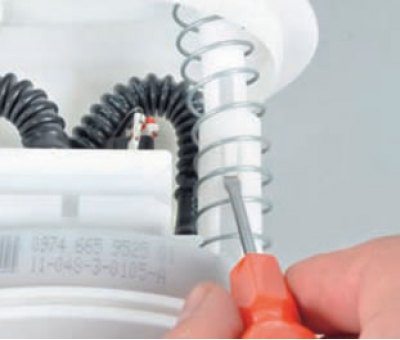
... answer the lid to the side.
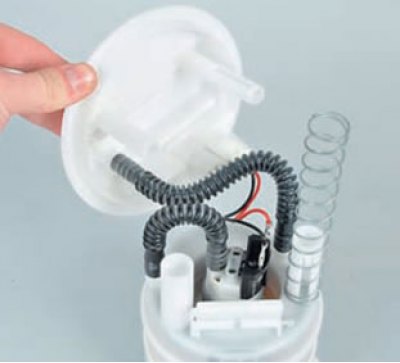
remove the spacer spring.
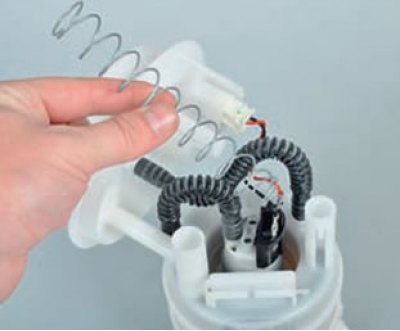
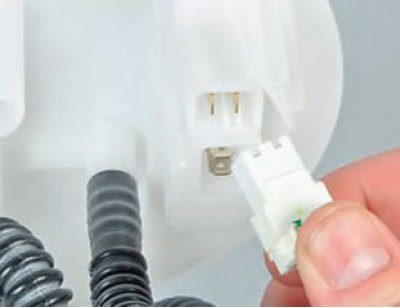
Disconnect the fuel pump connector from the connector on the inside of the cover.
Remove the fuel pump from the fuel filter housing.
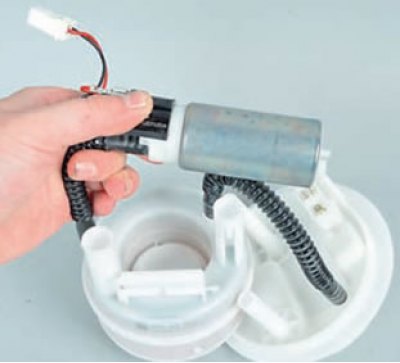
Note: The fuel hoses are heat-shrinkable to the pump and filter housing fittings.
After heating the plastic corrugated tube on the pump branch pipe, we remove the tube from the pump branch pipe.
For this purpose, use a stream of boiling water from a kettle or a hair dryer.
Caution: Before using a hair dryer, thoroughly blow out and dry the parts to avoid fuel ignition!
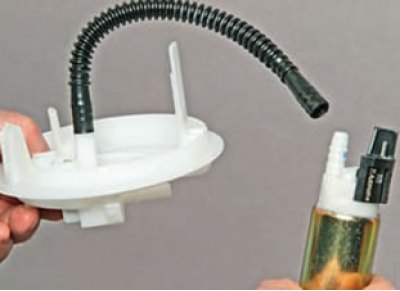
Note: After removing the hoses from the fittings, it may be necessary to replace the hoses to ensure a secure seal. Some car enthusiasts used corrugated fuel pump hoses for VAZ.
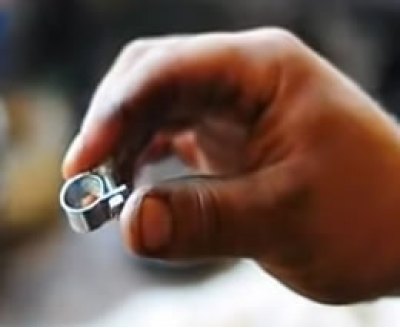
To install and secure the hose on the fuel pump after removal, some car enthusiasts use regular clamps (but not worm type) ~11 mm. The clamp should be secured in such a way as to ensure a tight connection and at the same time not to crush the plastic hose.
We assemble and install the module in reverse order.
Some misconceptions about the fuel pump
The slightest loss of tightness in the pump will immediately lead to a fire, since its brushes constantly spark.
The fuel pump is not a sealed structure, and its insides, such as the anchor or brushes, are constantly bathed in gasoline. But combustion is impossible: the concentration of fuel vapors is much higher than stoichiometric, and therefore it is impossible to ignite them.
Cars with fuel injection need to be refueled more often, but you can't drive "on a light bulb" at all.
Many people believe that if the tank is not full, the pump will definitely start sucking in air instead of gasoline and will quickly die. The pump is placed in a plastic cup, which prevents fuel from escaping during acceleration and tilting. The glass is pressed by a spring to the bottom point of the fuel tank. In addition, internal baffles in the fuel tank prevent the ebb and flow of gasoline. And what if the fuel runs out? There won't be any trouble here either: as soon as the pump stops creating pressure, the engine will stall, and the controller will remove power in a couple of seconds.
A motor that runs dry will fail immediately.
When the internal combustion engine stalls, power is removed from the electric fuel pump very quickly. Therefore, it does not have the physical ability to thresh for a long time in the "dry" mode. In addition, we ran the pumps "dry" for about ten minutes - and nothing: a cold body, low current consumption, smooth noise. Therefore, the pump will not die of its own accord from lack of gasoline.
Gasoline acts as a lubricant in the electric fuel pump.
The lubricating ability of gasoline is negligible. It acts not as a lubricant, but as a coolant.
Excessive pressure in the fuel line is harmful, so when replacing it, it is strictly forbidden to install a more powerful fuel pump.
Bypass valve (pressure regulator) in the fuel module, it monitors the amount of pressure created by the fuel pump, sending excess fuel back to the fuel tank. Therefore, a more efficient pump
will not cause any harm. It's a different matter if you installed a motor that is weaker than the standard one: when operating in maximum modes, the engine may not have enough fuel and it will start to "shut up".
In cars converted to gas, fuel pumps break down especially often.
There are horror stories on Internet forums: the fuel pump in cars with gas equipment always works, pumping gasoline in a small circle, and therefore breaks down more often. But this is a normal mode, no different from work. The only way trouble could arise would be if there was no gas left in the tank, but that would be reminiscent of sabotage. However, the pumps are not afraid of short-term dry operation either.