Car repair AvtoVAZ Car repair Renault Car repair Hyundai Car repair Ford Car repair Volkswagen Car repair Audi Car repair Chevrolet
English Русский
Български
Беларускі
Український
Српски
Hrvatski
Română
Polski
Slovenský
Magyar
articles sitemap contacts bookmark
LadaMan.ru


Kalina Granta Priora Vesta Largus XRAY
Largus 1 (2012-2023)

Adsorber — removal and installation (Largus 1)

  • Main
  • Largus
  • Largus 1
  • Power unit
  • Supply system
  • Adsorber — removal and installation
0
Contents: Removal ⇣ Installation ⇣
The adsorber is installed in the arch of the right front wheel. The electromagnetic valve for purging the adsorber is located on its upper cover.

Part numbers are listed here.

Replacement procedures do not differ depending on the engine type.
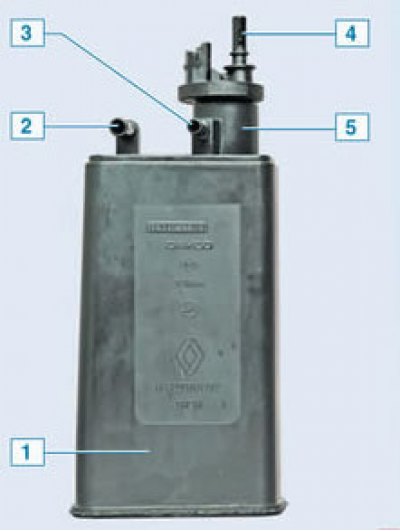
1 — adsorber; 2 — air supply nipple; 3 — fuel vapor supply nipple from the tank; 4 — purge valve…

1 — adsorber; 2 — air supply nipple; 3 — fuel vapor supply nipple from the tank; 4 — purge valve nipple; 5 — purge valve of the adsorber


Removal


If the work is carried out on a lift, the replacement can be done by removing the right mudguard of the bumper (see here).

If the work is carried out on the ground, then it is more convenient to replace it by removing the right front fender liner (see here).

Place the vehicle on a two-post lift, apply the parking brake, turn off the ignition and disconnect the ground wire from the battery.

[Article copied from a web page www.ladaman.ru]
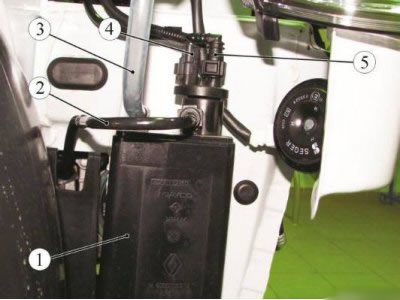
Figure 11-24 - Disconnecting the tubes and wiring harness connector from the canister: 1 -…

Figure 11-24 - Disconnecting the tubes and wiring harness connector from the canister: 1 - adsorber; 2 - fuel vapor recovery tube; (supply line); 3 - breather tube (ventilation); 4 - Wiring harness connector to the purge solenoid valve of the adsorber; 5 - adsorber tube (outlet main)


Press the spring clamps of the tube connectors 2 and 5, Figure 11-24,...
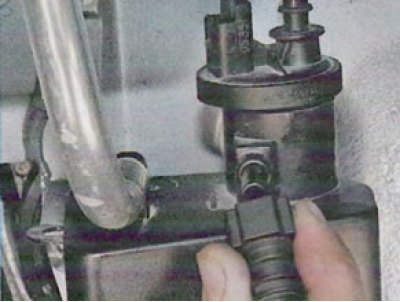
Press the spring clamps of the tube connectors 2 and 5, Figure 11-24,...


...and by moving along the axis of the fittings, disconnect the tubes from the purge valve of the adsorber.
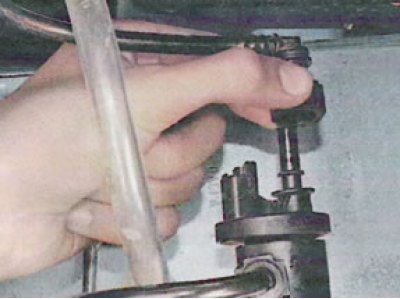
...and by moving along the axis of the fittings, disconnect the tubes from the purge valve of the…


Disconnect breather tube 3 from the adsorber.
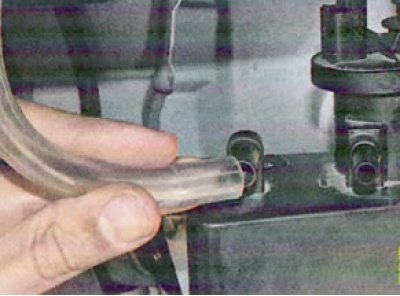
Disconnect breather tube 3 from the adsorber.


Disconnect the connector 4 of the electromagnetic valve from the adsorber.
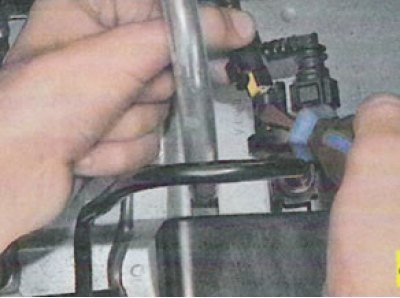
Disconnect the connector 4 of the electromagnetic valve from the adsorber.


Unscrew the two nuts 1, Figure 11-25, securing the adsorber and remove the adsorber 2 from the vehicle (replacement head 13, extension, ratchet).
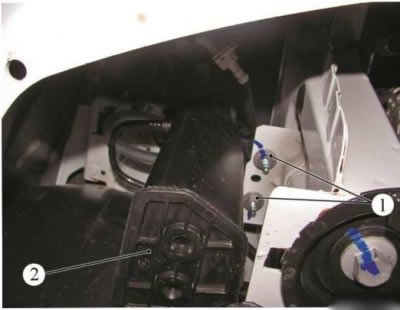


Figure 11-25 - Removing the adsorber: 1 - adsorber mounting nuts; 2 - adsorber

Figure 11-25 - Removing the adsorber: 1 - adsorber mounting nuts; 2 - adsorber


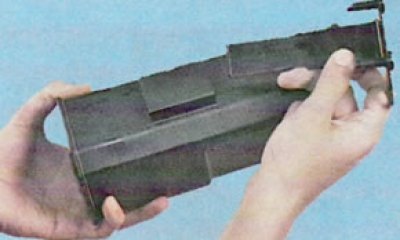
If necessary, the adsorber can be removed without the bracket. For this...
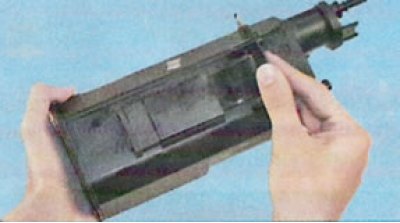
If necessary, the adsorber can be removed without the bracket. For this...


...move the adsorber up (for clarity, shown on a removed adsorber) until the rubber retainer comes out of its eye.
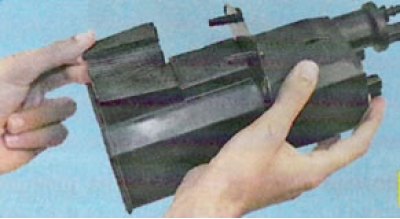
...move the adsorber up (for clarity, shown on a removed adsorber) until the rubber retainer comes…


Remove the retainer.

Remove the retainer.


Remove the canister from the bracket.


Installation


Install the adsorber 2, Figure 11-25, on the vehicle, install and tighten the nuts 1 for fastening the adsorber (replacement head 13, extension, ratchet).

Connect block 4, Figure 11-24, of the electromagnetic valve to the adsorber.

Connect the breather tube 3 to the adsorber.

Connect tubes 2 and 5 to the adsorber by moving along the axis of the fittings until the spring lock of the connector clicks. Check the reliability of the tubes.

Install the front right bumper mudguard.

Connect the ground wire terminal to the battery.


This article is available at russian, bulgarian, belarusian, ukrainian, serbian, croatian, romanian, polish, slovak, hungarian
This article has been reviewed: Daniil Markelov
Share with friends:
◀ Previous
Lada Largus 1: Supply system
Next ▶

Fuel rail — removal and installation
Intake manifold — removal and installation
Replacing the throttle position sensor
Throttle assembly (pipe) — removal and installation
Air filter housing — removal and installation
Electric fuel pump module (EFP) — removal and installation
Replacing the fuel filter, pump and fuel level sensor
Fuel tank — removal and installation
Fuel and steam pipe — removal and installation
More articles with information from manuals for Lada:

• Adsorber — removal and installation Lada Vesta 1 (2015-2023, VAZ-2180)
Link to this article in various formats
Reviews and comments of visitors
No comments yet


Add up two numbers: 28 + 15


Largus 1 (2012-2023) 
  • General information
  • Vehicle device
  • User manual
  • Maintenance
  • Power unit
  • Engine repair
  • Cooling and lubrication system
  • Supply system
  • Ignition system
  • Exhaust system
  • Spare parts catalog
  • Transmission
  • Clutch
  • Car gearbox
  • Drive shafts
  • Spare parts catalog
  • Chassis (running gear)
  • Suspension and wheels
  • Steering
  • Brake system
  • Spare parts catalog
  • Body and interior
  • Exterior (external elements)
  • Interior (internal elements)
  • Doors, locks and windows
  • Heating and ventilation
  • Spare parts catalog
  • Electrical equipment
  • Equipment and devices
  • Power devices
  • Lighting and signaling
  • Spare parts catalog
  • Electrical circuits
LadaMan.ru © 2018–2026 | Mobile version | About Lada | Sitemap: EN BG BY UA RS HR RO PL SK HU | Contacts with admin | | Add to bookmarks
Kalina Hatchback (2004-2013) | Kalina Sedan (2004-2013) | Granta 1 (2011-2023) | Priora 1 (2007-2018) | Vesta 1 (2015-2023) | Largus 1 (2012-2023) | X-Ray 1 (2015-2022) |
This site uses cookies to ensure everything runs smoothly.