



 |
 |
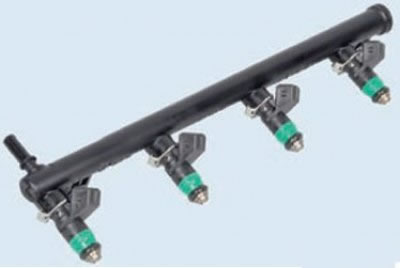
Fuel rail and fuel injector
Removal
Place the vehicle in the work area, apply the parking brake, and turn off the ignition.
For station wagons
Tilt the rear row of seats forward (for 5-seater configuration) or the middle row (for 7-seater configuration).
Disconnect and lift the floor trim.
Remove the electric fuel pump hatch cover.
Disconnect connector 1, Figure 2-1, of the rear wiring harness from module 2 of the electric fuel pump.
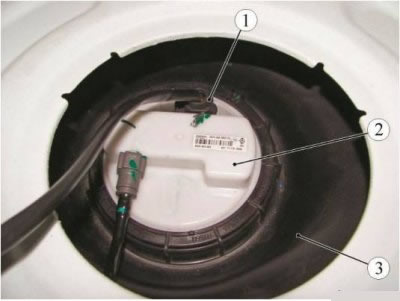
Figure 11-12 - Disconnecting the rear wiring harness connector from the electric fuel pump module: 1 - rear wiring harness connector to the electric fuel pump module; 2 - electric fuel pump module; 3 - fuel tank
Start the engine and let it run at idle speed until it stops completely to relieve pressure in the fuel system, ensuring the exhaust gases are removed (exhaust coil with a fan of the SERF/SP type from SovPlym). Turn off the ignition.
Disconnect the ground wire terminal from the battery.
Connect the connector, wiring harness to the electric fuel pump module. Install the electric fuel pump hatch cover. Install and secure the floor covering.
Lower the rear (for 5-seater configuration) or average (for 7-seater configuration) row of seats.
For cars with K4M engine
Unscrew two nuts 1, Figure 11-13, and remove protective cover 2 of the fuel rail (replacement head 13, extension, ratchet).
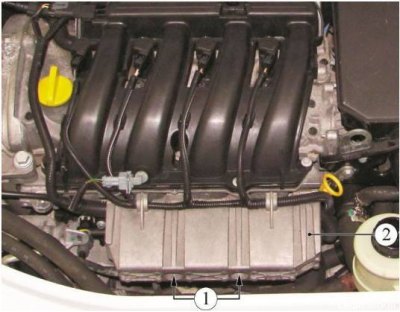
Figure 11-13 - Removing the fuel rail protective cover: 1 - Fuel rail protective casing fastening nuts; 2 - protective cover of the fuel rail
Press the spring clamp of the tube connector 1, Figure 11-14, and by moving along the axis of the fitting, disconnect the tube 1 from the fuel rail 3.
Attention. For a van, first cover the place where the fuel line connects to the fuel rail with a rag and prevent fuel from escaping when disconnecting the fuel line, since the pressure in the fuel line is maintained
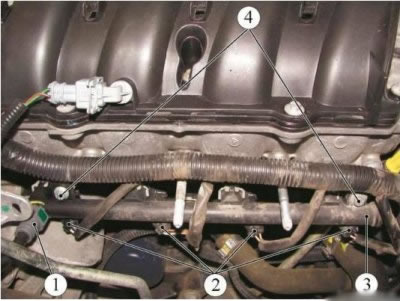
Figure 11-14 - Removing the fuel rail of the K4M engine: 1 - fuel pipe; 2 - wiring harness pads to injectors; 3 - fuel rail; 4 - fuel rail mounting bolts
Disconnect the 2 wiring harness pads from the fuel rail injectors 3.
Unscrew two bolts 4 and remove the fuel rail 3 together with the injectors (replaceable head 8, extension, ratchet).
Press the spring lock of the connector and disconnect the supply line 1, Figure 11-15, from the fuel rail 2.
Caution: For van-type vehicles, first cover the fuel line connector with a rag to prevent fuel from escaping when disconnecting the fuel line, as the pressure in the fuel line remains
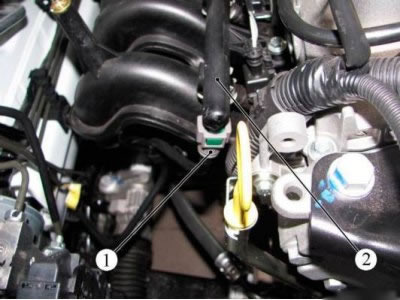
Figure 11-15 - Disconnecting the supply line from the fuel rail: 1 - supply pipeline; 2 - fuel rail
Remove the throttle pipe 1, Figure 11-16 (see above).
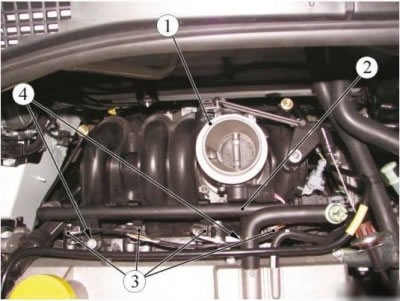
Figure 11-16 - Removing the fuel rail of the K7M engine: 1 - throttle pipe; 2 - fuel rail; 3 - wiring harness pads to injectors; 4 - fuel rail mounting bolts
Disconnect the 2 wiring harness pads from the injectors.
Unscrew the two bolts 4 and remove the fuel rail 2 (replaceable head 8, extension, ratchet).
Installation
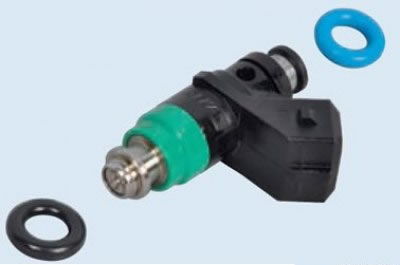
Attention. The injector sealing rings must be replaced.
Before installing the fuel rail on the engine, install new sealing rings on the injectors, having previously lubricated them with engine oil.
Install the fuel rail onto the engine.
Install and tighten the fuel rail mounting bolts.
Tightening torque of ramp mounting bolts 9 Nm (0.9 kgf·m) (replaceable head 8, extension, ratchet, torque wrench).
Connect the wiring harness connectors to the fuel rail injectors.
Connect the fuel pipe to the fuel rail by moving it along the axis of the fitting until the spring lock of the connector clicks. Check the reliability of the tube fixation.
For vehicles with a K4M engine, additionally: install protective cover 2, Figure 11-13, of the fuel rail on the engine, screw in and tighten nuts 1. Tightening torque of nuts 21 N·m (2.1 kgf·m) (replaceable head 13, extension, ratchet, torque wrench).
Operations for all vehicle configurations
Connect the ground wire terminal to the battery.