
Note. For catalog numbers of the front fenders and their mountings, see here.
Removing
We put the car on the handbrake.
Disconnect the battery terminal.
Jacking up the car (or raise on a lift to a height suitable for convenient work (electrohydraulic lift type P-3.2 G).
We remove the wheel.
We remove the bumper (see here).
We remove the headlight (see here).
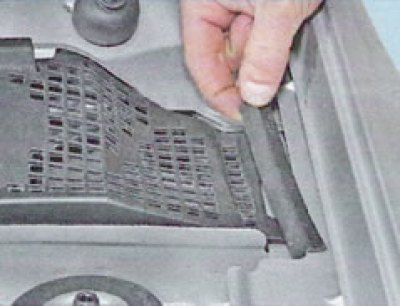
Remove the front fender liner as follows:
- unscrew six self-tapping screws 1, Figure 8-1;
- unscrew the nut 4 and remove the side mudguard 5;
- remove the fender liner retainers 2 and 3, remove the front wheel liner itself.
Note. the removal of the fender liner is also described in detail here.
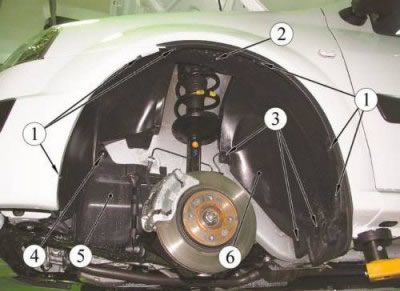
Figure 8-1 - Protective fender liner of the front wheel arch: 1 - screw securing the protective cover; 2 - latch; 3 - latch; 4 - nut; 5 - side mudguard; 6 - protective casing of the front wheel arch
We remove the turn signal from the wing. (see here).
Overcoming the resistance of the plastic holders, we take the upper edge of the wing lining to the center of the car, after which we take the lower edge of the lining up and remove the lining 1, Figure 8-3.
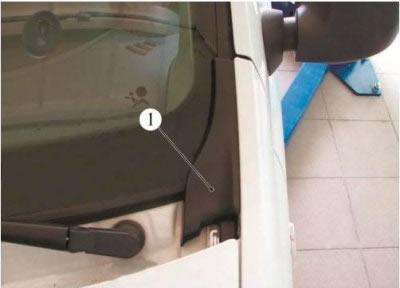
Figure 8-3 - Removing the front wing lining: 1 - front wing lining
Remove the air grill seal.
We unscrew the bolts 1, 3, 4, Figure 8-4, and the nut 5 for attaching the wing to the body and remove the wing 2
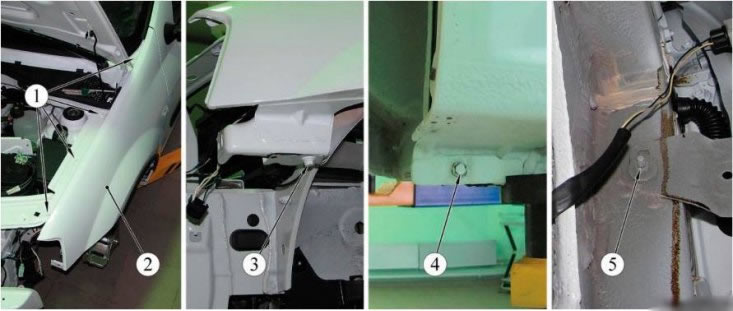
Figure 8-4 - Removing the front wing: 1 - four top mounting bolts (to the frame of the engine compartment); 2 - front wing; 3 - front mounting bolt (to the lower cross member of the radiator frame); 4 - bottom mounting bolt (to the threshold); 5 - rear fastening nut (to the body pillar)
Installation
Remove all fasteners and nuts, clean the surfaces of the body and wing from foreign objects, remnants of gasket material, and then clean all the centers of corrosion to bare metal
Degrease cleaned metal surfaces with white spirit.
Cover these areas with soil.
We install all the fasteners and nuts provided for by the design, as well as insulating gaskets, it is also possible to cover the surfaces to be joined with bituminous mastic. Thickness - 2.5 mm, width 2 cm. If mastic was applied, it is necessary to wait some time for it to dry before installing the wing (see the instructions for the mastic). If insulating gaskets are installed, then their dimensions are the same as for the old gaskets.
We install the hood and wrap the screws securing the wing, but not completely, leaving enough travel to adjust the gap.
We adjust the gaps between the fender, hood and front door. For ease of adjustment, you can use a rubber mallet, tapping and adjusting a fairly loosely fixed wing with it until the difference in the gaps between the body parts disappears.
Tighten the front fender mounting screws.
Install all removed parts in reverse order.