



Removal
Place the vehicle on a two-post lift and apply the parking brake (electrohydraulic lift type P-3.2 G).
Open the hood and disconnect the ground wire terminal from the battery.
Raise the vehicle to a height convenient for performing the work.
Remove the front bumper mudguards.
Unscrew the self-tapping screws 1, Figure 2-1, on the right and left sides of the vehicle, for the side mounting of the bumper (torx T20 replaceable head, ratchet).
Move the wheel arch protective cover aside and unscrew the 2 side bumper mounting bolts on the right and left sides of the vehicle (torx T30 replaceable head, extension, ratchet).
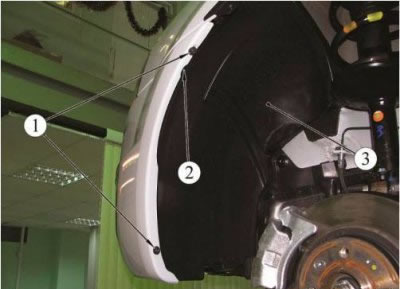
Figure 2-1 - Side bumper mount: 1 - side bumper mounting screw; 2 - side bumper mounting bolt; 3 - wheel arch protective cover
Unscrew bolts 1, Figure 2-2, of the lower bumper mount to the subframe (torx T30 replaceable head, ratchet).
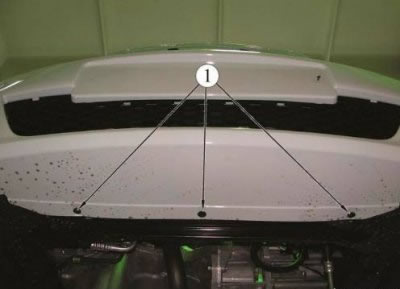
Figure 2-2 - Lower bumper mount: 1 - lower mounting bolt of the bumper to the subframe
Unscrew screws 1, Fig. 2-3, securing the bumper to the upper cross member of the radiator frame (torx T30 replaceable head, ratchet).
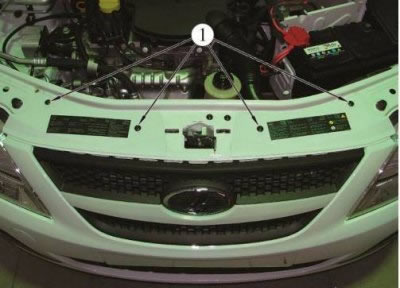
Figure 2-3 - Upper bumper mount: 1 - screw for fastening the bumper to the upper cross member of the radiator frame
If equipped with fog lights, disconnect the front bumper wiring harness connector from the instrument panel wiring harness connector.
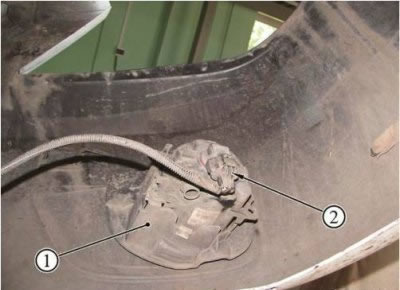
Figure 2-4 - Fog light: 1 - fog light; 2 - Front bumper wiring harness connector
Remove the front bumper.
If necessary, remove the fog lights from the front bumper: disconnect the front bumper wiring harness connectors 2 from the fog lights 1, Figure 2-4, and remove the fog lights
Installation
Installation should be carried out in the reverse order of removal.