



Open the hood and disconnect the ground wire terminal from the battery (spanner 10).
Raise the vehicle to a height convenient for work.
Unscrew the four screws 1, Figure 1-1, securing the bumper to the subframe (torx T30 replaceable head, ratchet).
Unscrew the three screws 3 securing the bumper to the body (torx T20 replaceable head, ratchet).
Unscrew two screws 2 and 4 securing the left and right wheel arch shield to the bumper (torx T20 replaceable head, ratchet).
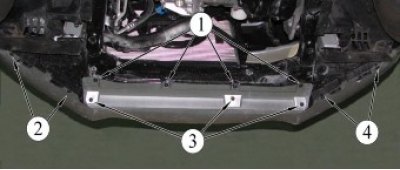
Figure 1-1 - Lower bumper mount: 1 - screw for fastening the bumper to the subframe; 2 - screw for lower mounting of bumper to body; 3, 4 - screw for fastening the wheel arch mudguard to the bumper
Unscrew the screws 1, Figure 1-2, on the right and left sides of the bumper side mount 2 (torx T20 replaceable head, ratchet).
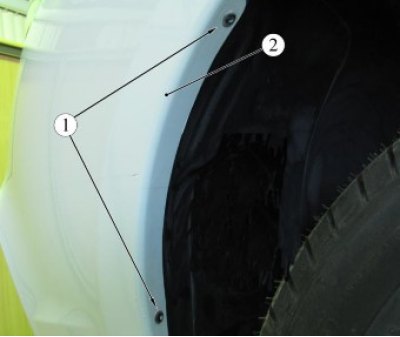
Figure 1-2 - Side bumper mount: 1 - side bumper mounting screw; 2 - bumper
Unscrew the four bolts 1, Figure 1-3, of the upper bumper mount to the body (torx T30 replaceable head, ratchet).
Disengage the bumper from the side brackets and remove the bumper.
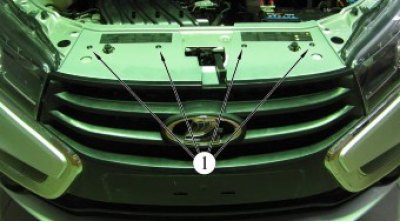
Figure 1-3 - Upper bumper mount: 1 - screw for fastening the bumper to the radiator frame cross member
Installation should be carried out in the reverse order of removal.
Present the vehicle to the Quality Control Department. The Quality Control Department will check the vehicle for compliance with the requirements of TU 017200-254-0023934 in the scope of work performed.