
Car repair AvtoVAZ Car repair Renault Car repair Hyundai Car repair Ford Car repair Volkswagen Car repair Audi Car repair Chevrolet
English Русский
Български
Беларускі
Український
Српски
Hrvatski
Română
Polski
Slovenský
Magyar
articles sitemap contacts bookmark
LadaMan.ru


Kalina Granta Priora Vesta Largus XRAY
Priora 1 (2007-2018, VAZ-2170)

Replacement of constant velocity joints (Priora 2170)

  • Main
  • Priora
  • Priora 1
  • Transmission
  • Drive shafts
  • Replacement of constant velocity joints
0
If you hear knocking noises in the front drive when cornering, check the constant velocity joints. If, when rocking the drive shaft by hand in the transverse direction, there is play or the mudguards are torn, such a joint must be replaced. There is practically no point in disassembling the hinge. This work is labor-intensive, and if the cover is torn, the dirt that gets into the joint will already render its parts unusable. They cannot be replaced separately, so the best solution is to replace the hinge assembly and its mudguard. The appearance of traces of grease on the hinge indicates that the cover is torn.

If during operation oil leaks are noticed at the point where the front wheel drive connects to the gearbox, replace the inner joint oil seal (see "Replacing gearbox seals").

You will need: pliers, a screwdriver, a hammer, and a soft metal punch.

1. Remove the front wheel drive from the vehicle (see "Removing and installing front wheel drives").

2. Clamp the drive shaft in a vice with soft metal jaw pads.
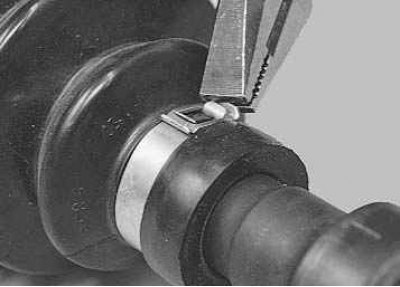
3. Use pliers to squeeze the bent tabs of the inner clamp of the inner hinge boot...


3. Use pliers to squeeze the bent tabs of the inner clamp of the inner hinge boot...


Main material on the website: ladaman
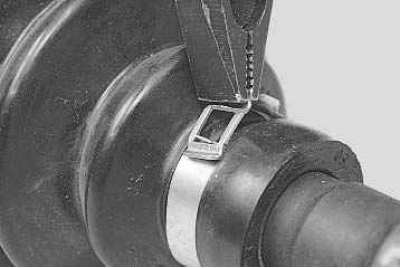
4. ...remove the clamp lock...
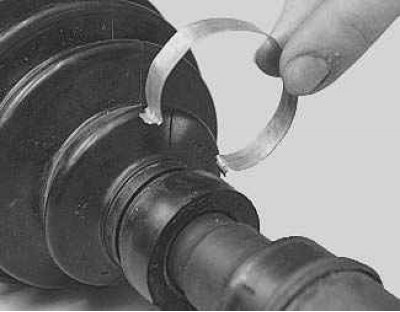

4. ...remove the clamp lock...

5. ...and remove the clamp.


5. ...and remove the clamp.

6. Remove the outer cover clamp in the same way.
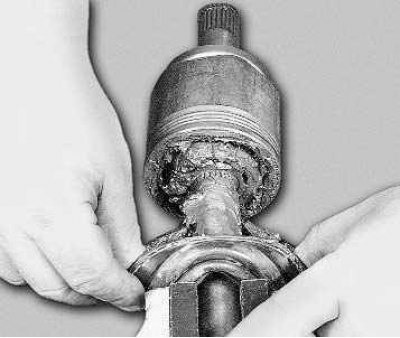
7. Slide the mudguard over the shaft and turn it inside out.
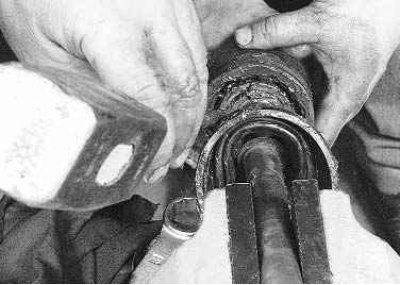

7. Slide the mudguard over the shaft and turn it inside out.

8. Using a drift, knock the inner joint off the shaft by applying force to the joint collar.
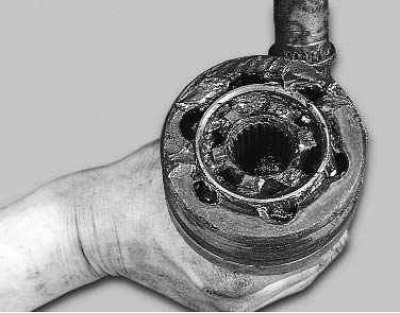

8. Using a drift, knock the inner joint off the shaft by applying force to the joint collar.


9. Check the presence of grease in the new joint. It should contain 80 cm³ of SHRUS-4 grease. If…


9. Check the presence of grease in the new joint. It should contain 80 cm³ of SHRUS-4 grease. If you think there is not enough grease, add it: extra grease will not hurt.
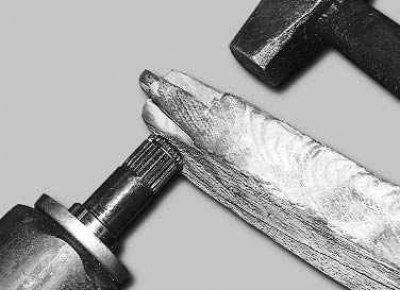
10. When installing the hinge, place it on the drive shaft using light hammer blows through a…


10. When installing the hinge, place it on the drive shaft using light hammer blows through a wooden spacer on the outer end of the tailpiece along its axis until the hinge is secured on the shaft. When installing the hinge, make sure that no dirt gets into it.
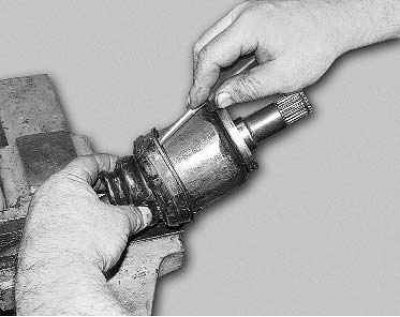
11. Install the mudguard onto the hinge housing.
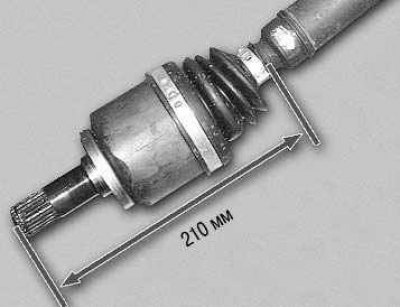

11. Install the mudguard onto the hinge housing.


12. When installing the inner joint cover, maintain the dimension from the end of the tailpiece to…


12. When installing the inner joint cover, maintain the dimension from the end of the tailpiece to the small edge of the mudguard cover equal to 210 mm, and carefully tighten the clamps using special pliers.
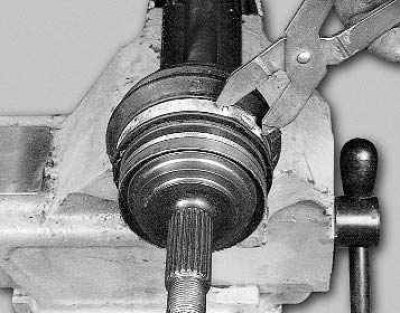
13. To replace the outer joint, remove its outer and inner clamps in the same way as you did for…


13. To replace the outer joint, remove its outer and inner clamps in the same way as you did for the inner joint.
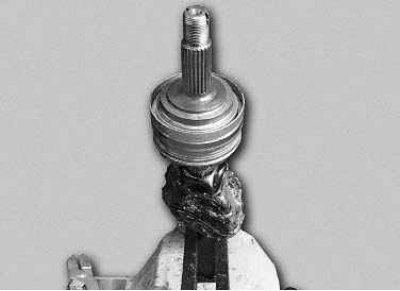
14. Slide the mudguard over the shaft and turn it inside out.

14. Slide the mudguard over the shaft and turn it inside out.


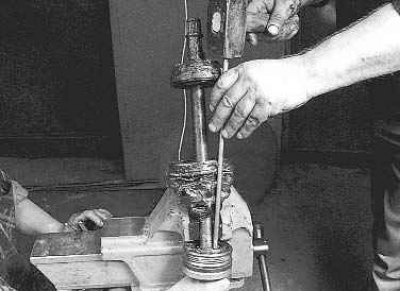
15. Using a drift, knock the outer joint off the shaft by applying force to the joint collar.


15. Using a drift, knock the outer joint off the shaft by applying force to the joint collar.

16. Install the outer hinge in the same way as the inner hinge. The difference is that 40 cm³ of SHRUS-4 grease must be placed in the joint.


This article is available at russian, bulgarian, belarusian, ukrainian, serbian, croatian, romanian, polish, slovak, hungarian
This article has been reviewed: Vladislav Voloshin
Share with friends:
◀ Previous
Lada Priora 1: Drive shafts
 

Removal and installation front wheel drives
Possible faults of front wheel drives
Design features of front wheel drives
 
More articles with information from manuals for Lada:

• Replacing CV joints (constant velocity joints) Lada Kalina Sedan (2004-2013, VAZ-1118)
• Replacing outer and inner CV joints (JR5) Lada Largus 1 (2012-2023)
• Rear suspension arm joints — replacement Lada X-Ray 1 (2015-2022)
Link to this article in various formats
Reviews and comments of visitors
No comments yet


Add up two numbers: 35 + 48


Priora 1 (2007-2018) 
  • General information
  • Vehicle device
  • User manual
  • Faults en route
  • Maintenance
  • Power unit
  • Engine repair
  • Cooling and lubrication system
  • Supply system
  • Exhaust system
  • Transmission
  • Clutch
  • Car gearbox
  • Drive shafts
  • Chassis (running gear)
  • Car suspension
  • Steering
  • Brake system
  • Body and interior
  • Exterior (external elements)
  • Interior (internal elements)
  • Doors, locks and windows
  • Electrical equipment
  • Equipment and devices
  • Power devices
  • Lighting and signaling
  • Cooling and heating
  • Electrical circuits
LadaMan.ru © 2018–2026 | Mobile version | About Lada | Sitemap: EN BG BY UA RS HR RO PL SK HU | Contacts with admin | | Add to bookmarks
Kalina Hatchback (2004-2013) | Kalina Sedan (2004-2013) | Granta 1 (2011-2023) | Priora 1 (2007-2018) | Vesta 1 (2015-2023) | Largus 1 (2012-2023) | X-Ray 1 (2015-2022) |
This site uses cookies to ensure everything runs smoothly.