
Car repair AvtoVAZ Car repair Renault Car repair Hyundai Car repair Ford Car repair Volkswagen Car repair Audi Car repair Chevrolet
English Русский
Български
Беларускі
Український
Српски
Hrvatski
Română
Polski
Slovenský
Magyar
articles sitemap contacts bookmark
LadaMan.ru


Kalina Granta Priora Vesta Largus XRAY
Priora 1 (2007-2018, VAZ-2170)

Outer Tie Rod End and Ball Joint Boot Replacement (Priora 2170)

  • Main
  • Priora
  • Priora 1
  • Chassis (running gear)
  • Steering
  • Outer Tie Rod End and Ball Joint Boot Replacement
0
If the steering wheel free play is increased, check the axial and radial clearances in the ball joints of the steering rods. If there is any looseness in the joint or corrosion has appeared on the ball stud, replace the ball joint assembly with the tip.

Attention! Be sure to replace the torn protective cover of the ball joint, otherwise dirt and water getting into the joint will quickly put it out of order. The cover can be replaced without removing the tip from the rod.


Bent inner tie rod ends must be replaced.

You will need: pliers with narrow jaws, a 13, 19, 22 key, a ball joint puller, a flat-blade screwdriver.

1. Remove the appropriate front wheel.

2. Clean the tie rod end to steering arm mounting nut and apply WD-40 type liquid to the threaded connection to make it easier to loosen the nut.
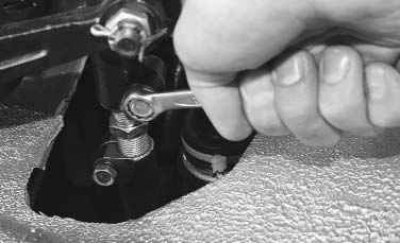
3. Loosen the bolts securing the outer and inner tie rod ends.
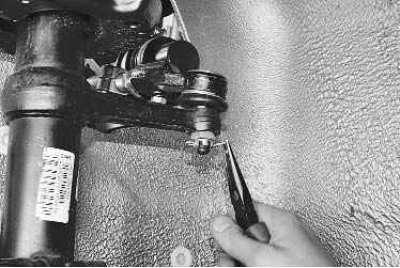

3. Loosen the bolts securing the outer and inner tie rod ends.

4. Bring the ends of the cotter pin tightly together…
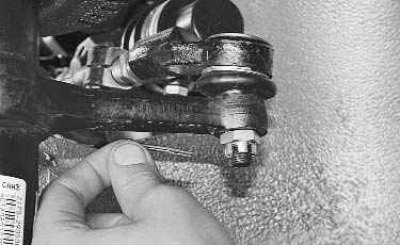

4. Bring the ends of the cotter pin tightly together…


5. …and remove the cotter pin. If you cannot remove the cotter pin by hand, use pliers.
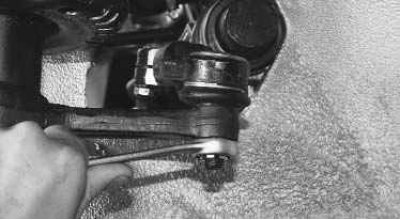

5. …and remove the cotter pin. If you cannot remove the cotter pin by hand, use pliers.

6. Loosen the nut…

6. Loosen the nut…

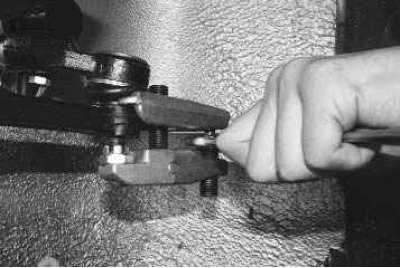
7. …and press out the ball joint pin using a puller.

7. …and press out the ball joint pin using a puller.

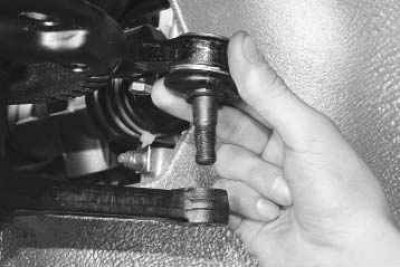
8. Unscrew the steering rod mounting nut and remove the rod from the hole.

8. Unscrew the steering rod mounting nut and remove the rod from the hole.


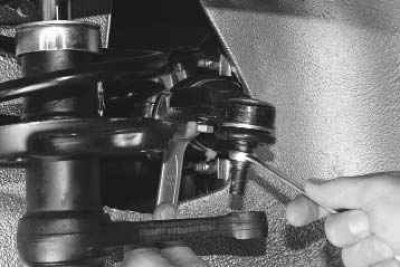
9. Holding the adjusting rod with a key…

9. Holding the adjusting rod with a key…

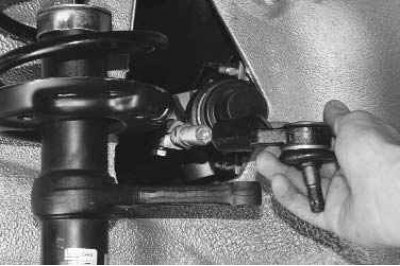
10. …unscrew the tip from the rod, counting the number of turns. When installing the tip, this will…


10. …unscrew the tip from the rod, counting the number of turns. When installing the tip, this will help maintain approximate wheel alignment.
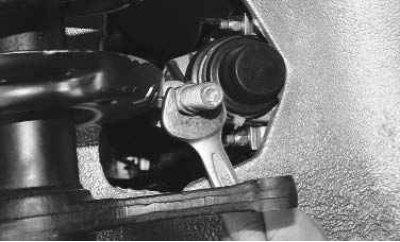
11. If it is necessary to replace the steering linkage adjusting rod, unscrew it, also counting the…


11. If it is necessary to replace the steering linkage adjusting rod, unscrew it, also counting the number of turns when unscrewing.


12. Install the tip in the reverse order of removal. Before tightening the end mounting bolt and pressing in the outer tie rod end joint, make sure that the joint surface is parallel to the bearing surface of the pivot arm. Adjust the hinge if necessary.
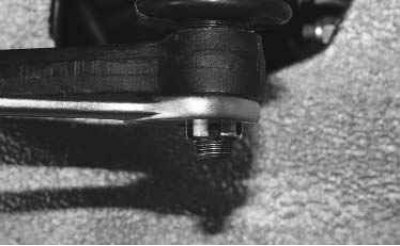
13. Tighten the ball joint pin nut to the required torque and bring it to the nearest slot in the…


13. Tighten the ball joint pin nut to the required torque and bring it to the nearest slot in the nut for the cotter pin. After installing the tip, check and adjust the wheel alignment angles if necessary.

14. To replace the ball joint protective boot, disconnect the rod from the steering arm (see item 8).
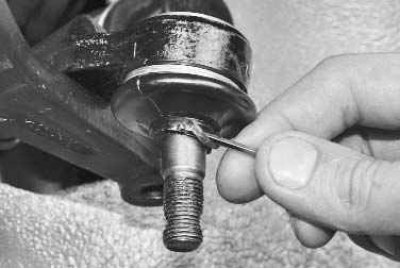
15. Remove the sealing ring from the protective cover by carefully prying it off with a narrow,…


15. Remove the sealing ring from the protective cover by carefully prying it off with a narrow, blunt object.
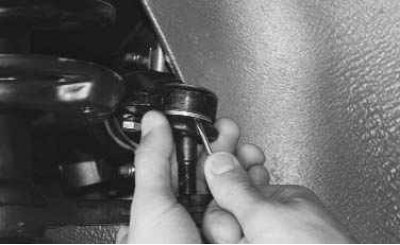
16. Carefully, so as not to damage the protective cover, pry it up with a screwdriver..
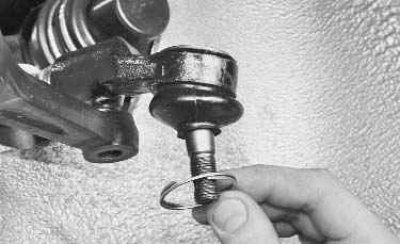

16. Carefully, so as not to damage the protective cover, pry it up with a screwdriver..


17. …and remove the spring ring.
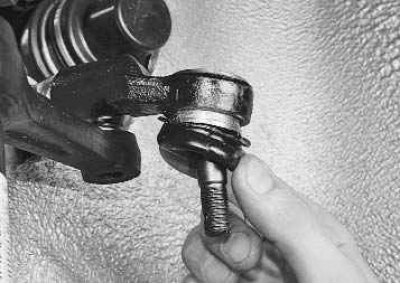

17. …and remove the spring ring.

18. Remove the protective cover.
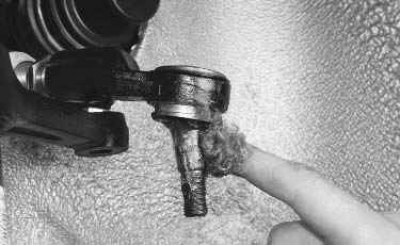

18. Remove the protective cover.

19. Remove the dirty top layer of grease (if it is noticeable that dirt has gotten inside the…


19. Remove the dirty top layer of grease (if it is noticeable that dirt has gotten inside the hinge, then such a hinge will have to be replaced) and apply new grease. Fill the new boot halfway with grease and install it on the hinge, pushing the edge of the boot onto the seat on the hinge body until it stops.


20. Install the spring and seal rings.

21. Check that the rings are installed correctly and that the edges of the cover fit tightly.


This article is available at russian, bulgarian, belarusian, ukrainian, serbian, croatian, romanian, polish, slovak, hungarian
This article has been reviewed: Vladislav Voloshin
Share with friends:
◀ Previous
Lada Priora 1: Steering
Next ▶

Removal and installation the steering cardan shaft
Removal and installation of electromechanical power steering
Removal and installation the steering wheel
Possible steering malfunctions
Features of the steering design
Removal and installation the inner tie rod end
Removal and installation the steering gear
Checking the gap between the rack stop and the stop nut
More articles with information from manuals for Lada:

• Removal and installation the outer tie rod end and replacing the ball… Lada Kalina Sedan (2004-2013, VAZ-1118)
• Outer drive joint — removal, replacement of protective cover and… Lada Granta 1 (2011-2023, VAZ-2190)
• Outer drive joint — removal, replacement of protective cover and… Lada Vesta 1 (2015-2023, VAZ-2180)
• Replacing the outer joint boot of the front wheel drive Lada Largus 1 (2012-2023)
• Outer Tie Rod End — removal and installation Lada X-Ray 1 (2015-2022)
Link to this article in various formats
Reviews and comments of visitors
No comments yet


Add up two numbers: 15 + 11


Priora 1 (2007-2018) 
  • General information
  • Vehicle device
  • User manual
  • Faults en route
  • Maintenance
  • Power unit
  • Engine repair
  • Cooling and lubrication system
  • Supply system
  • Exhaust system
  • Transmission
  • Clutch
  • Car gearbox
  • Drive shafts
  • Chassis (running gear)
  • Car suspension
  • Steering
  • Brake system
  • Body and interior
  • Exterior (external elements)
  • Interior (internal elements)
  • Doors, locks and windows
  • Electrical equipment
  • Equipment and devices
  • Power devices
  • Lighting and signaling
  • Cooling and heating
  • Electrical circuits
LadaMan.ru © 2018–2026 | Mobile version | About Lada | Sitemap: EN BG BY UA RS HR RO PL SK HU | Contacts with admin | | Add to bookmarks
Kalina Hatchback (2004-2013) | Kalina Sedan (2004-2013) | Granta 1 (2011-2023) | Priora 1 (2007-2018) | Vesta 1 (2015-2023) | Largus 1 (2012-2023) | X-Ray 1 (2015-2022) |
This site uses cookies to ensure everything runs smoothly.