
Note. The hood is quite heavy and bulky, so we recommend removing it with an assistant.
If the hood is not going to be replaced, it is recommended to mark the position of the washers relative to the hood hinges to facilitate its further installation. Noise isolation, rubber buffers and a safety hook in this case do not need to be removed from it.
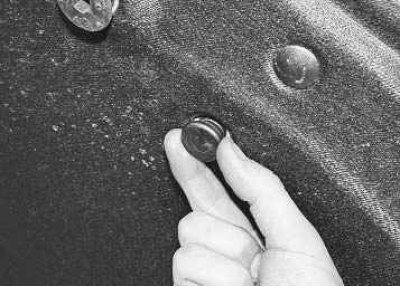
You will need: keys «on 10», «at 13», flat blade screwdriver, side cutters.
1. Open the hood and remove the safety hook from it by unscrewing it with a key «on 10» two nuts for its fastening.
2. Unscrew the two rubber buffers.
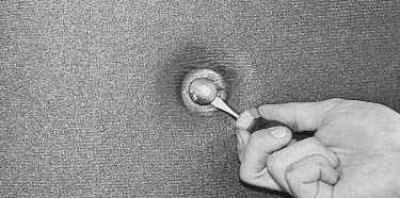
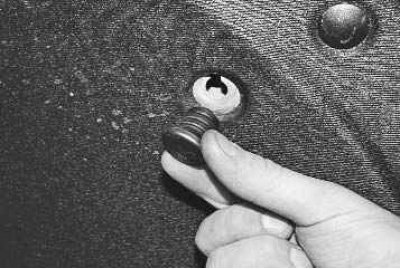
3. Pry off with a screwdriver, remove the nineteen plastic caps for fastening the soundproofing of the hood and remove the soundproofing.
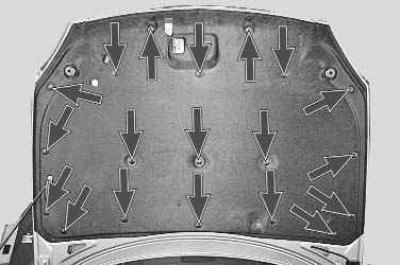
Note. This is how the soundproofing fasteners are located.
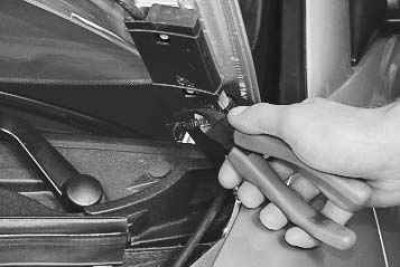
4. Cut the clamp of the windshield washer hose holder..
5.... and remove the holder.
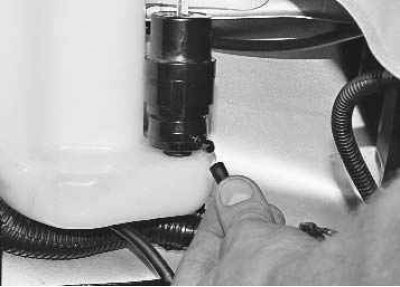
6. Disconnect the windshield washer hose from the washer pump.
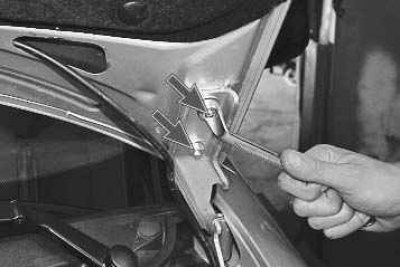
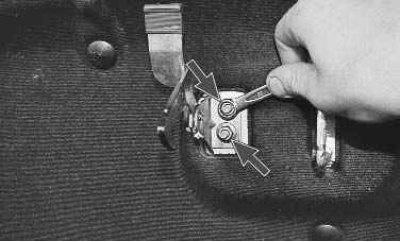
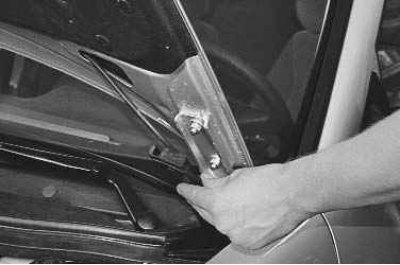
7. Turn away on two nuts of fastening of a cowl on both hinges. In this case, the assistant must hold the hood. Note that there are spring washers under the nuts.
8. Together with an assistant, remove the studs on the hood from the holes in the hinges and remove the hood.
9. Install the new hood on the hinges. Adjusting the position of the hood is carried out due to enlarged holes in the hinges. Therefore, before final tightening of the fastening nuts, cover the hood and move it so that the front edge of the hood is flush with the radiator lining. Carefully open the hood and finally tighten its fastening nuts. Install the noise insulation, rubber buffers and safety hook on the hood in the reverse order of removal.
10. Height adjustment of the hood is carried out by screwing in or out the rubber buffers. When properly adjusted, the gaps between the hood and the front fenders are the same and even on both sides.
11. Check the ease of opening and the reliability of the locking of the hood lock, if necessary, adjust the position of the lock (see «Hood lock adjustment»).