
Car repair AvtoVAZ Car repair Renault Car repair Hyundai Car repair Ford Car repair Volkswagen Car repair Audi Car repair Chevrolet
English Русский
Български
Беларускі
Український
Српски
Hrvatski
Română
Polski
Slovenský
Magyar
articles sitemap contacts bookmark
LadaMan.ru


Kalina Granta Priora Vesta Largus XRAY
Vesta 1 (2015-2023, VAZ-2180)

Engine cooling system radiator — removal and installation (Vesta 2180)

  • Main
  • Vesta
  • Vesta 1
  • Power unit
  • Cooling system
  • Engine cooling system radiator — removal and installation
0
Contents: Removal ⇣ Installation ⇣
Note: The work is labor-intensive. In a car with an air conditioning system, the work is complicated by the presence of a condenser installed in front of the radiator. When removing the radiator, there is a high probability of depressurization of the air conditioning system. Therefore, it is recommended that this work be performed at a specialized service station.


Removal


1. Drain the coolant (see "Coolant - Replacement"). After draining the liquid, do not connect the hose to the radiator.

2. Remove the front bumper (see "Front bumper - removal and installation").

3. Remove the front bumper reinforcement beam...
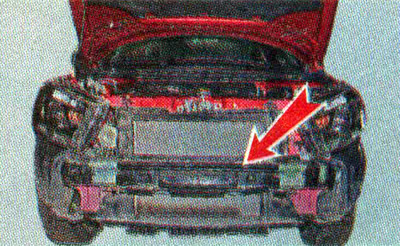
3. Remove the front bumper reinforcement beam...


...for which we unscrew the eight mounting bolts with a 10 mm wrench.
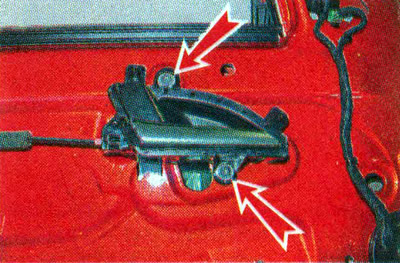
...for which we unscrew the eight mounting bolts with a 10 mm wrench.


4. Remove the temperature sensor from the radiator diffuser.
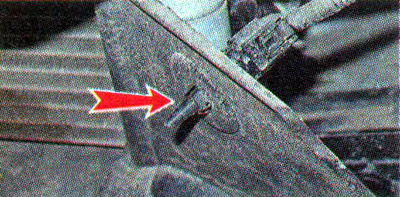


4. Remove the temperature sensor from the radiator diffuser.


5. Disconnect the wiring blocks from the electric fan and the electric fan control unit (see above, "Electric cooling fan - removal, inspection and replacement").

6. Using pliers, loosen the clamp, slide it along the hose and disconnect the upper radiator hose.
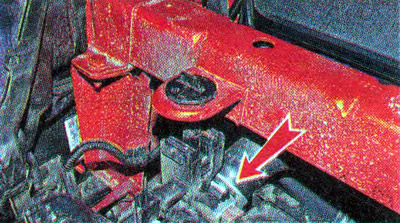
6. Using pliers, loosen the clamp, slide it along the hose and disconnect the upper radiator hose.


7. Similarly, disconnect the radiator steam hose.
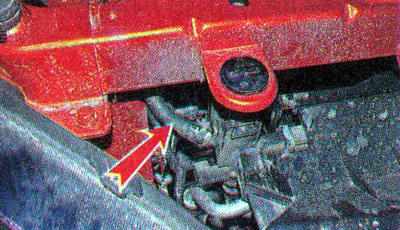
7. Similarly, disconnect the radiator steam hose.


8. Disconnect the air intake pipe from the radiator diffuser.
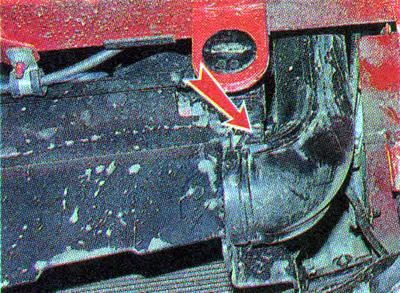


8. Disconnect the air intake pipe from the radiator diffuser.


9. On a car without air conditioning, unscrew the fasteners on the right and left sides of the radiator...
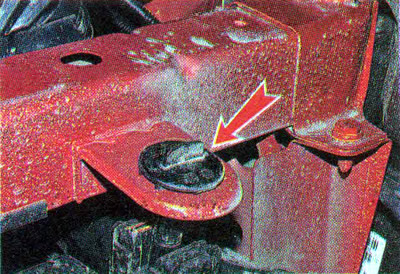
9. On a car without air conditioning, unscrew the fasteners on the right and left sides of the…


...and remove the radiator assembly with the electric fan.

On a car with air conditioning, remove the radiator diffuser guides, move the left side of the condenser forward and carefully remove the radiator.

10. Remove the electric fan from the radiator (see "Electric cooling fan - removal, inspection and replacement").

Installation


Recommendation. If the radiator has been in use, clean it from dirt on the outside before installation. Wash its interior with a cleaning agent for the cooling system (see "Operating and repair materials"), and from the outside - with a stream of water.


1. When replacing a radiator, we move the rubber supports and the drain plug with the gasket to the new radiator (if they are missing on the new radiator).


2. Install the radiator in place in the reverse order of removal.

3. Install the electric fan and connect the wiring harness blocks.

4. Fill the engine cooling system with liquid (see "Coolant - Replacement").

5. Make sure there is no coolant leakage at the connection points. If necessary, replace the hose clamps with screw clamps. We replace damaged hoses.


This article is available at russian, bulgarian, belarusian, ukrainian, serbian, croatian, romanian, polish, slovak, hungarian
This article has been reviewed: Kirill Dementyev
Share with friends:
◀ Previous
Lada Vesta 1: Cooling system
 

Electric cooling fan — removal, inspection and replacement
Electric Fan Control Unit — replacement
Coolant Pump — replacement
Thermostat — replacement
Expansion tank — removal and installation
 
More articles with information from manuals for Lada:

• Engine cooling system radiator — removal and installation Lada Kalina Hatchback (2004-2013, VAZ-1119)
• Engine cooling system radiator — removal and installation Lada Granta 1 (2011-2023, VAZ-2190)
• Features of the design of the engine cooling system Lada Priora 1 (2007-2018, VAZ-2170)
• Engine cooling system bracket (8 valves) Lada Largus 1 (2012-2023)
• Engine cooling system radiator — removal and installation Lada X-Ray 1 (2015-2022)
Link to this article in various formats
Reviews and comments of visitors
No comments yet


Add up two numbers: 11 + 38


Vesta 1 (2015-2023) 
  • General information
  • Governing bodies
  • User manual
  • Maintenance
  • Troubleshooting
  • Power unit
  • Engine repair
  • Control system
  • Supply system
  • Cooling system
  • Exhaust system
  • Transmission
  • Clutch
  • Mechanical gearbox
  • Automatic gearbox
  • Drive shafts
  • Chassis (running gear)
  • Wheels, tires and hubs
  • Front suspension
  • Rear suspension
  • Steering
  • Brake system
  • Body and interior
  • Exterior (external elements)
  • Doors, locks and windows
  • Heating and ventilation
  • Electrical equipment
  • Equipment and devices
  • Power devices
  • Breakers and switches
  • Lighting and signaling
  • Electrical circuits
LadaMan.ru © 2018–2026 | Mobile version | About Lada | Sitemap: EN BG BY UA RS HR RO PL SK HU | Contacts with admin | | Add to bookmarks
Kalina Hatchback (2004-2013) | Kalina Sedan (2004-2013) | Granta 1 (2011-2023) | Priora 1 (2007-2018) | Vesta 1 (2015-2023) | Largus 1 (2012-2023) | X-Ray 1 (2015-2022) |
This site uses cookies to ensure everything runs smoothly.