
The beam is replaced if it is deformed or other mechanical damage has appeared on it, as well as in the event of a malfunction of its silent blocks.
To perform the work, you will need an inspection ditch or overpass, a jack, a car stand.
Execution sequence
1. We prepare the car for work (see «Preparing the car for maintenance and repair»).
2. We install stops under the front wheels and hang out the back of the car.
3. Remove the rear wheels (see «Wheel replacement»).
4. Disconnect the rear brake hoses from the bracket on the beam (see «Brake hoses - replacement»).
5. Disconnect the shock absorbers from the trailing arms and remove the springs (see «Rear suspension springs - replacement»).
6. Disconnect the brake pipe from the working brake cylinder (see «Working brake cylinder - replacement»).
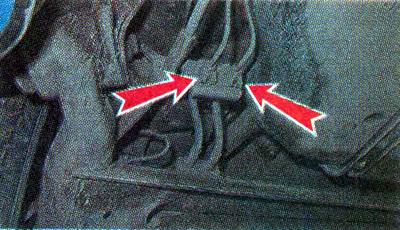
7. Remove the parking brake cable from the bracket on the trailing arm.
8. Using the TORX E14 key, we unscrew the four mounting bolts...

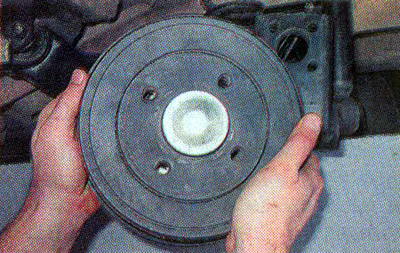
... remove the hub assembly with the brake drum, transfer it through the trailing arm and put it on the floor or stand.
If necessary, remove the parking brake cables from the holders.
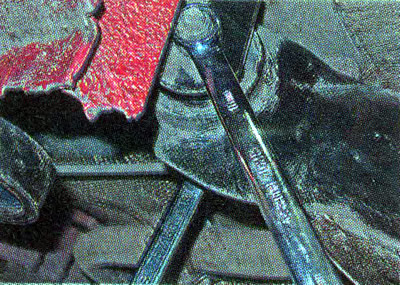
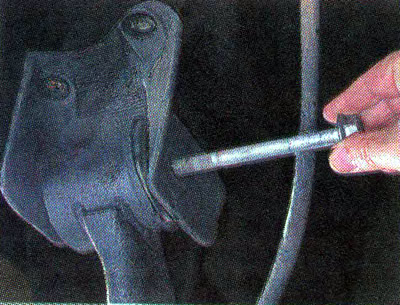
9. Holding the bolt from turning with an 18 mm key, loosen the nut with a second key of the same size. Similarly, loosen the nut on the other side of the car.
10. We install stops under the rear suspension beam.
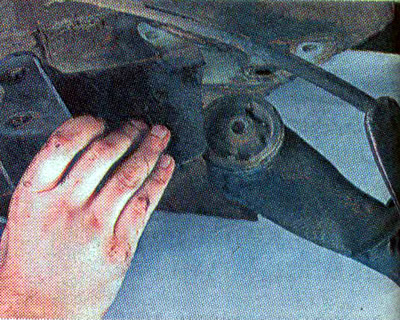
Comment. The fuel tank makes it difficult to remove the bolt of the right mounting of the rear suspension beam. To remove this bolt, unscrew the three bolts of the beam bracket, and move the right edge of the beam below the tank.
11. Using a 16 mm socket wrench, unscrew the three bolts securing the bracket to the body.
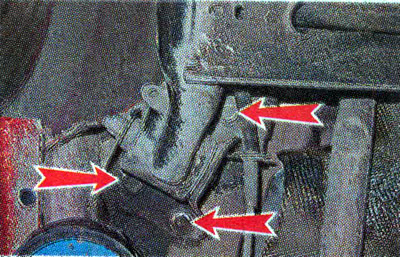
12. Slightly lower the beam, finally unscrew the nut of the bolt securing the beam to the bracket and remove the bolt.
13. Remove the brackets from the beam.
14. We remove the mounting bolt from the bracket on the other side of the car and remove the rear suspension beam.
15. We install the parts in the reverse order. We finally tighten the nuts of the bolts of the beam levers to the body brackets on the car standing on the ground. Tighten bolts and nuts to specified torques (see table. 11.3.1).