
Car repair AvtoVAZ Car repair Renault Car repair Hyundai Car repair Ford Car repair Volkswagen Car repair Audi Car repair Chevrolet
English Русский
Български
Беларускі
Український
Српски
Hrvatski
Română
Polski
Slovenský
Magyar
articles sitemap contacts bookmark
LadaMan.ru


Kalina Granta Priora Vesta Largus XRAY
Priora 1 (2007-2018, VAZ-2170)

Wheel replacement (Priora 2170)

  • Main
  • Priora
  • Priora 1
  • General information
  • Faults en route
  • Wheel replacement
0
Warning! Be careful when replacing a punctured tire. It may have been punctured by thieves in order to steal valuables from the car's interior while you are busy replacing it.


Note: To avoid getting dirty when changing a wheel, wear gloves and protective clothing if your vehicle has them.


You will need: a wheel wrench, a jack, a spare wheel, a pressure gauge, a pump.
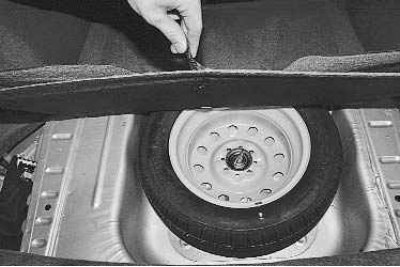
1. Open the trunk lid and fold back the mat using the loop.

1. Open the trunk lid and fold back the mat using the loop.

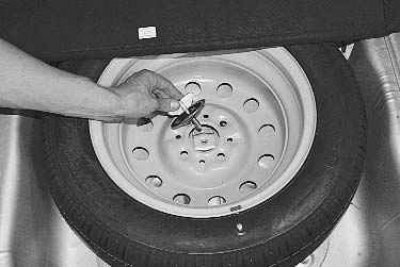
2. Unscrew the mounting bolt…

2. Unscrew the mounting bolt…

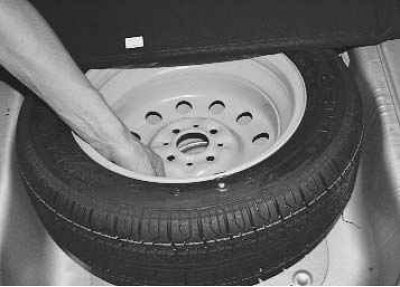
3. …and remove the spare wheel from the trunk.

3. …and remove the spare wheel from the trunk.


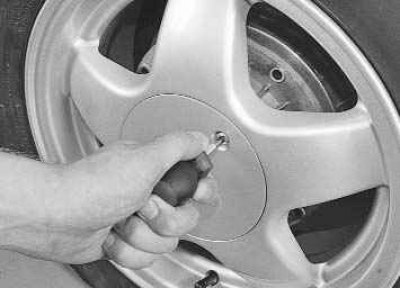
4. Remove the decorative cap mounting screw…
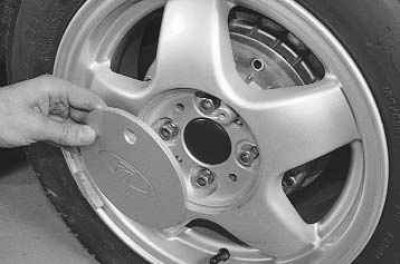

4. Remove the decorative cap mounting screw…

5. …and remove the cap.

5. …and remove the cap.

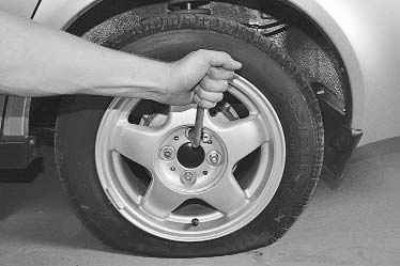
6. Use a wheel wrench to loosen the wheel mounting bolts. This may require a lot of effort.


6. Use a wheel wrench to loosen the wheel mounting bolts. This may require a lot of effort.

Caution! Loosen the wheel mounting bolts and tighten them only when the vehicle is parked on the ground.


Note: To make it easier to loosen the wheel bolts, you can use your foot instead of your hands, stepping on the handle of the wheel wrench from above.


To make this operation easier, we recommend purchasing a special wheel wrench with a telescopic handle. It is also convenient to work with a cross-shaped wheel wrench.
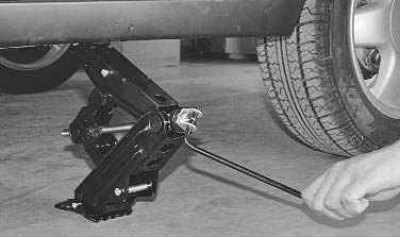
7. Install the jack and raise the car. If the vehicle is parked on soft ground, place a wide, firm…


7. Install the jack and raise the car. If the vehicle is parked on soft ground, place a wide, firm support under the lower support of the jack (a board of at least 300x300x20 mm in size, a flat stone, etc.).

Warning! Do not place bricks under the jack support: they easily break and the car may fall off the jack, seriously injuring you.
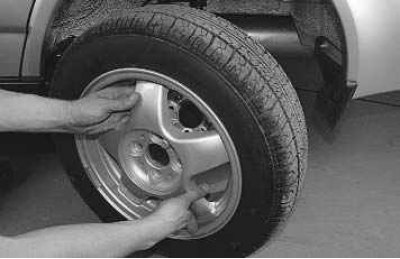

8. Completely unscrew the wheel mounting bolts and remove the wheel.
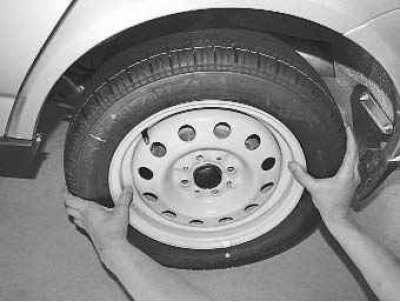

8. Completely unscrew the wheel mounting bolts and remove the wheel.

9. Install the spare tire onto the mounting pins. Screw in the mounting bolts without tightening…


9. Install the spare tire onto the mounting pins. Screw in the mounting bolts without tightening them completely.


Note: Try to keep the vehicle suspended with the wheel removed for as little time as possible.


Note: Only jack up the vehicle to the height necessary to remove and install the wheel.
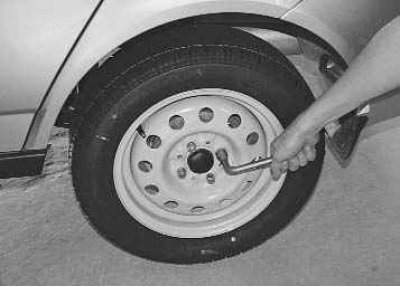

10. Lower the vehicle to the ground and tighten the wheel bolts evenly in a crisscross pattern. To…


10. Lower the vehicle to the ground and tighten the wheel bolts evenly in a crisscross pattern. To avoid damaging the wheel rim, do not try to "tighten" the mounting bolts by pressing the wrench handle with your foot.

Note: To get a feel for the required tightening force for the wheel mounting bolts, use a torque wrench at first.
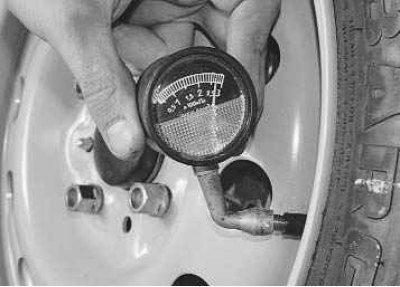

11. Before continuing driving, be sure to check the air pressure in the tire of the installed wheel…


11. Before continuing driving, be sure to check the air pressure in the tire of the installed wheel and, if necessary, bring it to the norm.

Note: As a rule, front-wheel drive VAZ vehicles are equipped with tubeless tires. If you do not have sufficient tire mounting skills, we advise you not to attempt this job yourself. One damage to the sidewall and you'll have to buy a new tire or install a tube.


Note: In a desperate situation, you can use a special first aid kit for repairing tubeless tires without dismounting the tire or tire sealant. They must be used in accordance with the instructions provided.


Note: Why is a tubeless tire better than a tube tire?


Note: Firstly, a tubeless tire deflates very slowly when punctured: you can pump it up and drive for weeks with a nail in the wheel until you have an opportunity to repair it.


Note: Secondly, when, after significant mileage, wires of the metal cord begin to protrude from the tubeless tire, it can still be used as a spare tire. There is no point in inserting a tube into such a tire: it will get punctured the first time you inflate it.


This article is available at russian, bulgarian, belarusian, ukrainian, serbian, croatian, romanian, polish, slovak, hungarian
This article has been reviewed: Vladislav Voloshin
Share with friends:
◀ Previous
Lada Priora 1: Faults en route
 

Actions in case of a puncture of a tire
Brake problems
Possible causes of vibrations and shocks on the steering wheel
Vibration and shock on the steering wheel
Possible causes of knocking in the suspension and ways to eliminate them
 
More articles with information from manuals for Lada:

• Front Wheel Drive Seals — Replacement Lada Kalina Hatchback (2004-2013, VAZ-1119)
• Adjusting the position of the steering wheel Lada Granta 1 (2011-2023, VAZ-2190)
• Adjusting the seat and steering wheel position Lada Vesta 1 (2015-2023, VAZ-2180)
• Wheel replacement Lada Largus 1 (2012-2023)
• Checking the condition of the front wheel brakes Lada X-Ray 1 (2015-2022)
Link to this article in various formats
Reviews and comments of visitors
No comments yet


Add up two numbers: 30 + 40


Priora 1 (2007-2018) 
  • General information
  • Vehicle device
  • User manual
  • Faults en route
  • Maintenance
  • Power unit
  • Engine repair
  • Cooling and lubrication system
  • Supply system
  • Exhaust system
  • Transmission
  • Clutch
  • Car gearbox
  • Drive shafts
  • Chassis (running gear)
  • Car suspension
  • Steering
  • Brake system
  • Body and interior
  • Exterior (external elements)
  • Interior (internal elements)
  • Doors, locks and windows
  • Electrical equipment
  • Equipment and devices
  • Power devices
  • Lighting and signaling
  • Cooling and heating
  • Electrical circuits
LadaMan.ru © 2018–2026 | Mobile version | About Lada | Sitemap: EN BG BY UA RS HR RO PL SK HU | Contacts with admin | | Add to bookmarks
Kalina Hatchback (2004-2013) | Kalina Sedan (2004-2013) | Granta 1 (2011-2023) | Priora 1 (2007-2018) | Vesta 1 (2015-2023) | Largus 1 (2012-2023) | X-Ray 1 (2015-2022) |
This site uses cookies to ensure everything runs smoothly.