Car repair AvtoVAZ Car repair Renault Car repair Hyundai Car repair Ford Car repair Volkswagen Car repair Audi Car repair Chevrolet
English Русский
Български
Беларускі
Український
Српски
Hrvatski
Română
Polski
Slovenský
Magyar
articles sitemap contacts bookmark
LadaMan.ru


Kalina Granta Priora Vesta Largus XRAY
Largus 1 (2012-2023)

Wheel replacement (Largus 1)

  • Main
  • Largus
  • Largus 1
  • General information
  • User manual
  • Wheel replacement
0
Contents: Safety rules ⇣ Wheel installation ⇣
Wheel replacement


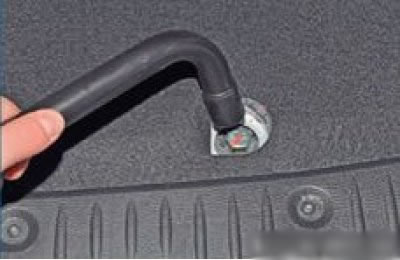
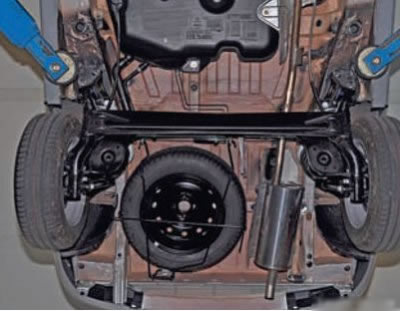
The spare wheel is located underneath the car, in a special bracket (holder). To get the spare wheel, you need to bend the closing valve in the trunk floor trim and unscrew the 17 screw.
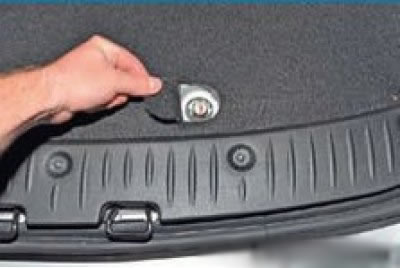
The spare wheel is located underneath the car, in a special bracket (holder). To get the spare…

As the screw is loosened, the holder hook and bracket will lower. After sufficient loosening, we unhook the hook from the holder and take out the spare wheel.
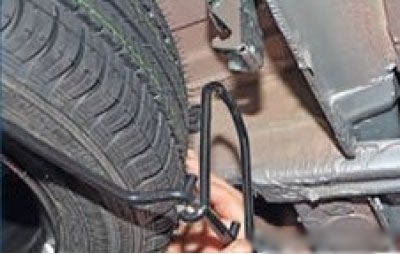


As the screw is loosened, the holder hook and bracket will lower. After sufficient loosening, we…


Note: Many car enthusiasts note that because the spare tire bolt is rarely unscrewed, it tends to "stick" very strongly, and in the event of the need to change the wheel on the road, it causes great difficulties in unscrewing it. This results in damage to the bolt and the need to purchase a new one. Therefore, it is recommended to lubricate this bolt so that it does not cause problems if it is necessary to replace the wheel.


Safety rules


There are certain safety rules that must be followed when jacking up a car. They are like this:
  • Always raise the vehicle on a level surface.
  • Apply the handbrake and block the rear wheels. This will keep the car from rolling backwards off the jack.
  • If the rear wheels lift, block the front wheels to keep the vehicle from rolling forward.
  • Block the wheel diagonally opposite the one that will be lifted.
  • If the vehicle is raised for work underneath, support it on stands. Do not place stands under the metal panels (sheets) at the bottom of the car, so that they (the panels) do not get damaged (sold out).

Do not work under a vehicle that is supported only by a tire jack.


1. The vehicle must be parked on a firm, flat surface with the front wheels turned straight ahead.

2. Turn off the ignition key; the automatic transmission must be set to position "P".

3. Ask all passengers to exit and apply the parking brake.

4. If necessary, use a wedge bar to secure the wheels and prevent the vehicle from rolling or sliding.

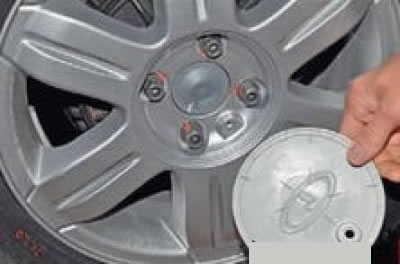
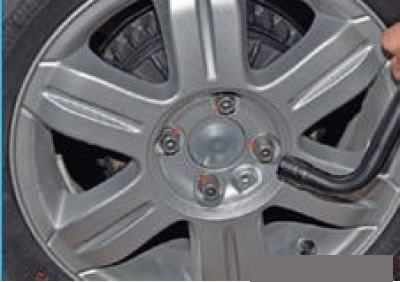
5. Use special standard tools to unscrew the decorative cap and wheel bolts, as shown in the figure.
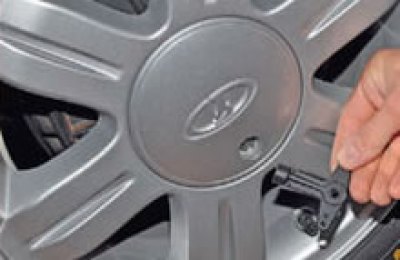
5. Use special standard tools to unscrew the decorative cap and wheel bolts, as shown in the figure.

5. Use special standard tools to unscrew the decorative cap and wheel bolts, as shown in the figure.


6. Position the jack so that its entire base is located on a solid surface.
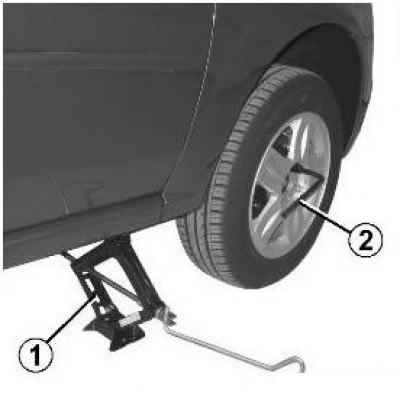


1 - jack, 2 - wheel wrench

1 - jack, 2 - wheel wrench


7. The jack must be installed vertically in the position specified for it.

8. Raise the vehicle until the wheels are off the ground.
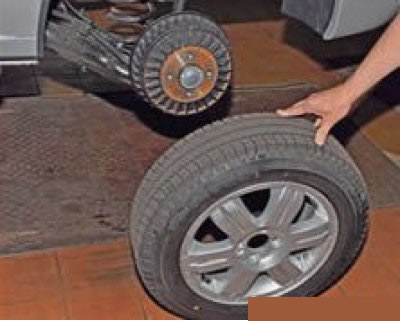
8. Raise the vehicle until the wheels are off the ground.


9. Loosen the wheel bolts to remove the wheel.

Wheel installation


1. Insert the wheel into the hub so that the bolt holes are in the appropriate locations. Tighten the wheel bolts clockwise.
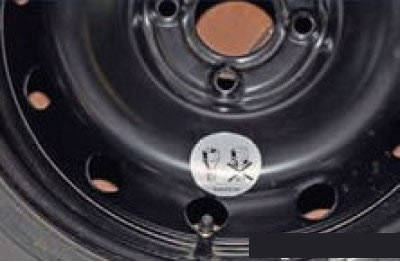
1. Insert the wheel into the hub so that the bolt holes are in the appropriate locations. Tighten…


Please note that if the car was equipped with alloy wheels, the spare wheel is secured with the bolts that are included with the spare wheel. This is reminded by the sticker on the spare wheel.


2. Tighten the wheel nuts securely in a diagonal sequence until they stop completely (tightening torque is 105 Nm).

3. Lower the vehicle and remove the jack.

4. Remove the jack together with the faulty wheel and secure them.

5. Since the spare tire may be stored for a long time, it should be inflated to a level slightly higher than the normal pressure to ensure the standard pressure level of the spare tire.


This article is available at russian, bulgarian, belarusian, ukrainian, serbian, croatian, romanian, polish, slovak, hungarian
This article has been reviewed: Daniil Markelov
Share with friends:
◀ Previous
Lada Largus 1: User manual
Next ▶

Tire pressure
Wheels, tires and disks — characteristics, features, replacement
Block of the emergency call system «ERA-GLONASS»
Anti-lock braking system ABS
Starting the engine from another battery
Application of manual transmission
How to use air conditioner
Catalytic converter (neutralizer)
Economical fuel consumption
Warning and emergency lights
More articles with information from manuals for Lada:

• Front Wheel Drive Seals — Replacement Lada Kalina Hatchback (2004-2013, VAZ-1119)
• Adjusting the position of the steering wheel Lada Granta 1 (2011-2023, VAZ-2190)
• Adjusting the position of the steering wheel Lada Priora 1 (2007-2018, VAZ-2170)
• Adjusting the seat and steering wheel position Lada Vesta 1 (2015-2023, VAZ-2180)
• Checking the condition of the front wheel brakes Lada X-Ray 1 (2015-2022)
Link to this article in various formats
Reviews and comments of visitors
No comments yet


Add up two numbers: 18 + 14


Largus 1 (2012-2023) 
  • General information
  • Vehicle device
  • User manual
  • Maintenance
  • Power unit
  • Engine repair
  • Cooling and lubrication system
  • Supply system
  • Ignition system
  • Exhaust system
  • Spare parts catalog
  • Transmission
  • Clutch
  • Car gearbox
  • Drive shafts
  • Spare parts catalog
  • Chassis (running gear)
  • Suspension and wheels
  • Steering
  • Brake system
  • Spare parts catalog
  • Body and interior
  • Exterior (external elements)
  • Interior (internal elements)
  • Doors, locks and windows
  • Heating and ventilation
  • Spare parts catalog
  • Electrical equipment
  • Equipment and devices
  • Power devices
  • Lighting and signaling
  • Spare parts catalog
  • Electrical circuits
LadaMan.ru © 2018–2026 | Mobile version | About Lada | Sitemap: EN BG BY UA RS HR RO PL SK HU | Contacts with admin | | Add to bookmarks
Kalina Hatchback (2004-2013) | Kalina Sedan (2004-2013) | Granta 1 (2011-2023) | Priora 1 (2007-2018) | Vesta 1 (2015-2023) | Largus 1 (2012-2023) | X-Ray 1 (2015-2022) |
This site uses cookies to ensure everything runs smoothly.