
Car repair AvtoVAZ Car repair Renault Car repair Hyundai Car repair Ford Car repair Volkswagen Car repair Audi Car repair Chevrolet
English Русский
Български
Беларускі
Український
Српски
Hrvatski
Română
Polski
Slovenský
Magyar
articles sitemap contacts bookmark
LadaMan.ru


Kalina Granta Priora Vesta Largus XRAY
Priora 1 (2007-2018, VAZ-2170)

Removal and installation the front door trim (Priora 2170)

  • Main
  • Priora
  • Priora 1
  • Body and interior
  • Doors, locks and windows
  • Removal and installation the front door trim
0
You will need a flat-head and Phillips-head screwdriver.

1. Disconnect the wire from the negative terminal of the battery.
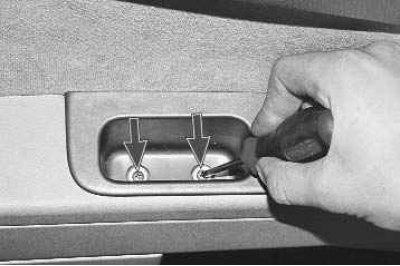
2. Remove the two screws securing the inner door handle to the window and mirror control module.
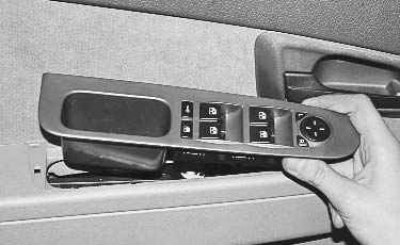

2. Remove the two screws securing the inner door handle to the window and mirror control module.

3. Remove the module from the door trim.
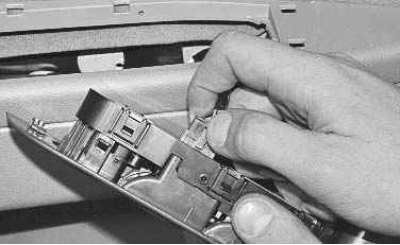

3. Remove the module from the door trim.

4. Release the lock..
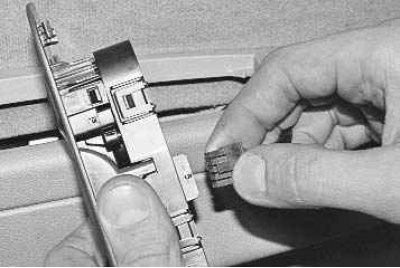

4. Release the lock..

5. …and disconnect the wiring harness connector from the power window and mirror control module.
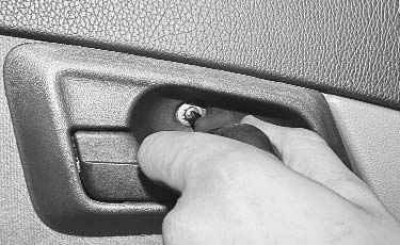

5. …and disconnect the wiring harness connector from the power window and mirror control module.


6. Remove the screw securing the inner door handle trim…
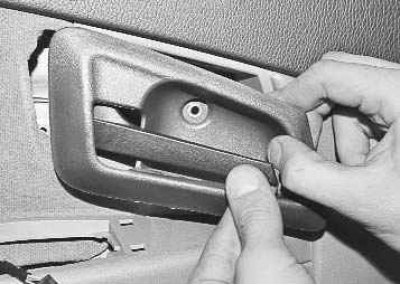

6. Remove the screw securing the inner door handle trim…

7. …and remove the trim.

7. …and remove the trim.

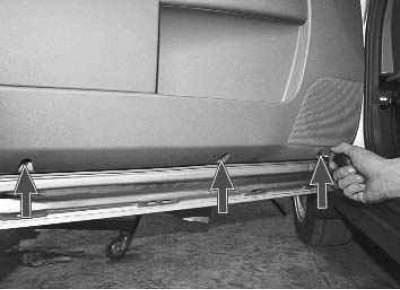
8. Remove the three screws securing the door trim.

8. Remove the three screws securing the door trim.

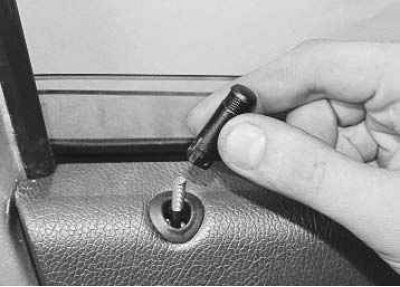
9. Unscrew the door lock button.

9. Unscrew the door lock button.


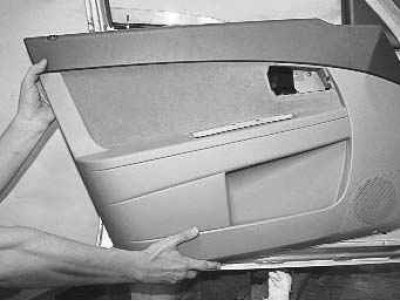
10. Using a screwdriver, pry the door trim so that the plastic clips come out of the holes in the…


10. Using a screwdriver, pry the door trim so that the plastic clips come out of the holes in the door and remove the trim.

Note: Insert the screwdriver as close to the holders as possible, otherwise the upholstery may be damaged.


Note: To avoid scratching the paint, wrap the tip of the screwdriver with electrical tape.
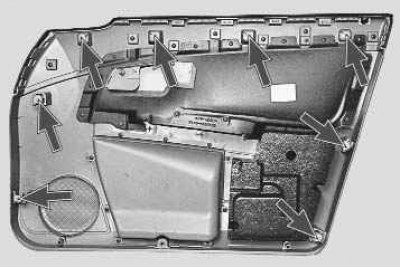

Note: Front door trim (view from the back side) it is attached to the door panel with eight plastic…


Note: Front door trim (view from the back side) it is attached to the door panel with eight plastic holders. Replace damaged holders with new ones.
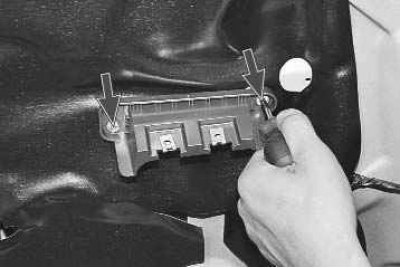

11. Remove the two screws securing the window and mirror control module bracket…

11. Remove the two screws securing the window and mirror control module bracket…


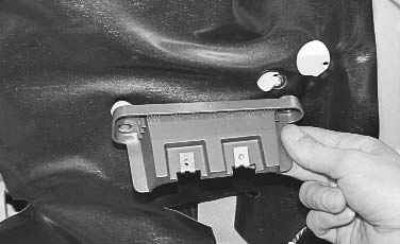
12. …and remove the bracket.
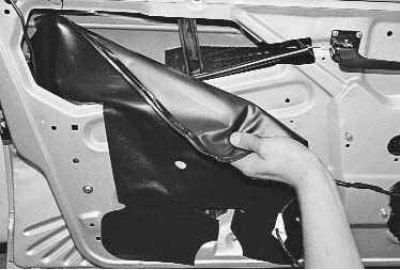

12. …and remove the bracket.

13. Remove the large…
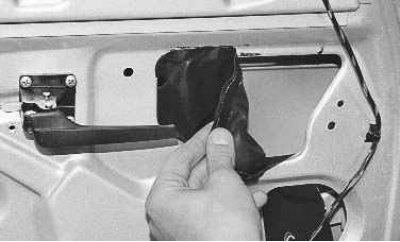

13. Remove the large…

14. …and small noise-insulating pads.


14. …and small noise-insulating pads.

15. Install the removed parts in the reverse order of removal.


This article is available at russian, bulgarian, belarusian, ukrainian, serbian, croatian, romanian, polish, slovak, hungarian
This article has been reviewed: Vladislav Voloshin
Share with friends:
◀ Previous
Lada Priora 1: Doors, locks and windows
Next ▶

Adjusting the position of the trunk lid lock
Removal and installation the trunk lid lock and its drive
Removal and installation the trunk lid
Removal and installation the front door lock
Adjusting the front door lock
Removal and installation the door opening limiter
Front door glass replacement
Replacing the front door window regulator
More articles with information from manuals for Lada:

• Front door trim — removal and installation Lada Kalina Hatchback (2004-2013, VAZ-1119)
• Front door trim — removal and installation Lada Granta 1 (2011-2023, VAZ-2190)
• Front door trim — removal and installation Lada Vesta 1 (2015-2023, VAZ-2180)
• Front door frame Lada Largus 1 (2012-2023)
• Front door right and left — removal and installation Lada X-Ray 1 (2015-2022)
Link to this article in various formats
Reviews and comments of visitors
No comments yet


Add up two numbers: 29 + 23


Priora 1 (2007-2018) 
  • General information
  • Vehicle device
  • User manual
  • Faults en route
  • Maintenance
  • Power unit
  • Engine repair
  • Cooling and lubrication system
  • Supply system
  • Exhaust system
  • Transmission
  • Clutch
  • Car gearbox
  • Drive shafts
  • Chassis (running gear)
  • Car suspension
  • Steering
  • Brake system
  • Body and interior
  • Exterior (external elements)
  • Interior (internal elements)
  • Doors, locks and windows
  • Electrical equipment
  • Equipment and devices
  • Power devices
  • Lighting and signaling
  • Cooling and heating
  • Electrical circuits
LadaMan.ru © 2018–2026 | Mobile version | About Lada | Sitemap: EN BG BY UA RS HR RO PL SK HU | Contacts with admin | | Add to bookmarks
Kalina Hatchback (2004-2013) | Kalina Sedan (2004-2013) | Granta 1 (2011-2023) | Priora 1 (2007-2018) | Vesta 1 (2015-2023) | Largus 1 (2012-2023) | X-Ray 1 (2015-2022) |
This site uses cookies to ensure everything runs smoothly.