
Car repair AvtoVAZ Car repair Renault Car repair Hyundai Car repair Ford Car repair Volkswagen Car repair Audi Car repair Chevrolet
English Русский
Български
Беларускі
Український
Српски
Hrvatski
Română
Polski
Slovenský
Magyar
articles sitemap contacts bookmark
LadaMan.ru


Kalina Granta Priora Vesta Largus XRAY
Priora 1 (2007-2018, VAZ-2170)

Removal and installation the trunk lid (Priora 2170)

  • Main
  • Priora
  • Priora 1
  • Body and interior
  • Doors, locks and windows
  • Removal and installation the trunk lid
0
Note: The trunk lid is quite heavy and bulky, so it is recommended to remove and install it with the help of two people.


You will need: wrenches "10", "13", pliers.

1. Disconnect the wire from the negative terminal of the battery.
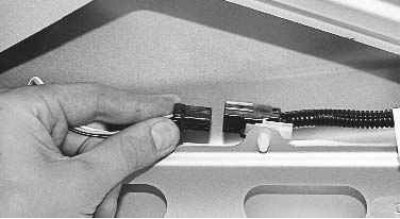
2. Disconnect the wiring harness connector.
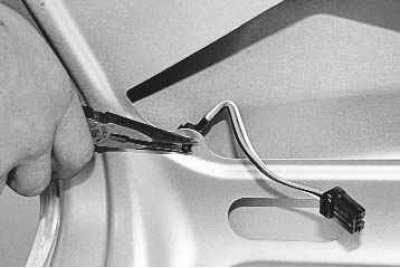

2. Disconnect the wiring harness connector.

3. Squeeze the wire harness retainer clip and remove the retainer from the hole in the trunk lid…


3. Squeeze the wire harness retainer clip and remove the retainer from the hole in the trunk lid inner panel.
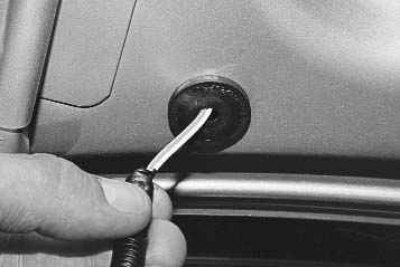
4. Remove the harness sealing bushing from the hole in the trunk lid. Remove the harness with the…


4. Remove the harness sealing bushing from the hole in the trunk lid. Remove the harness with the block from the trunk lid. If you are not going to replace the trunk lid, tie a thin wire or rope to the block for assembly and only then remove the harness, leaving the rope in the trunk lid. After this, untie the rope from the tourniquet.


5. Place a suitable stop under the lid.
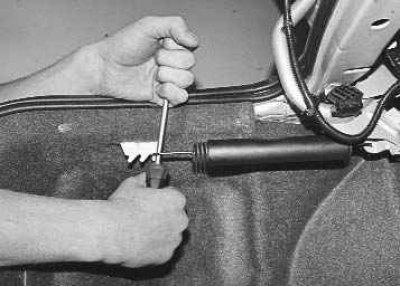
6. Unhook the springs of both hinges from the brackets on the body.

6. Unhook the springs of both hinges from the brackets on the body.

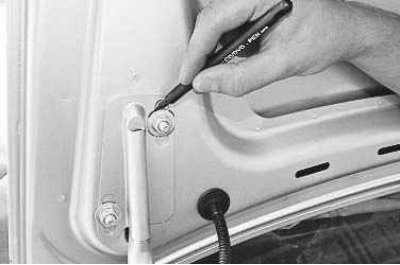
7. If you plan to install the old cover, mark the position of the washers on the cover hinges. In…


7. If you plan to install the old cover, mark the position of the washers on the cover hinges. In this case, after installation, you most likely will not have to adjust the position of the cover.
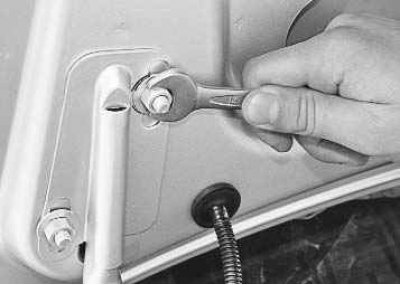
8. Using a 13 mm spanner, unscrew the two nuts securing the hinges to the lid on both sides (the…


8. Using a 13 mm spanner, unscrew the two nuts securing the hinges to the lid on both sides (the assistant must hold the lid) and remove the trunk lid.
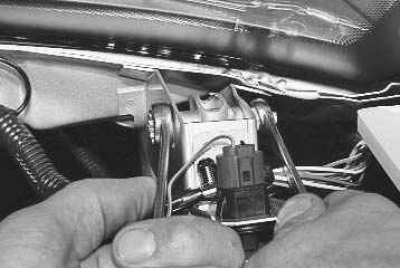


9. The trunk lid can be removed together with the hinges. To do this, use a 10 mm wrench to unscrew…


9. The trunk lid can be removed together with the hinges. To do this, use a 10 mm wrench to unscrew the nuts securing the hinge axles, holding the axles from turning with a 13 mm wrench, remove the axles and remove the trunk lid. When replacing, remove all fittings from the old cover and install them on the new one.

10. Install the cover in the reverse order of removal. The position of the lid is adjusted using oval holes in the hinges. Without completely tightening the nuts, carefully close the cover and, moving it, adjust the position of the cover in the opening. The gaps between the rear fenders and the cover should be uniform and equal. Then carefully open the cover and finally tighten the nuts that secure it.
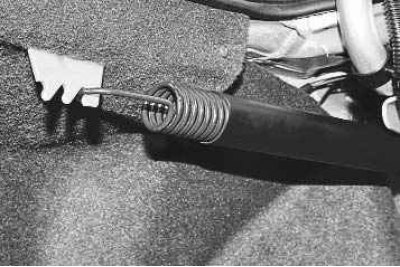
11. Adjust the force required to open the lid by moving the springs on one of the brackets that…


11. Adjust the force required to open the lid by moving the springs on one of the brackets that secure the teeth.


This article is available at russian, bulgarian, belarusian, ukrainian, serbian, croatian, romanian, polish, slovak, hungarian
This article has been reviewed: Vladislav Voloshin
Share with friends:
 
Lada Priora 1: Doors, locks and windows
Next ▶

 
Removal and installation the trunk lid lock and its drive
Adjusting the position of the trunk lid lock
Removal and installation the front door trim
Removal and installation the front door lock
Adjusting the front door lock
More articles with information from manuals for Lada:

• Trunk and Glove Compartment Lighting Lamps — Replacement Lada Kalina Hatchback (2004-2013, VAZ-1119)
• Trunk lid/tailgate Lada Granta 1 (2011-2023, VAZ-2190)
• Opening the trunk Lada Vesta 1 (2015-2023, VAZ-2180)
• Trunk doors and their mechanisms — removal, installation and… Lada Largus 1 (2012-2023)
• Trunk light — removal and installation and replacement of the lamp Lada X-Ray 1 (2015-2022)
Link to this article in various formats
Reviews and comments of visitors
No comments yet


Add up two numbers: 28 + 42


Priora 1 (2007-2018) 
  • General information
  • Vehicle device
  • User manual
  • Faults en route
  • Maintenance
  • Power unit
  • Engine repair
  • Cooling and lubrication system
  • Supply system
  • Exhaust system
  • Transmission
  • Clutch
  • Car gearbox
  • Drive shafts
  • Chassis (running gear)
  • Car suspension
  • Steering
  • Brake system
  • Body and interior
  • Exterior (external elements)
  • Interior (internal elements)
  • Doors, locks and windows
  • Electrical equipment
  • Equipment and devices
  • Power devices
  • Lighting and signaling
  • Cooling and heating
  • Electrical circuits
LadaMan.ru © 2018–2026 | Mobile version | About Lada | Sitemap: EN BG BY UA RS HR RO PL SK HU | Contacts with admin | | Add to bookmarks
Kalina Hatchback (2004-2013) | Kalina Sedan (2004-2013) | Granta 1 (2011-2023) | Priora 1 (2007-2018) | Vesta 1 (2015-2023) | Largus 1 (2012-2023) | X-Ray 1 (2015-2022) |
This site uses cookies to ensure everything runs smoothly.