
Car repair AvtoVAZ Car repair Renault Car repair Hyundai Car repair Ford Car repair Volkswagen Car repair Audi Car repair Chevrolet
English Русский
Български
Беларускі
Український
Српски
Hrvatski
Română
Polski
Slovenský
Magyar
articles sitemap contacts bookmark
LadaMan.ru


Kalina Granta Priora Vesta Largus XRAY
Largus 1 (2012-2023)

Rear suspension spring — removal and installation (Largus 1)

  • Main
  • Largus
  • Largus 1
  • Chassis (running gear)
  • Suspension and wheels
  • Rear suspension spring — removal and installation
0
Contents: Removal option #1 (with special…⇣ Installation ⇣ Removal option #2 (without special…⇣
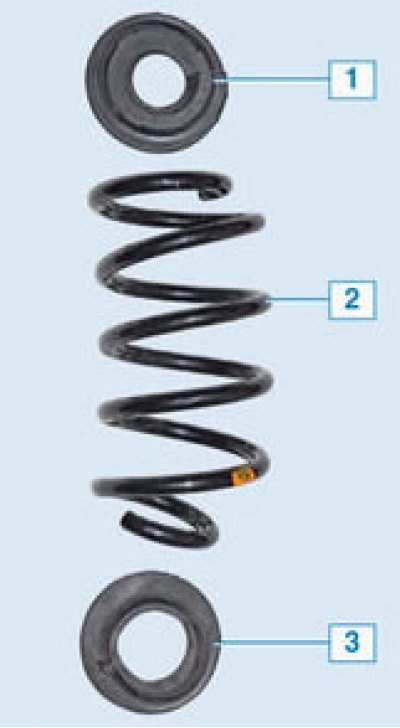
Suspension springs are divided into classes (by rigidity) and are marked accordingly. (For example, the springs installed on the Van modification have a reinforced design compared to conventional passenger ones) When replacing a suspension spring, it is recommended to install new springs of the same class as those installed at the factory. Opposite springs - left and right - must be of the same class. The original spring numbers are listed here. When choosing spare parts, keep in mind that the springs installed on the Cross modifications differ from those installed on the Station Wagon.

1, 3 – upper and lower gasket; 2 – rear suspension spring

1, 3 – upper and lower gasket; 2 – rear suspension spring


Removal option #1 (with special equipment available)


Attention. To prevent damage to the rubber-metal hinges of the rear suspension arms, do not hang the rear suspension arms with the hinges tightened by an amount greater than the position of the arms with the rear suspension springs fully unloaded.

Attention: When removing, note the color of the spring markings so as not to mix them up when installing.

Place the vehicle on a two-post lift, apply the parking brake and turn off the ignition.


Remove the rear wheels.

Remove the rear wheel speed sensor wiring harnesses from the holders on the rear suspension arms.

If you have special equipment: Raise the vehicle, place a transmission stand under the rear suspension arm and lower the vehicle until the spring begins to compress (transmission rack type OMA 604).

Mark the position of the spring on the rear suspension arm support cup.

Loosen the bolt securing the shock absorber to the rear suspension arm (replacement head 21, ratchet).
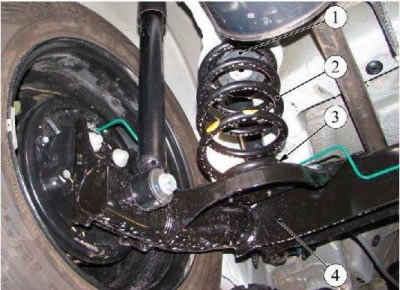
Figure 3-1 - Removing the rear suspension spring: 1 - upper spring gasket; 2 - rear suspension…

Figure 3-1 - Removing the rear suspension spring: 1 - upper spring gasket; 2 - rear suspension spring; 3 - lower spring gasket; 4 - rear suspension arms


Raise the vehicle until the rear suspension arm clears the transmission strut and remove spring 2, Figure 3-1, together with lower gasket 3.

Attention: If the upper gasket 1 of the spring has become detached, it must be replaced.


Installation


Caution: Re-use of the shock absorber mounting bolt to the rear suspension arm is not permitted. The bolt must be replaced.

Install the lower spring pad onto the rear suspension arm bearing surface.

Install the spring together with the upper gasket on the vehicle in the position marked during removal. Start installation from the top of the spring.


Lower the car until the spring begins to compress, connect the shock absorber to the rear suspension arm and screw in the new mounting bolt without tightening it (replacement head 21, ratchet).

Repeat the removal and installation operations for the second spring.

Install the rear wheel speed sensor wiring harnesses into the holders on the rear suspension arms.

Install the rear wheels.

Attention. The final tightening of the bolts securing the shock absorbers to the rear suspension arms must be performed with the vehicle standing on its wheels.

Finally tighten the bolts securing the shock absorbers to the rear suspension arms. Tightening torque of bolts 105 Nm (10.5 kgf·m) (replaceable head 21, torque wrench).

Removal option #2 (without special equipment)


It is more convenient to carry out the work on an inspection pit.
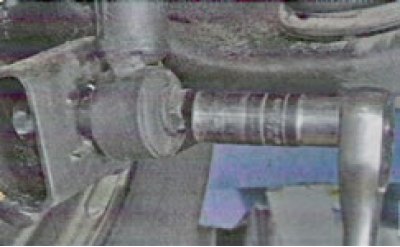
It is more convenient to carry out the work on an inspection pit.


We unscrew the bolt of the lower shock absorber mount to the rear suspension beam arm (see here).

Caution! To avoid damaging the rear brake hoses, do not unscrew the two shock absorber mounting bolts at the same time when the rear of the vehicle is raised.


We hang out the rear of the car (from both sides) and fix it on reliable (factory) stands.
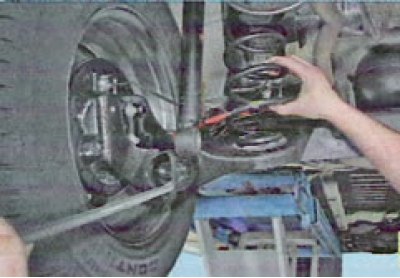


We hang out the rear of the car (from both sides) and fix it on reliable (factory) stands.


Using a mounting blade, press the trailing arm of the rear suspension down...

... OR
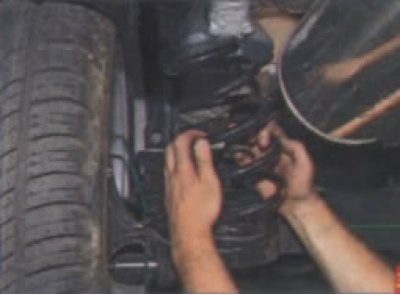
... OR


We pull the spring coils with both hands, pressing the beam lever down...
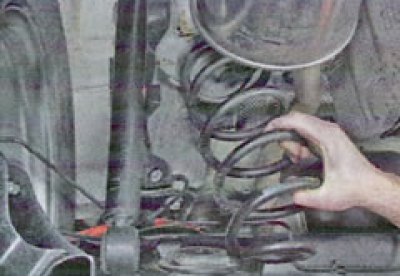
We pull the spring coils with both hands, pressing the beam lever down...


...and remove the spring.
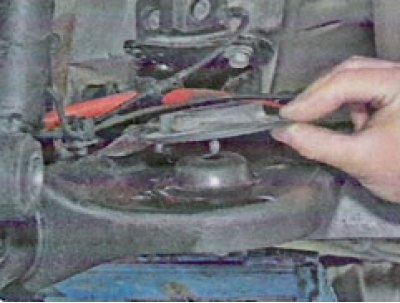
...and remove the spring.


We remove the lower and upper spring gaskets. In some cases, the upper spring pad sticks to the body.


We make sure that there are no deformations or breaks on the gaskets. We replace damaged ones with new ones.

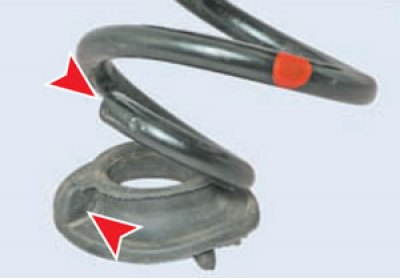
Before installing the spring, we install the upper gasket on it like this...
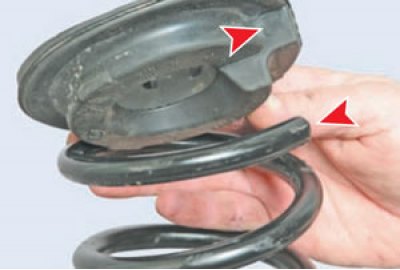
Before installing the spring, we install the upper gasket on it like this...


...so that the end of the upper coil of the spring rests against the ledge of the gasket.

Then, to prevent the top gasket from shifting when installing the spring, we attach it to the spring with tape or insulating tape.
Then, to prevent the top gasket from shifting when installing the spring, we attach it to the…


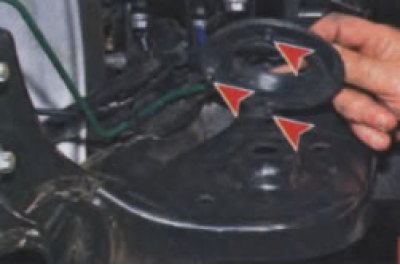
We install the lower spring gasket on the lever bracket so that the three rubber pins of the gasket enter the holes in the lever bracket.
We install the lower spring gasket on the lever bracket so that the three rubber pins of the gasket…


When installing the spring, make sure that the end of its lower coil rests against the ledge of the gasket (shown on the removed gasket).

Having moved the beam lever down, we put the upper end of the spring with the gasket on the protrusion of the body bracket. Further installation of the removed suspension elements is carried out in the reverse order.


This article is available at russian, bulgarian, belarusian, ukrainian, serbian, croatian, romanian, polish, slovak, hungarian
This article has been reviewed: Daniil Markelov
Share with friends:
◀ Previous
Lada Largus 1: Suspension and wheels
Next ▶

Rear shock absorber — removal and installation
Rear suspension — design description
Front suspension anti-roll bar — removal and installation
Front Suspension Subframe — Removal and Installation
Front suspension arm ball joint — removal and installation
Rear Wheel Hub Bearing — Checking, Removing and Installing
Rear Wheel Hub Axle — Removal and Installation
Rear suspension arms — removal and installation
Rear suspension arm joints (silent blocks) — replacement
Wheel — removal and installation
More articles with information from manuals for Lada:

• Shock absorber and spring rear suspension — removal and installation Lada Kalina Hatchback (2004-2013, VAZ-1119)
• Shock absorber and spring rear suspension — removal and installation Lada Granta 1 (2011-2023, VAZ-2190)
• Replacing the shock absorber and rear suspension spring Lada Priora 1 (2007-2018, VAZ-2170)
• Description of the rear suspension design Lada Vesta 1 (2015-2023, VAZ-2180)
• Rear suspension spring — removal and installation Lada X-Ray 1 (2015-2022)
Link to this article in various formats
Reviews and comments of visitors
No comments yet


Add up two numbers: 43 + 18


Largus 1 (2012-2023) 
  • General information
  • Vehicle device
  • User manual
  • Maintenance
  • Power unit
  • Engine repair
  • Cooling and lubrication system
  • Supply system
  • Ignition system
  • Exhaust system
  • Spare parts catalog
  • Transmission
  • Clutch
  • Car gearbox
  • Drive shafts
  • Spare parts catalog
  • Chassis (running gear)
  • Suspension and wheels
  • Steering
  • Brake system
  • Spare parts catalog
  • Body and interior
  • Exterior (external elements)
  • Interior (internal elements)
  • Doors, locks and windows
  • Heating and ventilation
  • Spare parts catalog
  • Electrical equipment
  • Equipment and devices
  • Power devices
  • Lighting and signaling
  • Spare parts catalog
  • Electrical circuits
LadaMan.ru © 2018–2026 | Mobile version | About Lada | Sitemap: EN BG BY UA RS HR RO PL SK HU | Contacts with admin | | Add to bookmarks
Kalina Hatchback (2004-2013) | Kalina Sedan (2004-2013) | Granta 1 (2011-2023) | Priora 1 (2007-2018) | Vesta 1 (2015-2023) | Largus 1 (2012-2023) | X-Ray 1 (2015-2022) |
This site uses cookies to ensure everything runs smoothly.