



Note: Catalog numbers of bearings and parts see here.
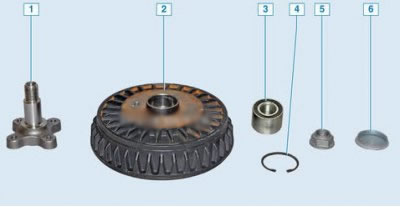
Rear Wheel Bearing Assembly: 1 - trunnion; 2 - brake drum; 3 - rear wheel bearing; 4 - bearing retaining ring; 5 - nut; 6 - cap
Checking the axial clearance
Attention. The axial clearance in the rear wheel hub bearing must not exceed the permissible value of 0.03 mm. If the axial clearance exceeds the permissible value, the bearing must be replaced.
Place the vehicle on a two-post lift, apply the parking brake and turn off the ignition.
Remove the rear wheel.
Install an indicator on the brake drum, rest the indicator foot against the end of the hub axle and check the axial clearance of the rear wheel hub bearing by applying an alternating load to the drum along the hub axle. If the axial clearance in the bearing exceeds the permissible value of 0.03 mm, the bearing must be replaced with a new one (indicator ICH 10, indicator holder from the set of indicator devices 67.7834-9540, spanner 17).
Note: A characteristic noise may indicate a faulty rear wheel bearing.
Removal
Remove the brake drum (see here).
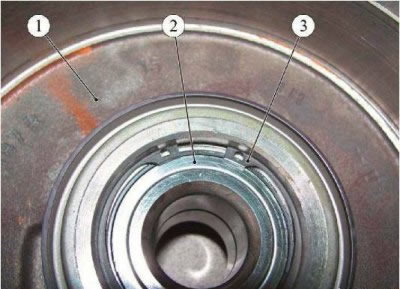
Figure 4-1 - Replacing the rear wheel hub bearing: 1 - brake drum; 2 - rear wheel hub bearing; 3 - retaining ring
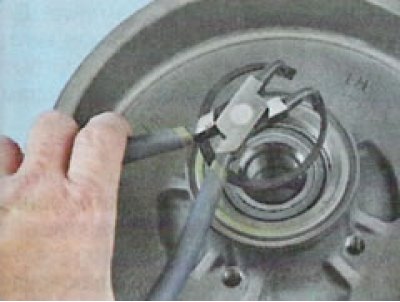
Remove the bearing retaining ring 3 from the brake drum 1, Figure 4-1 (internal retaining ring puller type 65 44 60 21 size J 21 f. "Stahlwille").
Install the brake drum on the press table, install a mandrel for pressing out, with an outer diameter of 52 mm, on the bearing and press out the bearing 2 of the rear wheel hub from the brake drum (hydraulic press type KS-124 (Kochubeyevsky plant "Avtospetsoborudovaniye"), mandrel with an outer diameter of 52 mm for pressing out the bearing of the rear wheel hub - self-made).
OR...
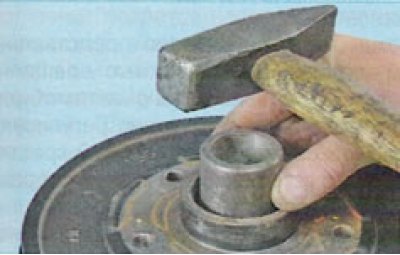
use a hammer and a suitable mandrel of the specified dimensions for this purpose. In this case, place wooden blocks under the brake drum
Installation
Caution: Before assembly, clean and lubricate the mating surfaces of the brake drum, rear wheel hub axle and bearing.
Attention. Before assembly, check the mounting surfaces of the brake drum and the rear wheel hub axle, replace defective parts.
Place the brake drum on the press table. Install the rear wheel hub bearing into the brake drum. Install a pressing mandrel with an outer diameter of 60 mm on the bearing and press the rear wheel hub bearing into the brake drum (hydraulic press type KS-124 (Kochubeyevsky Plant "Avtospetsoborudovaniye"), a mandrel with an outer diameter of 60 mm for pressing the rear wheel hub bearing - self-made).
Caution: When supporting the puller cup against the inside of the drum when pressing in the bearing on a vehicle with ABS, do not damage the rear wheel speed sensor reference ring.
or...
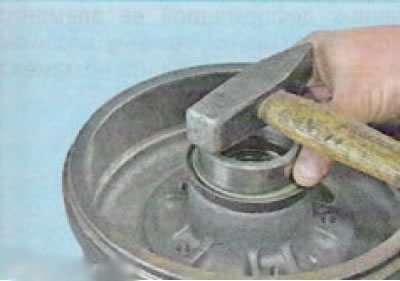
... press the bearing in with a hammer. The outer ring of an old bearing can be used as a mandrel.
Caution: When pressing the bearing into the brake drum, apply the pressing force to the outer race of the bearing. Pressing by acting on the inner bearing race is not permitted.
Install the bearing retaining ring into the brake drum (internal retaining ring puller type 65 44 60 21 size J 21 f. "Stahlwille").
Check the condition of the journal. In case of damage (threads, or bearing seating surface) - replace the trunnion. To do this, use the E16 head to unscrew the four mounting screws...
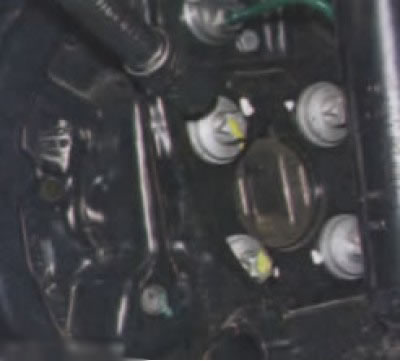
Remove and install a new trunnion.
Install the brake drum.
Check the operation and adjust the parking brake drive if necessary.
Install the rear wheel.
Press the brake pedal 2-3 times, check and, if necessary, top up the brake fluid level in the brake hydraulic reservoir.
Check the efficiency of the service brake system.