



Removing
Disconnect "mass" battery, brake the car and put it on a lift.
Drain the refrigerant from the vehicle's air conditioning system.
Unscrew bolts 3, figure 5-4, fixings and disconnect pipeline 1 connecting the compressor with the evaporator (short part) and pipeline 2 connecting the condenser to the evaporator, from the evaporator unit (wrench "at 13"). Install technological plugs in the openings of the evaporator block and on the pipelines.
Attention. Do not damage the air conditioning pipes.
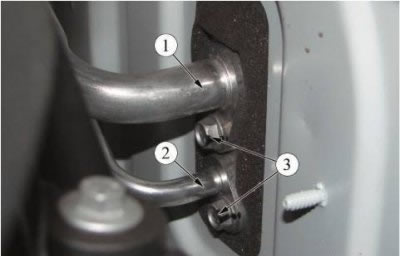
Figure 5-4 - Disconnecting the evaporator pipes: 1 - pipeline connecting the compressor with the evaporator (short part); 2 - pipeline connecting the condenser to the evaporator; 3 - pipeline fastening bolts
Remove the instrument panel and heater block.
Disassemble the heater block and remove the evaporator block from the heater body, Figure 5-5.
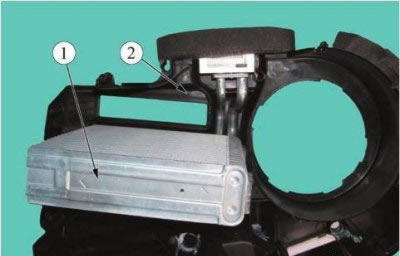
Figure 5-5 - Removing the evaporator: 1 - evaporator block; 2 - heater block housing
Check the elements of the evaporator block for mechanical damage to the tubes, plates and threaded connections. Replace damaged parts or evaporator unit (visual inspection).
Installation
Install the evaporator unit in the reverse order of removal.
Wherein:
- before installation, add compressor oil to the evaporator in the amount according to table 5-1
- before installing the evaporator unit, replace the O-rings with new ones. Apply compressor oil to the sealing rings;
- tightening torque of pipeline bolts - 8 Nm (0.8 kgf·m) (interchangeable head 13, knob and extension, torque wrench).
Evacuate the air conditioning system and charge the system with refrigerant (refrigerant R134a, loading rate - 475±35 g).
Check the air conditioning system for refrigerant leaks (leak detector).
Check the operation of the air conditioning system.