
Car repair AvtoVAZ Car repair Renault Car repair Hyundai Car repair Ford Car repair Volkswagen Car repair Audi Car repair Chevrolet
English Русский
Български
Беларускі
Український
Српски
Hrvatski
Română
Polski
Slovenský
Magyar
articles sitemap contacts bookmark
LadaMan.ru


Kalina Granta Priora Vesta Largus XRAY
Granta 1 (2011-2023, VAZ-2190)

Fuel tank — removal and installation (Granta 2190)

  • Main
  • Granta
  • Granta 1
  • Power unit
  • Supply system
  • Fuel tank — removal and installation
0
Contents: Removal ⇣ Installation ⇣
The fuel tank has a fuel vapor recovery system adsorber installed on top, and a fuel filter is attached to the right side of the tank.

To complete the work, you will need an inspection pit or overpass and a hose for pumping fuel.

We perform the work with an assistant.

Note: You can do it without an assistant, but you will need a height-adjustable support or stand. If possible, use up as much fuel as possible from the tank before performing work.


Removal


1. Prepare the car for work ("Preparing the car for maintenance and repair").

2. Relieve the fuel pressure ("Fuel Line - Pressure Relief").

After releasing the pressure, a small amount of fuel remains in the fuel line.

3. Disconnect the fuel line tube ends from the fuel module and the wiring harness connector ("Fuel module - removal and installation").

4. Disconnect the fuel line or fuel filter tubes ("Fuel filter - replacement").

5. Using a 10 mm socket wrench, unscrew one nut of the side mount of the fuel tank protective screen.
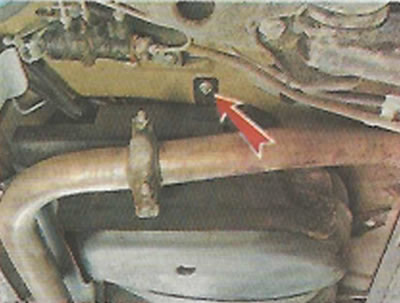
5. Using a 10 mm socket wrench, unscrew one nut of the side mount of the fuel tank protective…


6. Using the same wrench, loosen three more nuts securing the protective screen and remove the screen.
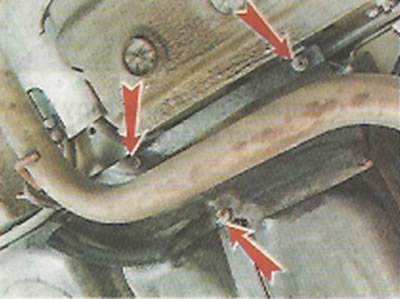
6. Using the same wrench, loosen three more nuts securing the protective screen and remove the…


7. Using a 10 mm socket wrench, unscrew the three nuts securing the protective casing of the fuel system tubes.
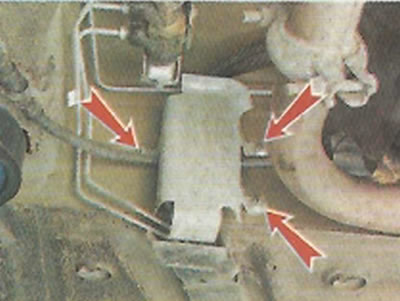


7. Using a 10 mm socket wrench, unscrew the three nuts securing the protective casing of the fuel…


8. Remove the casing. By squeezing the clamp, we disconnect the fuel line tubes and the purge tubes of the adsorber.
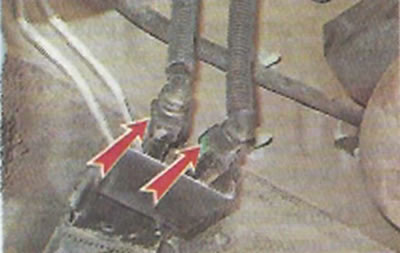
8. Remove the casing. By squeezing the clamp, we disconnect the fuel line tubes and the purge tubes…


9. By squeezing the clamps, disconnect the tip of the plastic tube from the ventilation tube of the filler neck.
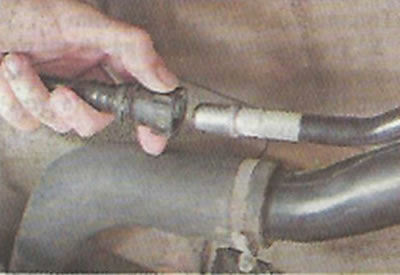
9. By squeezing the clamps, disconnect the tip of the plastic tube from the ventilation tube of the…


10. Using a Phillips screwdriver, loosen the clamp securing the fuel tank hose to the filler pipe.
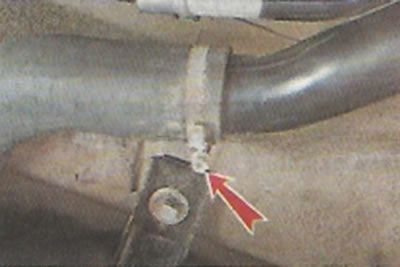


10. Using a Phillips screwdriver, loosen the clamp securing the fuel tank hose to the filler pipe.


11. Move the clamp along the hose and disconnect the hose from the filler pipe.
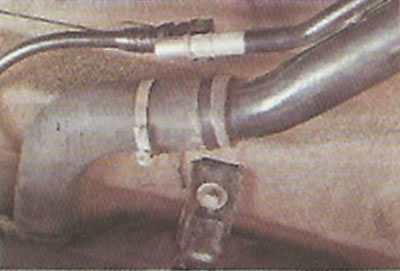
11. Move the clamp along the hose and disconnect the hose from the filler pipe.


12. Using this hose, pump out the maximum possible amount of fuel from the tank.

13. Install an adjustable support under the tank (or an assistant holds the tank from below).

14. Using a 13 mm socket wrench, unscrew the two bolts securing the fuel tank clamps.
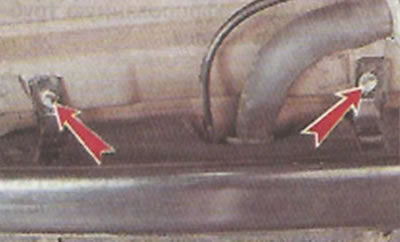
14. Using a 13 mm socket wrench, unscrew the two bolts securing the fuel tank clamps.


15. Remove the fuel tank assembly with the adsorber and fuel filter.
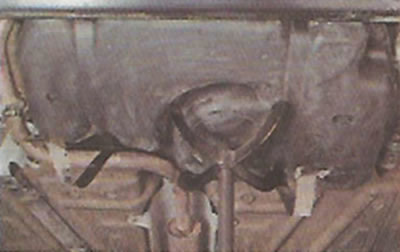


15. Remove the fuel tank assembly with the adsorber and fuel filter.


16. If necessary, disconnect the adsorber and fuel filter from the tank.

Note: If it is necessary to replace the adsorber, the fuel tank must be removed from the vehicle as shown above. If necessary, you can free up access to the adsorber by lowering the tank slightly on the height-adjustable stand. In this case, there is no need to disconnect all the tubes from the tank, and most importantly, the filler pipe hose (which is relevant if there is a lot of fuel in the tank). But disconnecting the tubes and removing the adsorber will still be difficult.
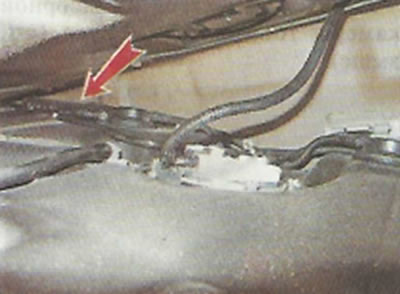

Note: If it is necessary to replace the adsorber, the fuel tank must be removed from the vehicle as…


Installation


We install the fuel tank in the reverse order.

Recommendation. If you fail to start the engine after two or three attempts, try removing air from the fuel rail through the diagnostic connector valve ("Checking the technical condition of the power supply system").


This article is available at russian, bulgarian, belarusian, ukrainian, serbian, croatian, romanian, polish, slovak, hungarian
This article has been reviewed: Polina Kudryashova
Share with friends:
◀ Previous
Lada Granta 1: Supply system
 

Fuel pump — replacement
Fuel module mesh filter — cleaning
Fuel Pressure Regulator — Replacement
Fuel Level Gauge Sensor — Replacement
Fuel module — removal and installation
 
More articles with information from manuals for Lada:

• Fuel tank — removal and installation Lada Kalina Hatchback (2004-2013, VAZ-1119)
• Replacing the fuel tank and its filler pipe Lada Priora 1 (2007-2018, VAZ-2170)
• Increased fuel consumption Lada Vesta 1 (2015-2023, VAZ-2180)
• Fuel tank — removal and installation Lada Largus 1 (2012-2023)
• Fuel tank — removal and installation Lada X-Ray 1 (2015-2022)
Link to this article in various formats
Reviews and comments of visitors
No comments yet


Add up two numbers: 15 + 39


Granta 1 (2011-2023) 
  • User manual
  • Governing bodies
  • Vehicle operation
  • Maintenance
  • Radio receiver
  • Radio receiver (option)
  • Power unit
  • Engine repair
  • Control system
  • Supply system
  • Cooling system
  • Exhaust system
  • Transmission
  • Clutch
  • Car gearbox
  • Drive shafts
  • Chassis (running gear)
  • Wheels, tires and hubs
  • Front suspension
  • Rear suspension
  • Steering
  • Brake system
  • Body and interior
  • Exterior (external elements)
  • Interior (internal elements)
  • Doors, locks and windows
  • Heating and ventilation
  • Electrical equipment
  • Equipment and devices
  • Power devices
  • Breakers and switches
  • Lighting and signaling
  • Electrical circuits
LadaMan.ru © 2018–2026 | Mobile version | About Lada | Sitemap: EN BG BY UA RS HR RO PL SK HU | Contacts with admin | | Add to bookmarks
Kalina Hatchback (2004-2013) | Kalina Sedan (2004-2013) | Granta 1 (2011-2023) | Priora 1 (2007-2018) | Vesta 1 (2015-2023) | Largus 1 (2012-2023) | X-Ray 1 (2015-2022) |
This site uses cookies to ensure everything runs smoothly.