Removing
1. We prepare the car for work («Preparing the car for maintenance and repair»).
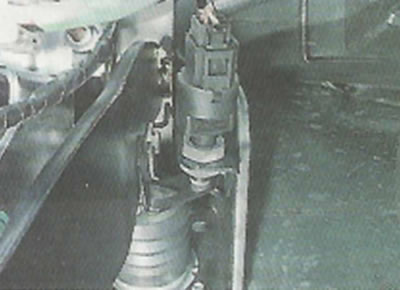
2. By pressing the latch, disconnect the wiring harness block from the switch.

3. Using a 19 mm spanner, loosen the switch locknut.
4. Remove the switch through the slot in the bracket.
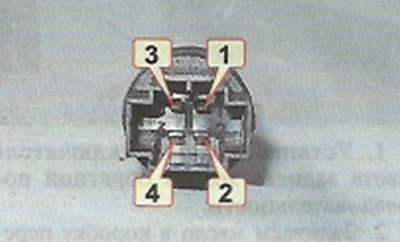
5. With a multimeter in ohmmeter mode, we check the health of the switch. When the switch button is in the free position, contacts 1 and 4 of the switch must be closed, and 2 and 3 open. When the button is pressed, pins 1 and 4 should open, and pins 2 and 3 should close. A defective switch must be replaced.
Installation
1. Install the brake light switch in reverse order.
2. After installing the switch, make sure that when the brake pedal is lightly pressed, the brake lights turn on, and when the pedal is released, they go out. If necessary, adjust the position of the switch (see below).
Adjustment
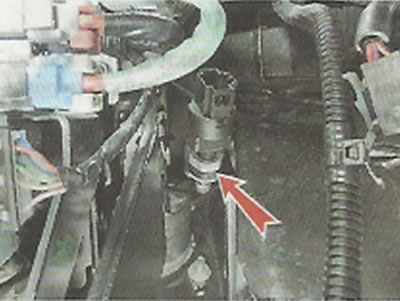
Comment. When the brake pedal is not depressed, its lever should rest against the switch. If the switch presses the pedal, then there may be no free brake pedal. resulting in incomplete release of the brakes. If there is a gap between the pedal arm and the body (threaded part) switch. then the switch stem will not be fully depressed and the brake lights will be turned on.
3. To adjust with two 19 mm wrenches, rotate the nuts and move the switch...
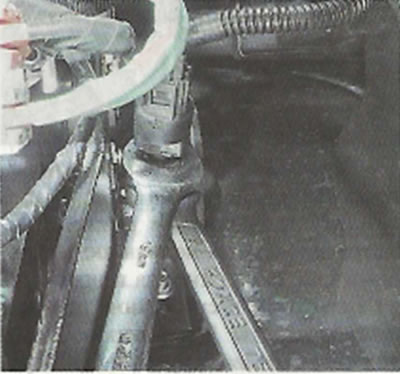
... ensuring that the switch rod is sunk to the stop and at the same time the switch does not move the brake pedal forward.