Car repair AvtoVAZ Car repair Renault Car repair Hyundai Car repair Ford Car repair Volkswagen Car repair Audi Car repair Chevrolet
English Русский
Български
Беларускі
Український
Српски
Hrvatski
Română
Polski
Slovenský
Magyar
articles sitemap contacts bookmark
LadaMan.ru


Kalina Granta Priora Vesta Largus XRAY
Granta 1 (2011-2023, VAZ-2190)

Parking brake cables — removal and installation (Granta 2190)

  • Main
  • Granta
  • Granta 1
  • Chassis (running gear)
  • Brake system
  • Parking brake cables — removal and installation
0
Contents: Removal ⇣ Installation ⇣
The need to replace the parking brake cables arises if the cables, as a result of corrosion, have lost the ability to move in the casing, have stretched out significantly, or have broken threads.

Advice: If it is necessary to replace one of the cables, we also replace the other cable.


Removal


1. Prepare the car for work ("Preparing the car for maintenance and repair").

2. Remove the brake drums ("Brake drum - removal and installation").

3. Remove the protective screen ("Parking brake - adjustment").

4. Loosen the lock nut of the parking brake lever travel adjusting nut ("Parking brake - adjustment") and unscrew the lock nut.

4. Loosen the lock nut of the parking brake lever travel adjusting nut («Parking brake -…


5. Using a 13 mm deep-head socket wrench and a cardan joint, unscrew the adjusting nut and remove it from the rod.
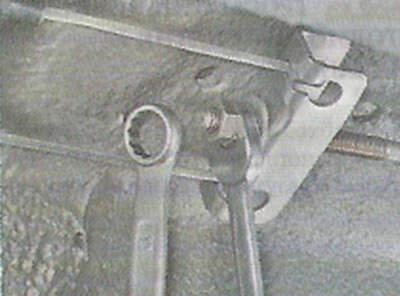
5. Using a 13 mm deep-head socket wrench and a cardan joint, unscrew the adjusting nut and remove…


6. Remove the cable equalizer from the adjusting rod.


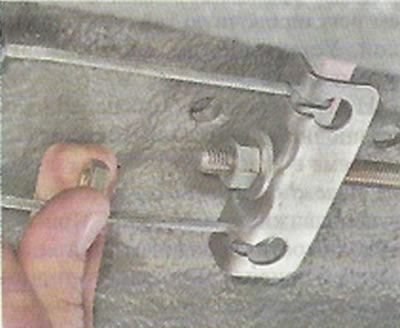
7. Disconnect the cable ends from the equalizer.
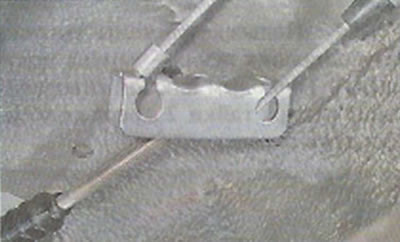
7. Disconnect the cable ends from the equalizer.


8. At the brake mechanism of the left rear wheel, using a large slotted screwdriver, move the spacer lever forward and remove the cable shackle from the hook of the spacer lever.
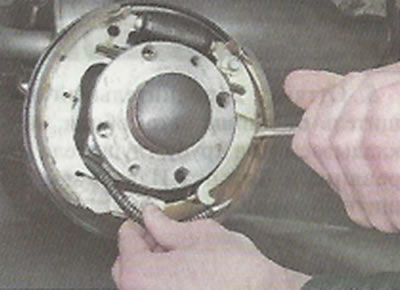
8. At the brake mechanism of the left rear wheel, using a large slotted screwdriver, move the…


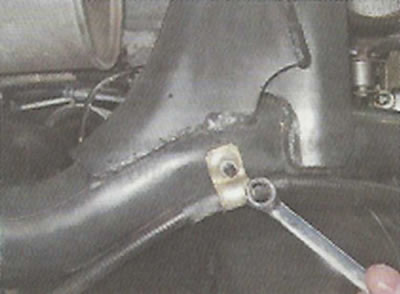
9. Using a 10 mm open-end wrench, unscrew the nut of the bracket securing the cable to the left arm of the rear suspension.

9. Using a 10 mm open-end wrench, unscrew the nut of the bracket securing the cable to the left arm…


10. Remove the front end of the cable from the hole in the body bracket.
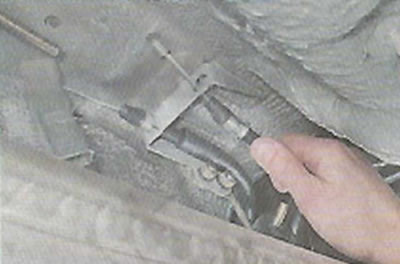


10. Remove the front end of the cable from the hole in the body bracket.


11. Remove the cable from the two brackets that secure it to the bottom of the body.
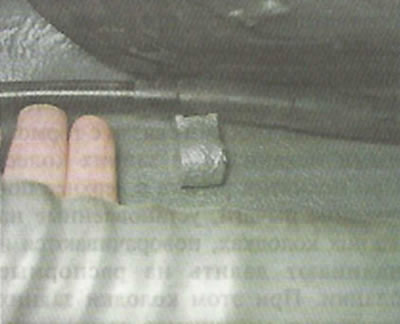
11. Remove the cable from the two brackets that secure it to the bottom of the body.


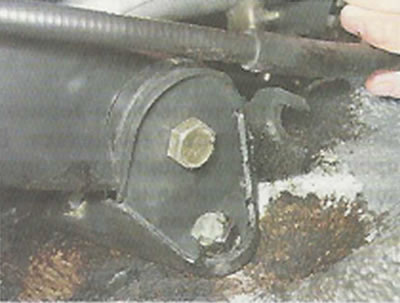
12. Remove the cable from the rear suspension beam bracket.

12. Remove the cable from the rear suspension beam bracket.


13. We take the cable out of the hole in the support shield of the rear brake mechanism and remove it.
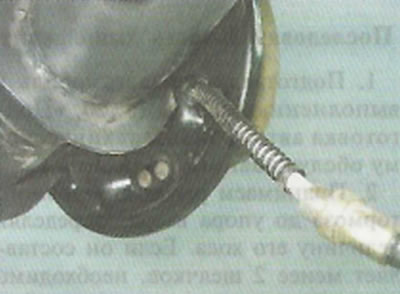
13. We take the cable out of the hole in the support shield of the rear brake mechanism and remove…


14. Remove the second cable in the same way.


Installation


1. Install the cable in reverse order.

2. After installing the brake drums, adjust the stroke of the parking brake lever ("Parking brake - adjustment").

(Main material on the website: LADAman)


This article is available at russian, bulgarian, belarusian, ukrainian, serbian, croatian, romanian, polish, slovak, hungarian
This article has been reviewed: Polina Kudryashova
Share with friends:
◀ Previous
Lada Granta 1: Brake system
Next ▶

Parking brake — adjustment
Parking brake system
Rear Brake Fluid Pressure Regulator — Removal and Installation
Rear Brake Fluid Pressure Regulator — Adjustment
Vacuum brake booster — removal and installation
Anti-lock braking system
More articles with information from manuals for Lada:

• Parking brake cables — removal and installation Lada Kalina Hatchback (2004-2013, VAZ-1119)
• Replacing the spring of the parking brake lever pawl Lada Priora 1 (2007-2018, VAZ-2170)
• Parking brake Lada Vesta 1 (2015-2023, VAZ-2180)
• Brake system — description of the design Lada Largus 1 (2012-2023)
• Adjusting the parking brake Lada X-Ray 1 (2015-2022)
Link to this article in various formats
Reviews and comments of visitors
No comments yet


Add up two numbers: 35 + 31


Granta 1 (2011-2023) 
  • User manual
  • Governing bodies
  • Vehicle operation
  • Maintenance
  • Radio receiver
  • Radio receiver (option)
  • Power unit
  • Engine repair
  • Control system
  • Supply system
  • Cooling system
  • Exhaust system
  • Transmission
  • Clutch
  • Car gearbox
  • Drive shafts
  • Chassis (running gear)
  • Wheels, tires and hubs
  • Front suspension
  • Rear suspension
  • Steering
  • Brake system
  • Body and interior
  • Exterior (external elements)
  • Interior (internal elements)
  • Doors, locks and windows
  • Heating and ventilation
  • Electrical equipment
  • Equipment and devices
  • Power devices
  • Breakers and switches
  • Lighting and signaling
  • Electrical circuits
LadaMan.ru © 2018–2026 | Mobile version | About Lada | Sitemap: EN BG BY UA RS HR RO PL SK HU | Contacts with admin | | Add to bookmarks
Kalina Hatchback (2004-2013) | Kalina Sedan (2004-2013) | Granta 1 (2011-2023) | Priora 1 (2007-2018) | Vesta 1 (2015-2023) | Largus 1 (2012-2023) | X-Ray 1 (2015-2022) |
This site uses cookies to ensure everything runs smoothly.