Car repair AvtoVAZ Car repair Renault Car repair Hyundai Car repair Ford Car repair Volkswagen Car repair Audi Car repair Chevrolet
English Русский
Български
Беларускі
Український
Српски
Hrvatski
Română
Polski
Slovenský
Magyar
articles sitemap contacts bookmark
LadaMan.ru


Kalina Granta Priora Vesta Largus XRAY
Vesta 1 (2015-2023, VAZ-2180)

Clutch — replacement (Vesta 2180)

  • Main
  • Vesta
  • Vesta 1
  • Transmission
  • Clutch
  • Clutch — replacement
0
Contents: Removal ⇣ Installation ⇣
Recommendation. When replacing the driven clutch disc, it is advisable to also replace the pressure plate (basket), even if there are no noticeable signs of wear on its working surface. The fact is that during operation its working surface wears out and the rigidity of the diaphragm spring weakens. It is also necessary to replace the release bearing if it has play, sticks when rotating, or makes an audible noise (see above, "Checking the technical condition of the clutch").


To perform the work, you will need a mandrel for centering the driven clutch disc.

Note: Operation shown on an automated gearbox.


Removal


1. Remove the gearbox (see "Manual gearbox - removal and installation" or "Automated gearbox - removal and installation").

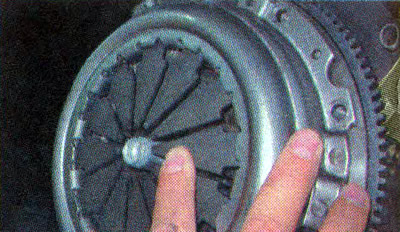
Recommendation. If replacing the pressure plate assembly (basket) is not planned, use a center punch to mark its position on the flywheel.
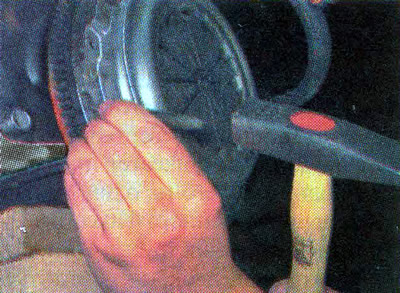

Recommendation. If replacing the pressure plate assembly (basket) is not planned, use a center…


2. Using an 8 mm socket or open-end wrench, unscrew the six bolts securing the basket to the flywheel, holding the flywheel from turning with a mounting blade or a large slotted screwdriver.
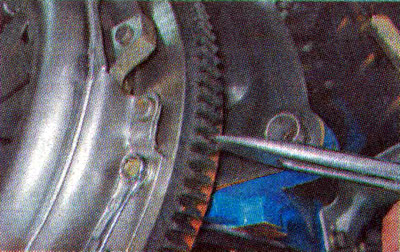
2. Using an 8 mm socket or open-end wrench, unscrew the six bolts securing the basket to the…


3. Remove the basket and driven disk.
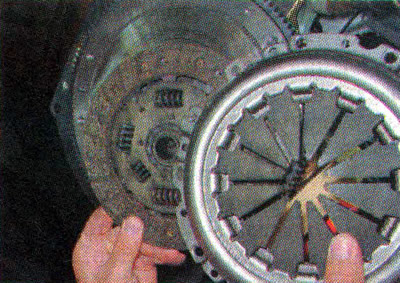


3. Remove the basket and driven disk.


4. Pulling towards you, remove the release bearing 1 from the guide sleeve. Remove the lever 2 from the crankcase opening together with the protective cover 3. Wash the removed parts in kerosene. We replace damaged and worn parts.
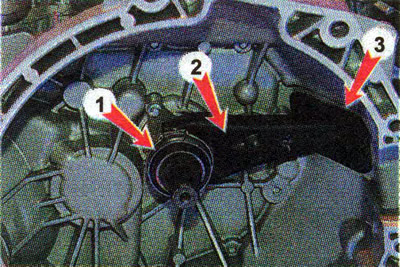
4. Pulling towards you, remove the release bearing 1 from the guide sleeve. Remove the lever 2 from…


Installation


1. Clean the splined portion of the gearbox input shaft and the release bearing guide sleeve from dirt and old grease.

2. Apply a thin layer of SHRUS-4 grease to them and to the working surface of the clutch release fork axle.

3. Install the drive parts into the clutch housing (fork, spring, release bearing) in the reverse order of removal, apply plastic grease to the working surface of the fork.

4. Insert the centering mandrel into the hole in the end of the crankshaft.
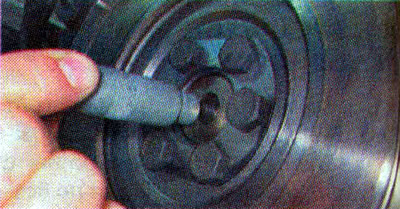


4. Insert the centering mandrel into the hole in the end of the crankshaft.


5. Install the driven clutch disc on the mandrel, orienting it so that the side where the disc hub protrudes more faces the gearbox.
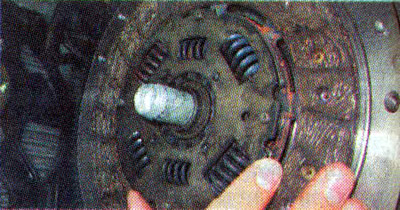
5. Install the driven clutch disc on the mandrel, orienting it so that the side where the disc hub…


6. Install the basket.

6. Install the basket.


7. Having aligned the previously made marks, use an 8 mm socket wrench to evenly tighten the basket mounting bolts. Finally tighten the bolts to a torque of 19.1–30.9 Nm (2.0-3.2 kgcm).


8. Remove the centering mandrel

9. Install the gearbox in the reverse order of removal.

10. Check the operation of the clutch release drive and, if necessary, eliminate the detected malfunction.


This article is available at russian, bulgarian, belarusian, ukrainian, serbian, croatian, romanian, polish, slovak, hungarian
This article has been reviewed: Kirill Dementyev
Share with friends:
◀ Previous
Lada Vesta 1: Clutch
 

Clutch release hydraulic drive — bleeding
Clutch — checking technical condition
Description of the clutch design
Basic data for monitoring, adjustment and maintenance
 
More articles with information from manuals for Lada:

• The clutch is slipping (engine speed increases, but the car does not… Lada Kalina Hatchback (2004-2013, VAZ-1119)
• Clutch Reference Data Lada Granta 1 (2011-2023, VAZ-2190)
• Checking and adjusting the clutch release drive Lada Priora 1 (2007-2018, VAZ-2170)
• Clutch malfunctions and how to fix them Lada Largus 1 (2012-2023)
• Troubleshooting Clutch Problems Lada X-Ray 1 (2015-2022)
Link to this article in various formats
Reviews and comments of visitors
No comments yet


Add up two numbers: 31 + 13


Vesta 1 (2015-2023) 
  • General information
  • Governing bodies
  • User manual
  • Maintenance
  • Troubleshooting
  • Power unit
  • Engine repair
  • Control system
  • Supply system
  • Cooling system
  • Exhaust system
  • Transmission
  • Clutch
  • Mechanical gearbox
  • Automatic gearbox
  • Drive shafts
  • Chassis (running gear)
  • Wheels, tires and hubs
  • Front suspension
  • Rear suspension
  • Steering
  • Brake system
  • Body and interior
  • Exterior (external elements)
  • Doors, locks and windows
  • Heating and ventilation
  • Electrical equipment
  • Equipment and devices
  • Power devices
  • Breakers and switches
  • Lighting and signaling
  • Electrical circuits
LadaMan.ru © 2018–2026 | Mobile version | About Lada | Sitemap: EN BG BY UA RS HR RO PL SK HU | Contacts with admin | | Add to bookmarks
Kalina Hatchback (2004-2013) | Kalina Sedan (2004-2013) | Granta 1 (2011-2023) | Priora 1 (2007-2018) | Vesta 1 (2015-2023) | Largus 1 (2012-2023) | X-Ray 1 (2015-2022) |
This site uses cookies to ensure everything runs smoothly.