



Note: catalog number of the radiator and its fasteners see here.
See also Replacing the air conditioner radiator.
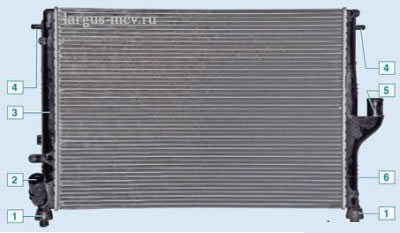
Radiator: 1 – rubber cushion of the lower mount; 2 – outlet pipe; 3 – left tank; 4 – upper mounting pin; 5 – supply pipe; 6 – right tank
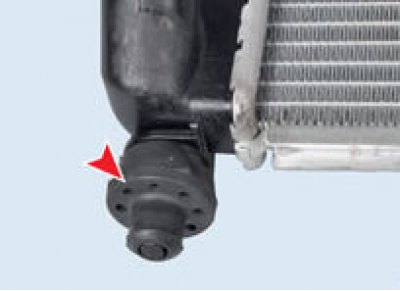
Rubber radiator mounting cushion
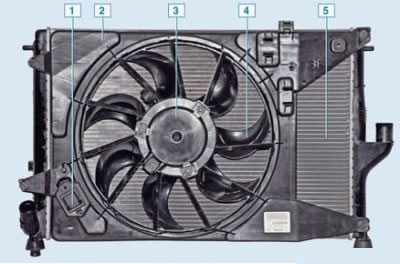
Radiator assembly with fan: 1 – additional resistor; 2 – casing; 3 – electric motor; 4 – impeller; 5 – radiator
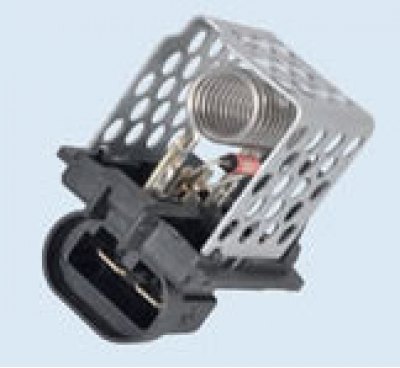
Additional fan resistor
Radiator maintenance
The windward surfaces of the radiator may become contaminated with insect debris, leaves and other particles after a certain period of vehicle operation. In this case, the blockage will affect the operation of the air conditioner and the cooling system, and may lead to malfunction of the air conditioner, as well as overheating of the cooling system, etc. Therefore, it is recommended to clean the radiator and condenser.
The front surface of the radiator should be cleaned once a year. Pressurized water or air can be used to clean radiator fins and blow away leaf and insect debris. The condenser is flushed by direct blowing through the radiator.
Water and air pressure should not exceed 150 kPa. Pressure above 150 kPa may damage the condenser and radiator fins.
The radiator fins must be maintained in a condition that ensures good heat transfer. they cannot be cleaned with a brush. Otherwise, damage to the plates may result in a decrease in heat transfer.
Under no circumstances should you spray water on a hot radiator, as the release of hot steam can cause harm. The use of water for cleaning can only be used when the engine is not running or is cooled down.
Removal
Place the vehicle on a two-post lift, apply the parking brake, turn off the ignition and disconnect the ground wire from the battery.
Remove the engine crankcase guard (see here).
Remove the front bumper (see here).
Drain the fluid from the engine cooling system (see here).
Flush the engine cooling system (see ibid).
For vehicles with power steering
Remove reservoir 1, Figure 13-4, of the power steering pump from the mounting bracket without disconnecting the pipes, and tie it to the engine.
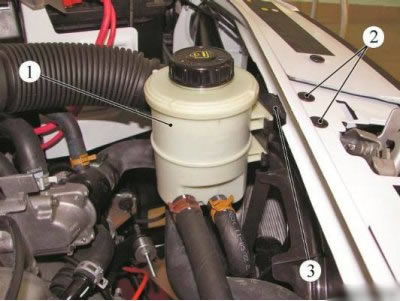
Figure 13-4 - Removing the power steering pump reservoir: 1 - Power steering pump reservoir; 2 - mounting screw; 3 - Power steering pump reservoir mounting bracket
Loosen two screws 2 and remove bracket 3 securing the power steering pump reservoir (torx T30 bit screwdriver).
Operations for all vehicle configurations
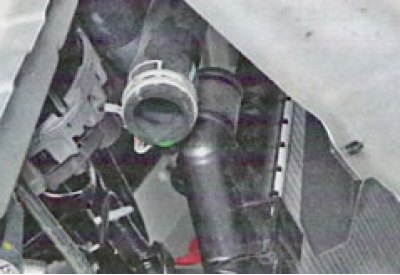
Remove the clamps on the inlet and outlet hoses of the engine cooling system radiator (tool for removing elastic clamps Mot. 1448).
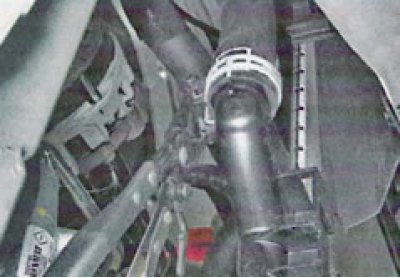
Disconnect the inlet and outlet hoses of the cooling system radiator.
For cars with air conditioning
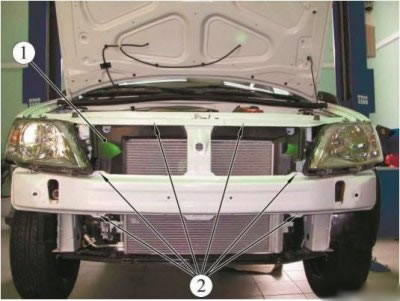
Figure 13-5 - Removing the air deflector: 1 - air deflector; 2 - air deflector mounting screw
Disconnect the wire harness from the holder on the electric fan.
Disconnect the air conditioner line from the holder on the electric fan.
Remove the two condenser mounting bolts (air conditioner radiator) to the radiator of the engine cooling system...
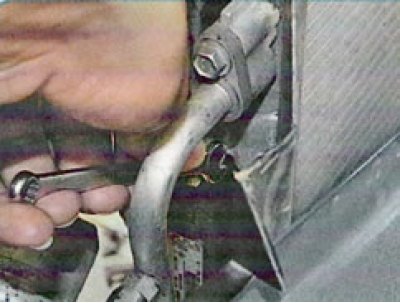
Disconnect the condenser 2, Fig. 13-6, of the air conditioner from the radiator of the engine cooling system (flat head screwdriver).
Remove air deflector 1, Figure 13-5.
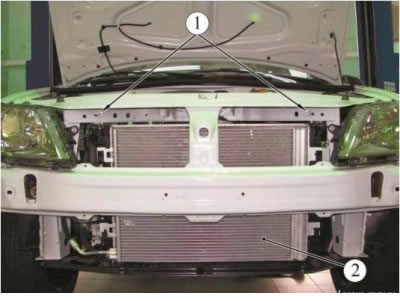
Figure 13-6 - Disconnecting the air conditioner condenser from the engine cooling system radiator: 1 - radiator bracket mounting bolt; 2 - air conditioner condenser
Secure the air conditioner condenser to the upper cross member.
Operations for all vehicle configurations
Remove the electric fan of the engine cooling system (see here).
Loosen bolts 1, Figure 13-7, securing the radiator bracket to the car body (replacement head 10, extension, ratchet handle).
Remove the 2 radiator mounting brackets from the engine cooling system radiator.
Remove radiator 1, Figure 13-8, of the engine cooling system from its mount on the front suspension subframe and remove the radiator.
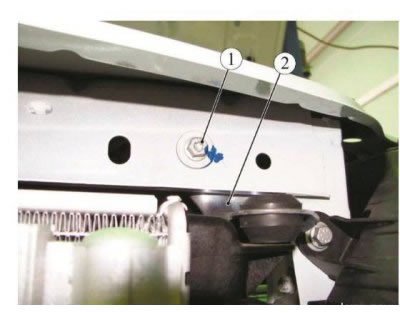
Figure 13-7 - Upper mount of the engine cooling system radiator: 1 - radiator bracket mounting bolt; 2 - radiator mounting bracket
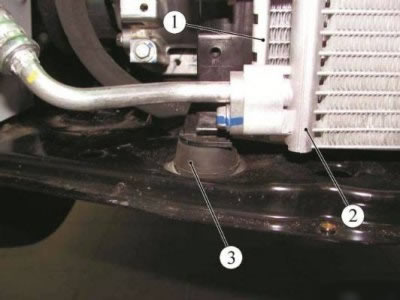
Figure 13-8 - Lower mount of the engine cooling system radiator: 1 - engine cooling system radiator; 2 - air conditioner condenser; 3 - lower radiator mount
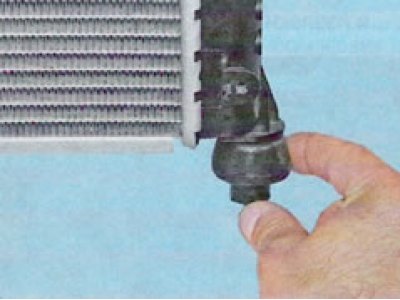
Rubber radiator pads (supports) are placed on the pins at the bottom of each radiator tank. Remove them. Replace heavily compressed or hardened cushions.
Installation
Install the engine cooling system radiator into the lower mounts on the front suspension subframe.
Install brackets 2, Figure 13-7, for fastening the radiator onto the cooling system radiator.
Install and tighten bolts 1 securing the radiator bracket to the body. Tightening torque of radiator bracket mounting bolts 8 Nm (0.8 kgf·m) (replacement head 10, extension, ratchet handle, torque wrench).
Install the electric fan of the engine cooling system (see below).
Connect the inlet and outlet hoses to the cooling system radiator.
Install new clamps on the radiator inlet and outlet hoses (tool for removing elastic clamps Mot. 1448).
For cars with air conditioning
Install and secure the air conditioner condenser to the engine cooling system radiator.
Install air deflector 1, Figure 13-5, and secure with clamps to the vehicle body (torx T30 bit screwdriver).
Secure the power steering line to the holder on the power steering fan.
Connect the wire harness to the holder on the electric fan.
Connect the air conditioner pipe to the holder on the electric fan.
For vehicles with power steering
Install bracket 3, Figure 13-4, for fastening the power steering pump reservoir and secure with two screws 2 (screwdriver with Torx TZ0 bit).
Install reservoir 1 of the power steering pump onto the mounting bracket.
Operations for all vehicle configurations
Fill the engine cooling system (see above).
Install the engine crankcase guard.
Install the front bumper.
Connect the ground wire terminal to the battery.
Bleed air from the engine cooling system (see above).