
Car repair AvtoVAZ Car repair Renault Car repair Hyundai Car repair Ford Car repair Volkswagen Car repair Audi Car repair Chevrolet
English Русский
Български
Беларускі
Український
Српски
Hrvatski
Română
Polski
Slovenský
Magyar
articles sitemap contacts bookmark
LadaMan.ru


Kalina Granta Priora Vesta Largus XRAY
Vesta 1 (2015-2023, VAZ-2180)

Inner drive joint — removal, replacement of protective cover and installation (Vesta 2180)

  • Main
  • Vesta
  • Vesta 1
  • Transmission
  • Drive shafts
  • Inner drive joint — removal, replacement of protective cover and installation
0
Contents: Removal ⇣ Installation ⇣
Note: The work is shown using a ball-type joint as an example. The tripod type hinge is repaired in a similar manner.


To perform the work you will need: special pliers for installing clamps for fastening CV joint covers or sliding pliers; external snap ring pliers; cV joint grease - 80 cm³; new hinge protective cover; new retaining and thrust rings of the hinge.

Removal


1. Remove the drive assembly (see "Front Wheel Drive - Removal and Installation").

2. Secure the drive assembly in a vice and use special pliers or sliding pliers to remove the large and small clamps of the protective cover.
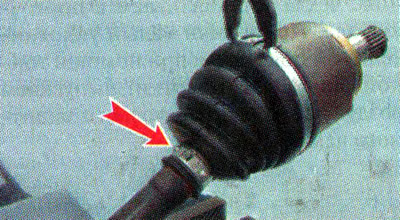
2. Secure the drive assembly in a vice and use special pliers or sliding pliers to remove the large…


3. Using a slotted screwdriver, pry up and remove the protective cover from the inner hinge housing.

Recommendation. A damaged cover can be removed by cutting it with a knife.


Warning: When performing the following operation, if the joint is to be reused, do not strike the separator or the joint housing.


4. Secure the drive shaft in a vice. By striking the inner ring of the joint with a hammer through a soft metal punch, we knock the joint off the drive shaft.
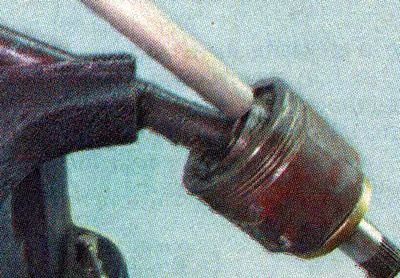
4. Secure the drive shaft in a vice. By striking the inner ring of the joint with a hammer through…


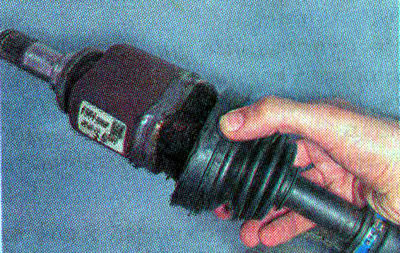
Note: To disassemble the tripod type hinge, slide the cover along the shaft away from the hinge.


Note: To disassemble the tripod type hinge, slide the cover along the shaft away from the hinge.

Using an external snap ring plier, we loosen...
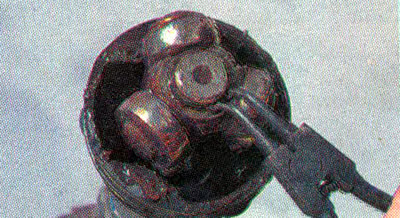
Using an external snap ring plier, we loosen...


...and remove the retaining ring.
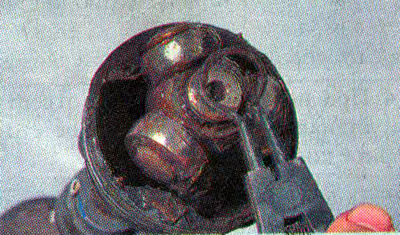
...and remove the retaining ring.


Using light blows through a drift, we move the hinge sleeve along the shaft splines,...
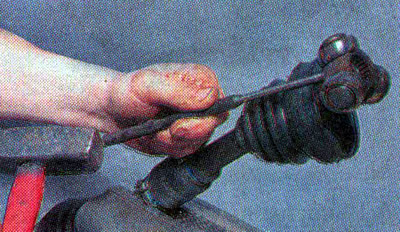
Using light blows through a drift, we move the hinge sleeve along the shaft splines,...


...we remove it and the cover.


5. Remove the retaining and thrust rings in the same way as shown on the outer hinge (see "Outer drive joint - removal, replacement of protective cover and installation").

Original text on the website (LADAMAN)

6. Remove the protective cover from the drive shaft.

7. Wash the joint in kerosene, wipe with a clean cloth and let dry.

Installation


1. Fix the drive shaft in a vice in a vertical position.

2. Wind the tape (or electrical tape) on the shaft splines, put a new protective cover on the shaft, move the cover to the middle of the shaft and remove the tape.

Note: On the right drive, turn the cover inside out onto the shaft.


Recommendation. Do not use a socket head to install the thrust ring. The internal chamfer found on almost all heads will compress the ring, preventing it from being installed on the shaft.


3. Using a 24mm open-end wrench as a mandrel, install a new thrust ring onto the splined end of the shaft.
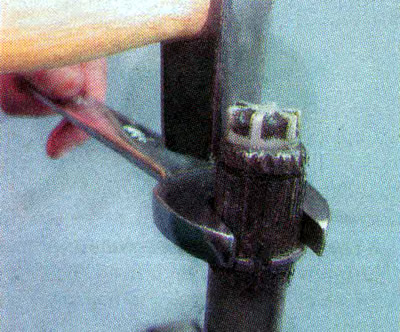
3. Using a 24mm open-end wrench as a mandrel, install a new thrust ring onto the splined end of the…


4. Using a slotted screwdriver, install a new retaining ring onto the shaft.
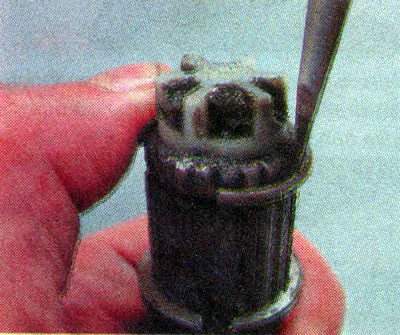
4. Using a slotted screwdriver, install a new retaining ring onto the shaft.


5. Apply CV joint grease to the shaft splines.


6. Place the inner ring of the joint onto the shaft splines. We align the hinge housing with the shaft axis. Using a hammer blow through a wooden block, press the hinge onto the shaft until the retaining ring is fully installed.
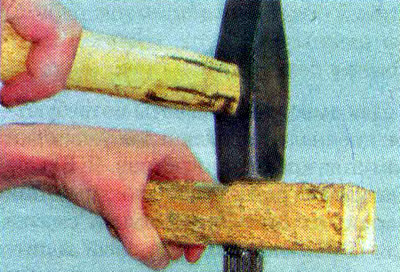
6. Place the inner ring of the joint onto the shaft splines. We align the hinge housing with the…


Warning! The inner joint requires 80 cm³ of grease.


7. Fill the joint with CV joint grease, and place the remaining grease (from 80 cm³) in a protective cover.

8. We put the large sealing belt of the protective cover on the hinge body, and install the small sealing belt of the cover into the groove of the shaft. By lifting the small sealing belt of the cover with a thin slotted screwdriver, we release air from the inner cavity of the protective cover.
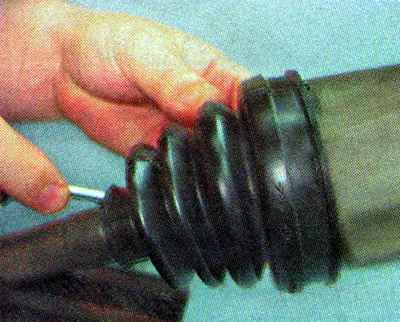
8. We put the large sealing belt of the protective cover on the hinge body, and install the small…


9. Using special pliers or large sliding pliers, install the large and small clamps of the protective cover.
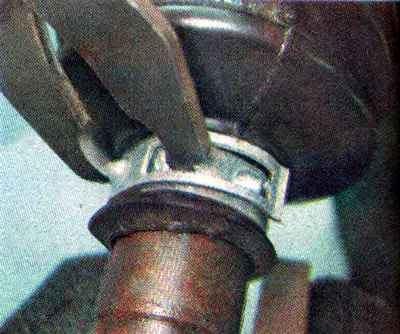


9. Using special pliers or large sliding pliers, install the large and small clamps of the…


Recommendation. Before installing the assembled drive on the vehicle, be sure to install a new retaining ring on the splined tailpiece of the inner joint.


10. Install the drive assembly on the vehicle (see "Front Wheel Drive - Removal and Installation").


This article is available at russian, bulgarian, belarusian, ukrainian, serbian, croatian, romanian, polish, slovak, hungarian
This article has been reviewed: Kirill Dementyev
Share with friends:
◀ Previous
Lada Vesta 1: Drive shafts
 

Outer drive joint — removal, replacement of protective cover and…
Front Wheel Drive — Removal and Installation
Checking the technical condition
Description of the design of drive shafts
Basic data for monitoring, adjustment and maintenance
 
More articles with information from manuals for Lada:

• Outer drive joint — removal, replacement of protective cover and… Lada Kalina Hatchback (2004-2013, VAZ-1119)
• Outer drive joint — removal, replacement of protective cover and… Lada Granta 1 (2011-2023, VAZ-2190)
• Removal and installation the mudguard and protective wing cover Lada Priora 1 (2007-2018, VAZ-2170)
• Inner Tie Rod Joint Protective Cover — replacement Lada Largus 1 (2012-2023)
• Protective cover for inner joint of steering rod Lada X-Ray 1 (2015-2022)
Link to this article in various formats
Reviews and comments of visitors
No comments yet


Add up two numbers: 45 + 24


Vesta 1 (2015-2023) 
  • General information
  • Governing bodies
  • User manual
  • Maintenance
  • Troubleshooting
  • Power unit
  • Engine repair
  • Control system
  • Supply system
  • Cooling system
  • Exhaust system
  • Transmission
  • Clutch
  • Mechanical gearbox
  • Automatic gearbox
  • Drive shafts
  • Chassis (running gear)
  • Wheels, tires and hubs
  • Front suspension
  • Rear suspension
  • Steering
  • Brake system
  • Body and interior
  • Exterior (external elements)
  • Doors, locks and windows
  • Heating and ventilation
  • Electrical equipment
  • Equipment and devices
  • Power devices
  • Breakers and switches
  • Lighting and signaling
  • Electrical circuits
LadaMan.ru © 2018–2026 | Mobile version | About Lada | Sitemap: EN BG BY UA RS HR RO PL SK HU | Contacts with admin | | Add to bookmarks
Kalina Hatchback (2004-2013) | Kalina Sedan (2004-2013) | Granta 1 (2011-2023) | Priora 1 (2007-2018) | Vesta 1 (2015-2023) | Largus 1 (2012-2023) | X-Ray 1 (2015-2022) |
This site uses cookies to ensure everything runs smoothly.