



Removal
Place the vehicle on a two-post lift (electro-hydraulic lift type P-3.2 G with a lifting capacity of 3.2 t).
Apply the parking brake, turn off the ignition, raise the hood, disconnect the ground wire terminal from the battery (10 mm spanner).
Disconnect the two connectors 1 and 2, Figure 20-1, of the rear wiring harness from the connectors of the instrument panel wiring harness, located under the instrument panel to the left of the driver.
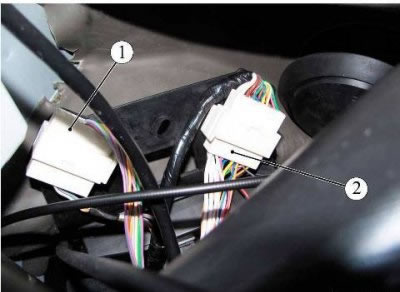
Figure 20-1 - Rear Wiring Harness Connectors: 1,2 - rear wiring harness pads to instrument panel wiring harness pads
Disconnect the rear wiring harness connector from the driver's door interior light switch (at the bottom on the left B-pillar).
Disconnect the rear wiring harness connector from the front passenger door interior light switch (at the bottom on the right B-pillar).
Remove the rear door trims.
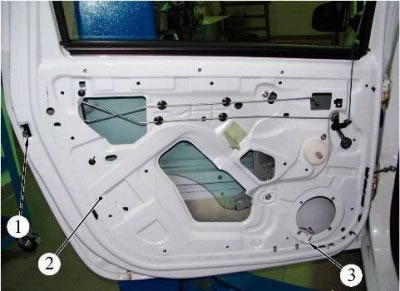
Figure 20-2 - Left rear door: 1 - left rear lock; 2 - left rear door; 3 - rear wiring harness connector to left rear speaker
Disconnect connector 3, Figure 20-2, of the rear wiring harness from the left rear speaker.
Disconnect the rear wiring harness connector from the lock 1 of the left rear door 2.
Similarly, disconnect the rear wiring harness connectors from the right rear speaker and from the right rear lock.
Unscrew the car body floor trim on the left and right sides.
Remove the rear seat and rear floor trim from the vehicle.
Remove the fuel tank cap.
Disconnect connector 1, Figure 20-3, of the rear wiring harness from the electric fuel pump.
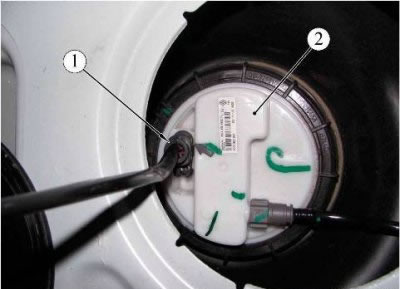
Figure 20-3 - Fuel tank: 1 - rear wiring harness block to electric fuel pump; 2 - electric fuel pump
Disconnect the left loading door glass washer pipes.
Loosen the nut and disconnect terminal 3, Figure 20-4, the ground wire of the rear left light (replacement head 10, ratchet).
Disconnect the rear wiring harness connector 4 from the left loading door wiring harness connector.
Disconnect connector 5 of the rear wiring harness from the trunk light.
Loosen the nut and disconnect the terminal of the ground wire of the right rear light (replacement head 10, ratchet).
Disconnect connector 3, Figure 20-5, of the rear wiring harness from limit switch 2 of the left loading door.
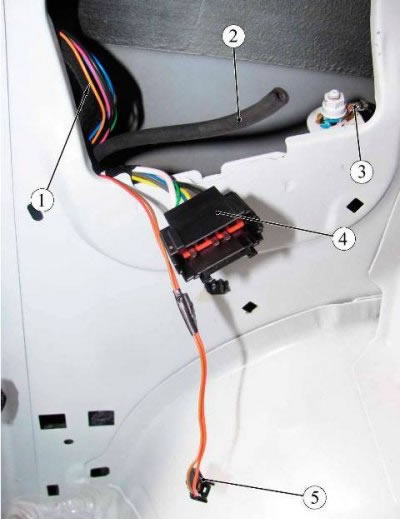
Figure 20-4 - Rear Wiring Harness: 1 - rear wiring harness; 2 - left loading door glass washer tube; 3 - terminal of the ground wire of the rear left light; 4 - rear wiring harness connector to left loading door wiring harness connector; 5 - connector of the wiring harness rear to the trunk light
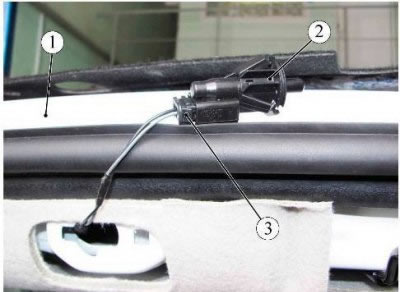
Figure 20-5 - Left loading door switch: 1 - car body; 2 - left loading door limit switch; 3 - rear wiring harness connector
Disconnect the two clamps 1, Figure 20-6 (flat head screwdriver).
Unscrew the two nuts 2 securing the protective harness cover of the rear speed sensor from the vehicle body (replacement head 13, ratchet, extension).
Remove the protective cover from the rear speed sensor wiring harness.
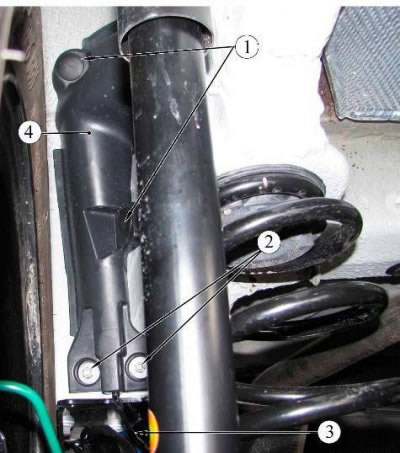
Figure 20-6 - Disconnecting the wiring harness from the rear speed sensor: 1 - retainer; 2 - fastening nut; 3 - rear speed sensor wiring harness; 4 - protective cover for the rear speed sensor wiring harness
Disconnect connector 1, Figure 20-7, of the rear wiring harness from connector 2 of the rear left speed sensor wiring harness.
[Full article on the website: ladaman.ru]
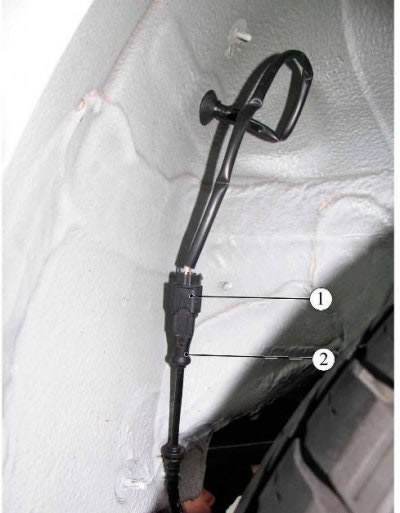
Figure 20-7 - Rear left speed sensor: 1 - rear wiring harness connector; 2 - rear left speed sensor wiring harness connector
Similarly, disconnect the rear wiring harness connector from the rear right speed sensor.
Remove the rear wiring harness.
Installation
Install the rear wiring harness in the reverse order of removal.
In this case, the tightening torque of the nuts securing the terminals of the ground wires of the rear wiring harness is 8 N·m (0.8 kgf·m) (replaceable head 10, ratchet, torque wrench).