



Remove the decorative caps from the nuts securing the levers 4, Figure 12-1, of the windshield wiper, unscrew the nuts, remove the levers together with the brushes (flat screwdriver, 16mm spanner).
Remove hood seal 1.
Unscrew the three screws 3 of the self-tapping fastening of the right 2 windshield frame trim, remove the plastic clip 6, remove the trim (replaceable Torx T20 head, ratchet, device type 12770 f. "StahlwiUe").
Similarly, remove the left 5th windshield frame trim.
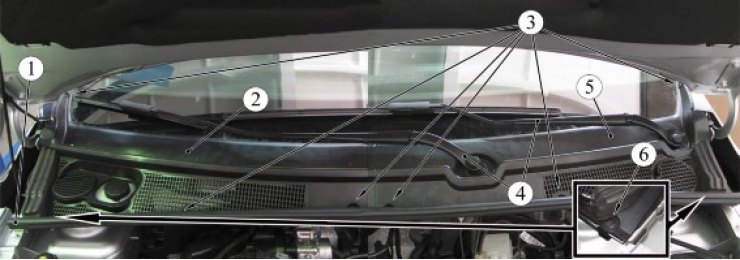
Figure 12-1 - Fastening the windshield frame trim: 1 - hood seal; 2 - right windscreen frame trim; 3 - screw for fastening the windshield frame trim; 4 - windshield wiper lever; 5 - left windscreen frame trim; 6 - clip
Unscrew the two bolts 3, Figure 12-2, securing the windshield wiper 1, remove the windshield wiper, disconnecting the connector 2 of the wiring harness from it (replacement head 10, ratchet).
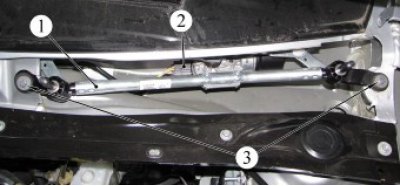
Figure 12-2 - Wiper blade mounting: 1 - windshield wiper; 2 - wiring harness block; 3 - windshield wiper mounting bolt
Install the windshield wiper in the reverse order of removal.
Present the vehicle to the Quality Control Department. The Quality Control Department will check the vehicle for compliance with the requirements of TU 017200-254-0023934 in the scope of work performed.