
Car repair AvtoVAZ Car repair Renault Car repair Hyundai Car repair Ford Car repair Volkswagen Car repair Audi Car repair Chevrolet
English Русский
Български
Беларускі
Український
Српски
Hrvatski
Română
Polski
Slovenský
Magyar
articles sitemap contacts bookmark
LadaMan.ru


Kalina Granta Priora Vesta Largus XRAY
Priora 1 (2007-2018, VAZ-2170)

Replacing lamps in lighting fixtures (Priora 2170)

  • Main
  • Priora
  • Priora 1
  • Electrical equipment
  • Lighting and signaling
  • Replacing lamps in lighting fixtures
0
Note: For proper operation of lighting and light signalling, use the lamps specified in Appendix 6.


Attention! Before replacing bulbs in vehicle lighting devices, disconnect the wire from the negative terminal of the battery.


To replace the high beam headlight bulb perform the following operations.
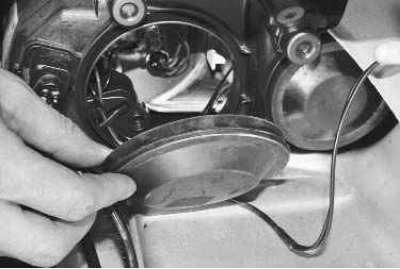
1. Remove the rubber cover of the high beam headlight bulb…

1. Remove the rubber cover of the high beam headlight bulb…

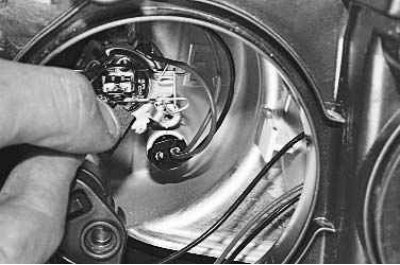
2. …disconnect the wiring harness from the lamp terminals…

2. …disconnect the wiring harness from the lamp terminals…

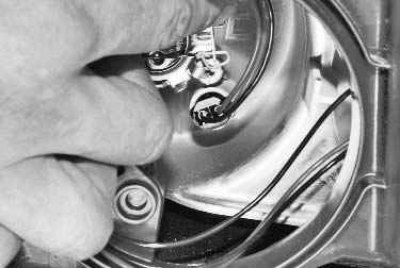
3. …disengage the spring clamp of the lamp from the hooks…

3. …disengage the spring clamp of the lamp from the hooks…


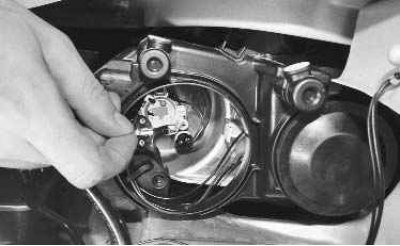
4. …and remove the lamp.


4. …and remove the lamp.

Attention! Do not touch the bulb with your fingers, as the halogen lamp gets very hot, grease stains will cause the bulb to darken and, as a result, reduce the luminous flux. Handle the lamp by the bulb only with clean gloves or a clean cloth. If grease stains do appear on the lamp, remove them with alcohol.


5. Install the lamp in the reverse order of removal.

To replace the low beam headlight bulb perform the following operations.
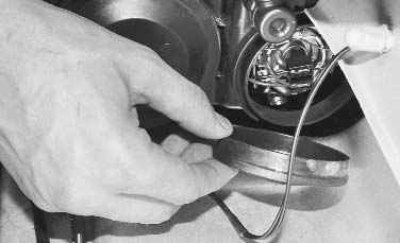
1. Remove the rubber cover of the low beam headlight bulb…
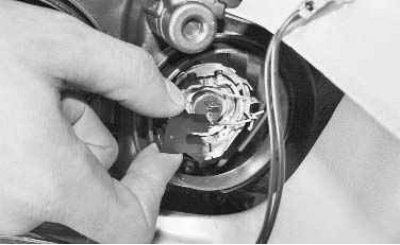

1. Remove the rubber cover of the low beam headlight bulb…

2. …disconnect the wiring harness from the lamp terminals…
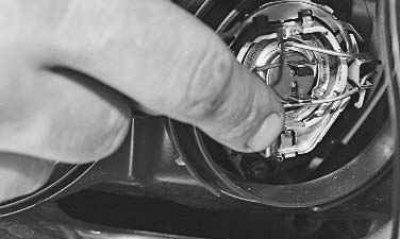

2. …disconnect the wiring harness from the lamp terminals…


3. …disengage the spring clamp of the lamp from the hooks…
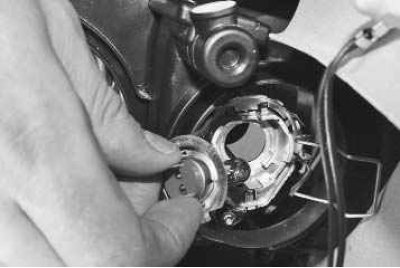

3. …disengage the spring clamp of the lamp from the hooks…

4. …and remove the lamp.


4. …and remove the lamp.

5. Install the lamp in the reverse order of removal.

(For more details, see the page: www.Ladaman.ru)

To replace the side light bulb in the headlight perform the following operations.

1. Remove the rubber cover of the low beam headlight bulb (see above)…
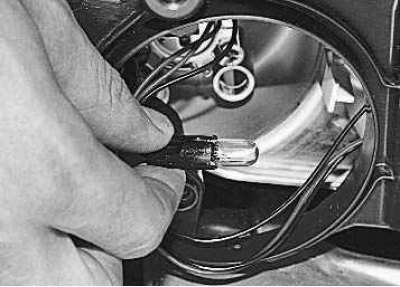
2. …remove the socket together with the lamp…
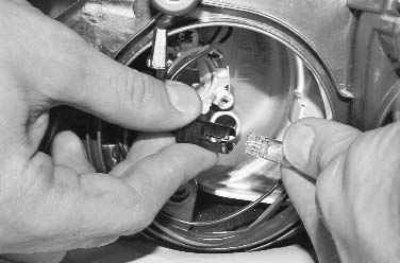

2. …remove the socket together with the lamp…


3. …and remove the lamp from the socket.


3. …and remove the lamp from the socket.

4. Install the lamp in the reverse order of removal.

To replace the front turn signal lamp perform the following operations.
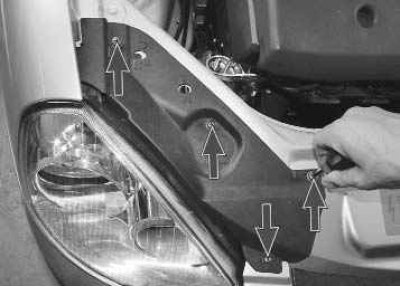
1. Remove the four headlight housing mounting screws…
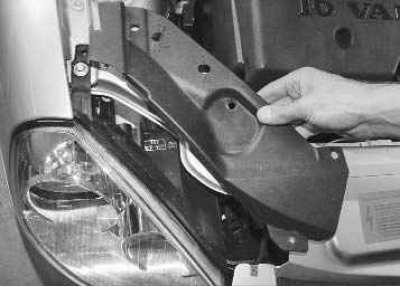

1. Remove the four headlight housing mounting screws…

2. …and remove the casing.
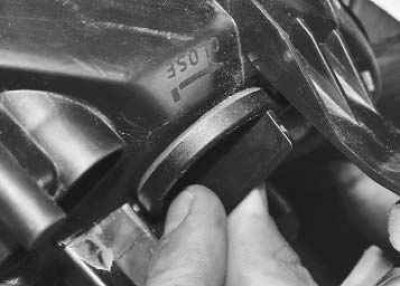

2. …and remove the casing.

3. Turn the front turn signal bulb socket counterclockwise…
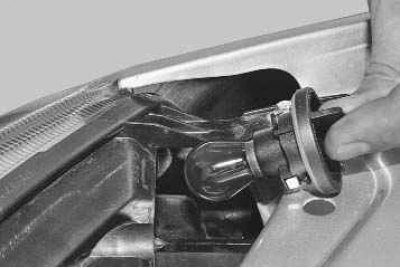

3. Turn the front turn signal bulb socket counterclockwise…


4. …and remove it from the headlight unit.
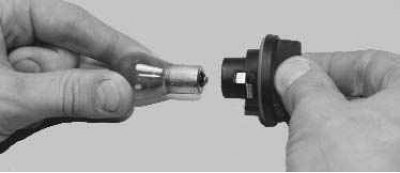

4. …and remove it from the headlight unit.

5. Turn the bulb in the socket counterclockwise and remove it from the socket.


5. Turn the bulb in the socket counterclockwise and remove it from the socket.

6. Install the lamp in the reverse order of removal.

To replace the bulb in the side turn signal perform the following operations.
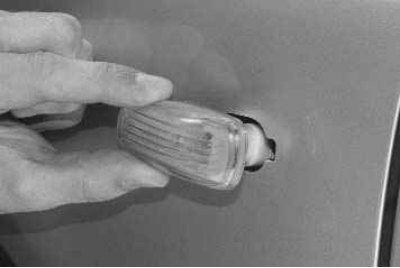
1. Remove the side turn signal light from the vehicle (see «Replacing the side turn signal light»)…


1. Remove the side turn signal light from the vehicle (see "Replacing the side turn signal light")…
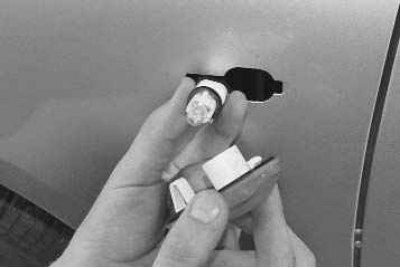


2. …remove the socket and the lamp from it…
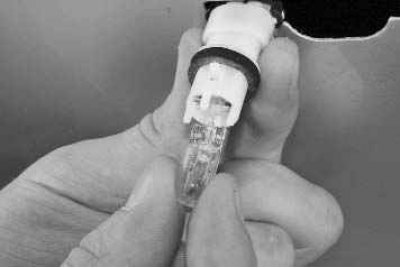

2. …remove the socket and the lamp from it…

3. …and remove the lamp from the socket.


3. …and remove the lamp from the socket.

To replace any bulb in the rear light perform the following operations.

Note: The side light and fog light bulbs are combined into one bulb, two-filament.


1. Remove the light from the vehicle (see "Replacing the rear light").
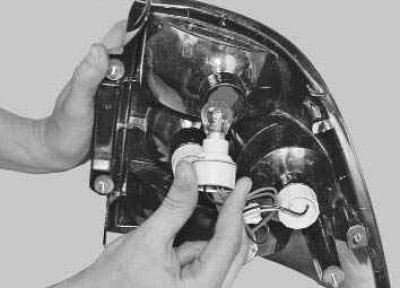
2. Turn the side light and fog light bulb holder counterclockwise and remove it from the lamp.
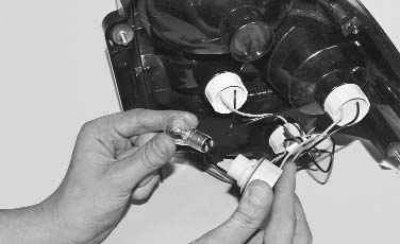

2. Turn the side light and fog light bulb holder counterclockwise and remove it from the lamp.

3. Turn the bulb counterclockwise in the socket and remove it.


3. Turn the bulb counterclockwise in the socket and remove it.

4. Install the new lamp in the reverse order of removal.

5. Replace the remaining rear light bulbs in the same way.

The lamp in the license plate light replace in the following order.
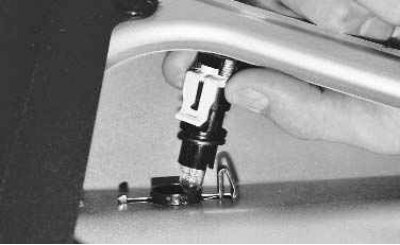
1. Remove the socket together with the lamp…
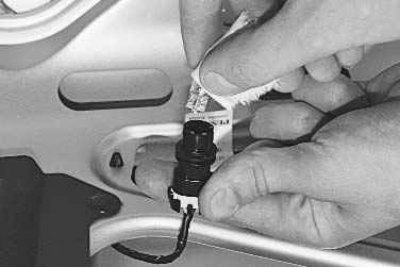

1. Remove the socket together with the lamp…

2. …and remove the lamp from the socket.


2. …and remove the lamp from the socket.

3. Install the lamp in the reverse order of removal.

4. Replace the second lamp in the same way as the first, after removing the trunk lid lock trim (see "Removing and installing the trunk lid lock and its drive").

To replace the trunk light bulb perform the following operations.
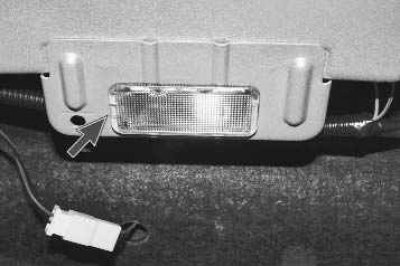
1. Pry the light up at the point shown by the arrow and remove it from the opening.
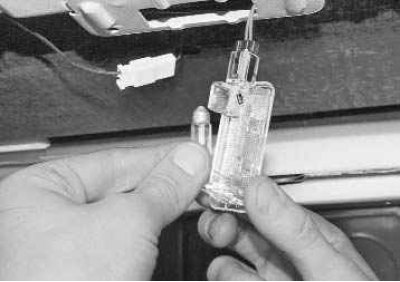

1. Pry the light up at the point shown by the arrow and remove it from the opening.

2. Press the spring contact and remove the lamp.


2. Press the spring contact and remove the lamp.

3. Install the lamp in the reverse order of removal.

To replace the interior lighting lamp perform the following operations.
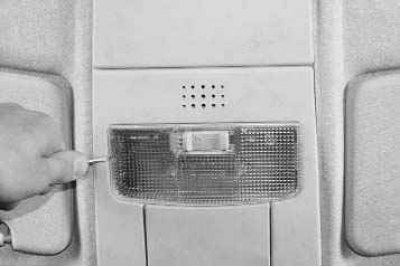
1. Pry up the lampshade..
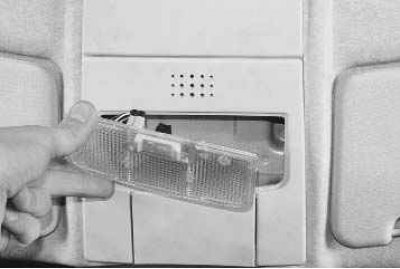

1. Pry up the lampshade..

2. …and, overcoming the resistance of the clamps, remove the interior light.
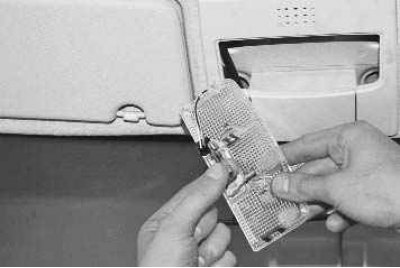

2. …and, overcoming the resistance of the clamps, remove the interior light.

3. Press the spring contact and remove the lamp.


3. Press the spring contact and remove the lamp.

4. Install the lamp in the reverse order of removal.


This article is available at russian, bulgarian, belarusian, ukrainian, serbian, croatian, romanian, polish, slovak, hungarian
This article has been reviewed: Vladislav Voloshin
Share with friends:
◀ Previous
Lada Priora 1: Lighting and signaling
Next ▶

Possible malfunctions of lighting and light signaling
Features of the design of headlights and lighting
Headlight replacement
Replacing the side turn signal light
Replacing the rear light
Replacing an additional brake light
Replacing the license plate light
More articles with information from manuals for Lada:

• Trunk and Glove Compartment Lighting Lamps — Replacement Lada Kalina Hatchback (2004-2013, VAZ-1119)
• Replacing lamps Lada Granta 1 (2011-2023, VAZ-2190)
• Lighting fixtures Lada Vesta 1 (2015-2023, VAZ-2180)
• Interior and cargo area lighting lamps Lada Largus 1 (2012-2023)
• Replacing lamps Lada X-Ray 1 (2015-2022)
Link to this article in various formats
Reviews and comments of visitors
No comments yet


Add up two numbers: 27 + 14


Priora 1 (2007-2018) 
  • General information
  • Vehicle device
  • User manual
  • Faults en route
  • Maintenance
  • Power unit
  • Engine repair
  • Cooling and lubrication system
  • Supply system
  • Exhaust system
  • Transmission
  • Clutch
  • Car gearbox
  • Drive shafts
  • Chassis (running gear)
  • Car suspension
  • Steering
  • Brake system
  • Body and interior
  • Exterior (external elements)
  • Interior (internal elements)
  • Doors, locks and windows
  • Electrical equipment
  • Equipment and devices
  • Power devices
  • Lighting and signaling
  • Cooling and heating
  • Electrical circuits
LadaMan.ru © 2018–2026 | Mobile version | About Lada | Sitemap: EN BG BY UA RS HR RO PL SK HU | Contacts with admin | | Add to bookmarks
Kalina Hatchback (2004-2013) | Kalina Sedan (2004-2013) | Granta 1 (2011-2023) | Priora 1 (2007-2018) | Vesta 1 (2015-2023) | Largus 1 (2012-2023) | X-Ray 1 (2015-2022) |
This site uses cookies to ensure everything runs smoothly.