



Removal
Place the vehicle in a work area, apply the parking brake, turn off the ignition, lift the hood, and disconnect the ground wire from the battery (spanner 10).
Insert a flat-head screwdriver into the slot between frame 1, Figure 16-1, of the interior light and the roof trim 2 from the front side of the frame, carefully press the interior light frame, disengage the clips and remove the frame from the socket in the roof trim.
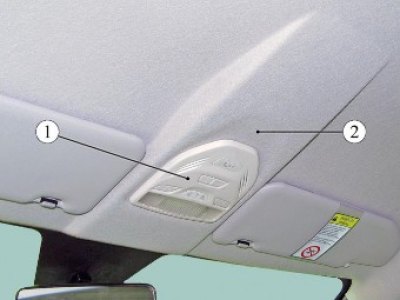
Figure 16-1 - Interior light: 1 - interior light frame; 2 - roof lining
Unscrew the two screws 1, Figure 16-2, self-tapping fastenings of the interior light (t20 bit, screwdriver).
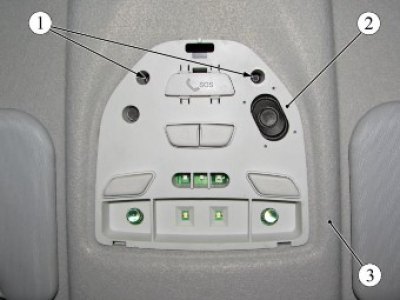
Figure 16-2 - Interior light with frame removed: 1 - self-tapping screw; 2 - interior lighting lamp; 3 - roof lining
Using a flat-head screwdriver, through the hole in the rear part of the lamp, release the spring clip 1 from engagement with the body, Figure 16-3, and remove the lamp 4 of the interior lighting from the socket in the car roof trim (flat head screwdriver).
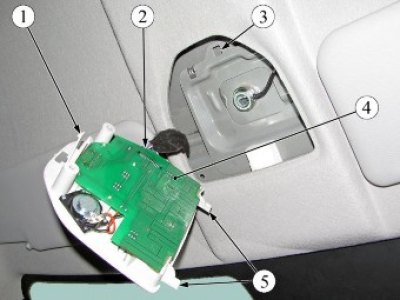
Figure 16-3 - Removing the interior light: 1 - spring retainer; 2 - wiring harness block; 3 - socket for installing a spring retainer; 4 - interior lighting lamp; 5 - retainer
Disconnect connector 2 of the wiring harness from the connector of the interior light 4 and remove the light.
(Data obtained from the website: «ladaman.ru»)
The interior lighting lamp is non-detachable, and if any of its components fail, (interior lighting, loudspeaker, microphone, function on/off buttons), the lampshade is replaced as an assembly.
Installation
Install the interior light in the reverse order of removal.
Present the vehicle to the Quality Control Department. The Quality Control Department will check the vehicle for compliance with the requirements of TU 017200-254-00232934, paragraphs 1.19.21.3, 1.19.21.6 in the scope of work performed.