
Note:
- See also Replacing taillight bulbs.
- For part numbers of the rear light and its parts, see Here.
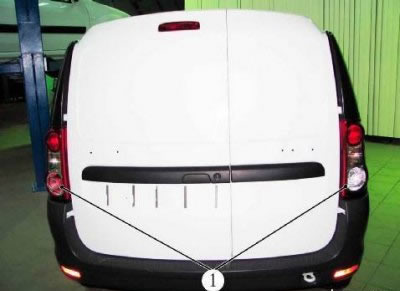
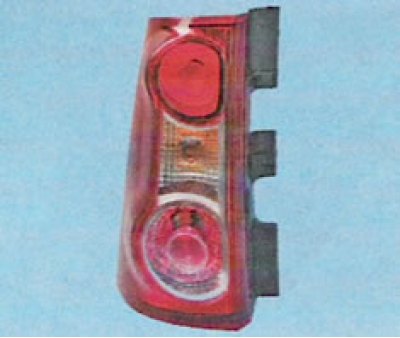
Figure 8-1 - Rear lights of the car: 1 - rear right/left lamp
Removing
Place the car on the workplace, brake with the parking brake, turn off the ignition. Raise the hood, disconnect the wire terminal "masses" from battery (wrench "on 10").
Open right and left tailgate (trunk).
Remove mesh (when removing the rear light from the right fender) (in the presence of).
Remove jack (when removing the rear light from the right fender).
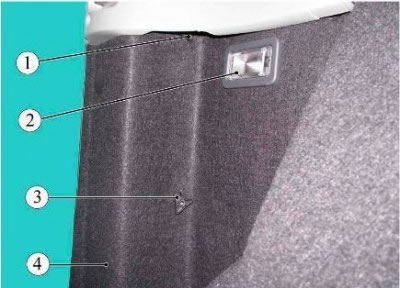
Figure 8-2 - Removing the rear light: 1, 3 - rear light fastening nuts; 2 - trunk lighting cover; 4 - trunk upholstery
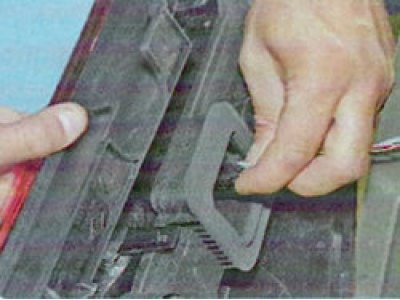
Unscrew the two wing nuts fastening the rear light 1.3, Figure 8-2, fastening the rear light of the right or left to the car body.
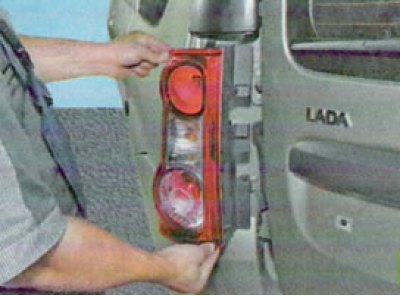
Pull out the lantern as far as the wiring will allow.
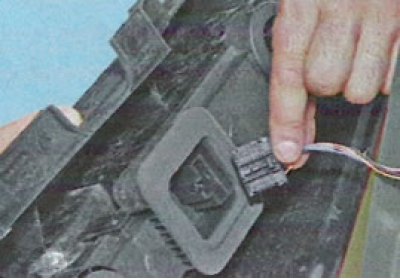
Press the latch and disconnect the block 2, Figure 8-3, of the rear wiring harness from the right or left lamp.
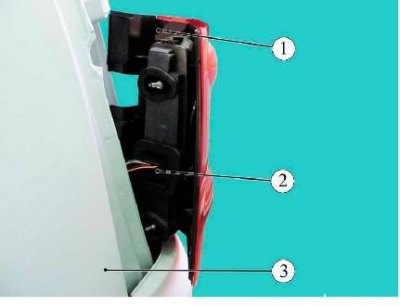
Figure 8-3 - Removing the rear light: 1 - rear left lamp; 2 - block of the rear wiring harness to the rear lamp; 3 - car body
 |  |
Remove the lamp, right or left.
Release clamps 2, Figure 8-4, remove the board from the rear lamp housing.
To replace the tail light bulbs, turn the appropriate bulb, Figure 8-5, counterclockwise, remove it, and replace the bulb. Check flashlight operation.
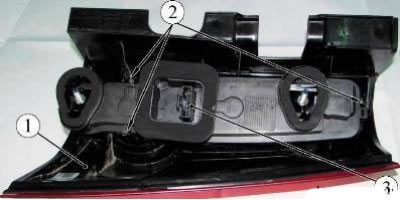
Figure 8-4 - Rear lamp: 1 - rear lamp housing; 2 - clamps; 3 - rear lamp connector to the rear wiring harness block
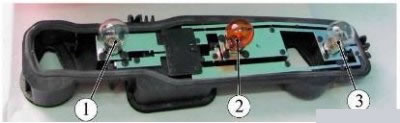
Figure 8-5 - Rear lamps: 1 - a lamp of a signal of braking and dimensional light; 2 - turn indicator lamp; 3 - reverse light and fog light lamp
Installation
Install the rear light on the fender along the dowel pins. Install the rear light in the reverse order of removal. At the same time, ensure the sealing of the lantern in conjunction with the body. Put the jack in place (when removing the rear light of the right wing). Put the mesh back in place (in the presence of).