



Open the hood and disconnect the ground wire terminal from the battery (spanner 10).
Removing the front seat.
Press lever 3, Figure 8-1, upward and move seat 2 to the extreme rear position.
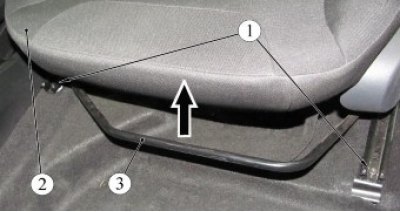
Figure 8-1 - Front sled mount: 1 - front runner mounting bolt; 2 - front seat; 3 - front seat movement mechanism lever
Unscrew the two bolts 1 securing the skids (torx T40 replaceable head, ratchet).
Press the lever and move the seat to the extreme forward position.
Unscrew the two rear bolts 1, Figure 8-2, securing the runners, disconnect the rear wiring harness connectors from the seat, remove the seat (torx T40 replaceable head, ratchet).
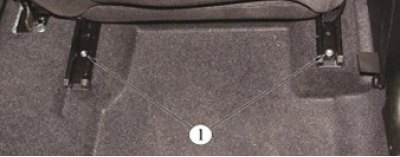
Figure 8-2 - Rear sled mount: 1 - rear runner mounting bolt
Original publication on the website: LADAMAN
Removing the rear seat.
Fold back cushion 2, Figure 8-3, of the rear seat forward.
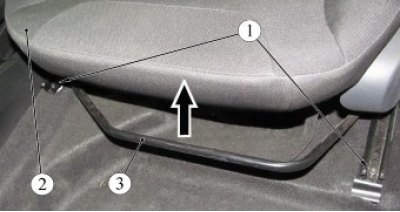
Figure 8-3 - Rear seat cushion mounting: 1 - body; 2 - rear seat cushion; 3 - bracket mounting hole; 4 - pillow bracket
Remove bracket 4 of the cushion from mounting hole 3 in body 1, and similarly remove the second bracket from the mounting hole on the other side of the cushion.
Remove the rear seat cushion from the vehicle interior.
Loosen bolt 4, Figure 8-4, securing the lower point of the left 2 seat belt (replaceable head 16, ratchet).
Loosen bolt 9 securing bracket of left backrest 7 of rear seat to body floor (replaceable head 16, ratchet).
Loosen the mounting bolt 8 of the left backrest bracket by several turns (replacement head 17, ratchet).
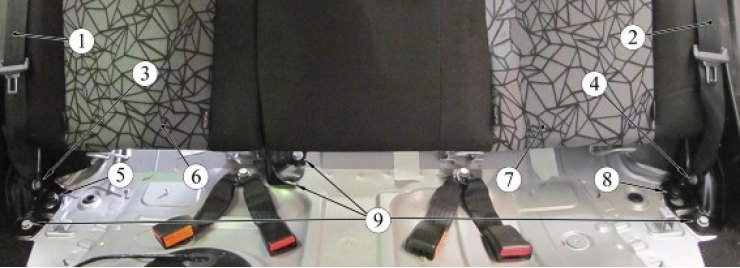
Figure 8-4 - Rear seat backrest fastening: 1 - rear right seat belt; 2 - rear left seat belt; 3 - bolt for fastening the lower point of the right seat belt; 4 - bolt for fastening the lower point of the left seat belt; 5 - mounting bolt of the right rear seat back bracket; 6 - right rear seat back; 7 - rear seat back left; 8 - mounting bolt of the left backrest bracket of the rear seat; 9 - rear seat back bracket mounting bolt
Press the seatback folding lock, move the seatback bracket back to remove the head of the mounting bolt through the hole in the bracket, remove the seatback from axis 1, Figure 8-5, bracket 3 of the right seatback 2 and remove the seatback from the vehicle interior.
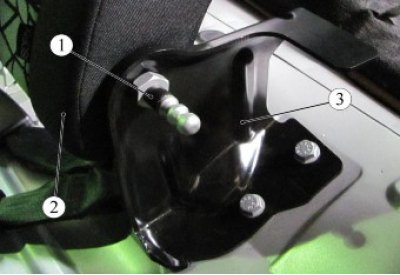
Figure 8-5 - Left rear seat back pivot axis: 1 - axis of rotation of the left backrest of the rear seat; 2 - right rear seat back; 3 - rear seat back bracket
Loosen bolt 3, see figure 8-4, securing the lower point of the right 1 seat belt (replaceable head 16, ratchet).
Unscrew the three bolts 9 securing the brackets of the right 6 rear seat back to the body floor (replaceable head 16, ratchet).
Loosen the mounting bolt 5 of the backrest bracket by several turns (replacement head 17, ratchet).
Press the seatback folding latch, move the seatback bracket back to expose the head of the mounting bolt through the hole in the bracket, and remove the seatback from the vehicle interior.
Install the seat in the reverse order of removal.
When installing the front seats, apply "Fiol-1" type lubricant to the friction surfaces of the runners. Consumption rate is 10 g per seat.
Present the vehicle to the Quality Control Department. The Quality Control Department will check the vehicle for compliance with the requirements of this TI and TU 017200-254-0023934 in the scope of work performed.