Car repair AvtoVAZ Car repair Renault Car repair Hyundai Car repair Ford Car repair Volkswagen Car repair Audi Car repair Chevrolet
English Русский
Български
Беларускі
Український
Српски
Hrvatski
Română
Polski
Slovenský
Magyar
articles sitemap contacts bookmark
LadaMan.ru


Kalina Granta Priora Vesta Largus XRAY
Largus 1 (2012-2023)

Lighting control (Largus 1)

  • Main
  • Largus
  • Largus 1
  • General information
  • User manual
  • Lighting control
0
Please adhere to the relevant traffic regulations when using lighting devices.

When driving on a rainy day, the window glass will quickly cool down and the temperature of the glass inside the vehicle will quickly decrease, so the moisture remaining in the air will accumulate and create condensation. In this case, water will appear on the inside of the window glass. The reason for the appearance of condensation on the inner surface of the front headlight glass is the same. In other words, the amount of water in the air will increase as the temperature rises and as the temperature drops, the water will accumulate and create condensation known as fog.

If condensation appears on the vehicle's light fittings, then after turning on the high and low beams, the condensation that appeared on the glass of the headlights will begin to dissipate and disappear after 1 hour - this is a normal phenomenon. If not, there may be water inside. Contact the appropriate service station to carry out repairs.

When replacing the light bulb, carefully check the installation of each part of the headlight to ensure that it is installed correctly and well insulated! Otherwise, serious consequences may occur due to water or dust getting inside!

High pressure water jets should not be used to wash the engine compartment, especially the lighting fittings. Otherwise, due to the high pressure of the jet, parts of the light fittings may become loose and come off, and the ventilation hole, electrical wiring and electrical connectors may get wet.


As a result, the water that will be inside the light fittings or steam will not dissipate, which will lead to the creation of a large amount of condensation.

Side lights


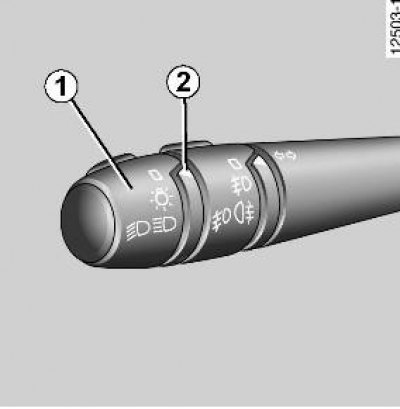
Turn the outer ring of the steering column switch lever 1 to the position where mark 2 aligns with the corresponding symbol.
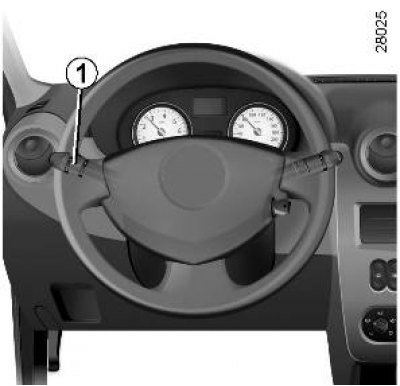
Turn the outer ring of the steering column switch lever 1 to the position where mark 2 aligns with…

Low beam headlight


Turn the outer ring of the steering column switch lever 1 to the position where mark 2 aligns with the corresponding symbol. The corresponding indicator light will light up on the instrument panel.


High beam headlight


If the low beam is already on, pull the steering column switch lever 1 towards you to turn on the high beam. The corresponding indicator lamp on the instrument panel will light up.

To turn the low beam headlights back on, move the switch lever toward you again.

Fog lights


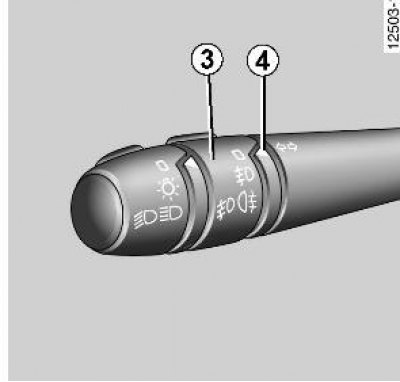
Please note that if it is necessary to turn on the fog lights, the side lights and low beam headlights must be turned on. Typically, front fog lights are turned on in case of fog, snowstorm, rain or in case of severely limited visibility.
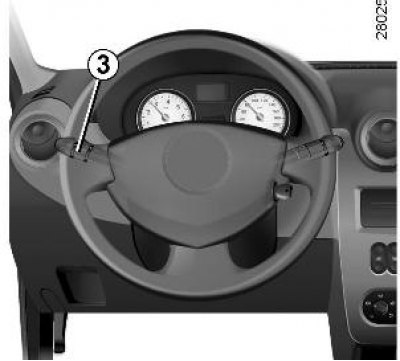
Please note that if it is necessary to turn on the fog lights, the side lights and low beam…

Turn the middle ring 3 of the steering column switch lever to the position where the mark 4 aligns with the corresponding symbol.


The fog lights only come on if the exterior lights are already on. When switched on, the corresponding lamp on the panel lights up.

Remember to turn off your fog lights when you don't need them to avoid disturbing other drivers.

Rear fog light


Turn the middle ring 3 of the steering column switch lever to the position where the mark 4 aligns with the corresponding symbol.

Turning off outdoor lighting


Set the outer ring of the steering column switch lever 1 or 3 to its original position.


This article is available at russian, bulgarian, belarusian, ukrainian, serbian, croatian, romanian, polish, slovak, hungarian
This article has been reviewed: Daniil Markelov
Share with friends:
◀ Previous
Lada Largus 1: User manual
Next ▶

Warning and emergency lights
Economical fuel consumption
Catalytic converter (neutralizer)
How to use air conditioner
Application of manual transmission
Adjusting headlight beams with a corrector in the vertical plane
Recommendations for operation and driving
Luggage compartment shelf
Passive safety system
Storage compartments/interior equipment
More articles with information from manuals for Lada:

• Lighting control unit — removal and installation Lada Kalina Hatchback (2004-2013, VAZ-1119)
• Lighting control module and low beam headlight corrector Lada Granta 1 (2011-2023, VAZ-2190)
• Replacement of control unit for external lighting and instrument… Lada Priora 1 (2007-2018, VAZ-2170)
• Replacing the battery in the remote control Lada Vesta 1 (2015-2023, VAZ-2180)
• Troubleshooting Lighting and Light Signaling Lada X-Ray 1 (2015-2022)
Link to this article in various formats
Reviews and comments of visitors
No comments yet


Add up two numbers: 15 + 13


Largus 1 (2012-2023) 
  • General information
  • Vehicle device
  • User manual
  • Maintenance
  • Power unit
  • Engine repair
  • Cooling and lubrication system
  • Supply system
  • Ignition system
  • Exhaust system
  • Spare parts catalog
  • Transmission
  • Clutch
  • Car gearbox
  • Drive shafts
  • Spare parts catalog
  • Chassis (running gear)
  • Suspension and wheels
  • Steering
  • Brake system
  • Spare parts catalog
  • Body and interior
  • Exterior (external elements)
  • Interior (internal elements)
  • Doors, locks and windows
  • Heating and ventilation
  • Spare parts catalog
  • Electrical equipment
  • Equipment and devices
  • Power devices
  • Lighting and signaling
  • Spare parts catalog
  • Electrical circuits
LadaMan.ru © 2018–2026 | Mobile version | About Lada | Sitemap: EN BG BY UA RS HR RO PL SK HU | Contacts with admin | | Add to bookmarks
Kalina Hatchback (2004-2013) | Kalina Sedan (2004-2013) | Granta 1 (2011-2023) | Priora 1 (2007-2018) | Vesta 1 (2015-2023) | Largus 1 (2012-2023) | X-Ray 1 (2015-2022) |
This site uses cookies to ensure everything runs smoothly.